
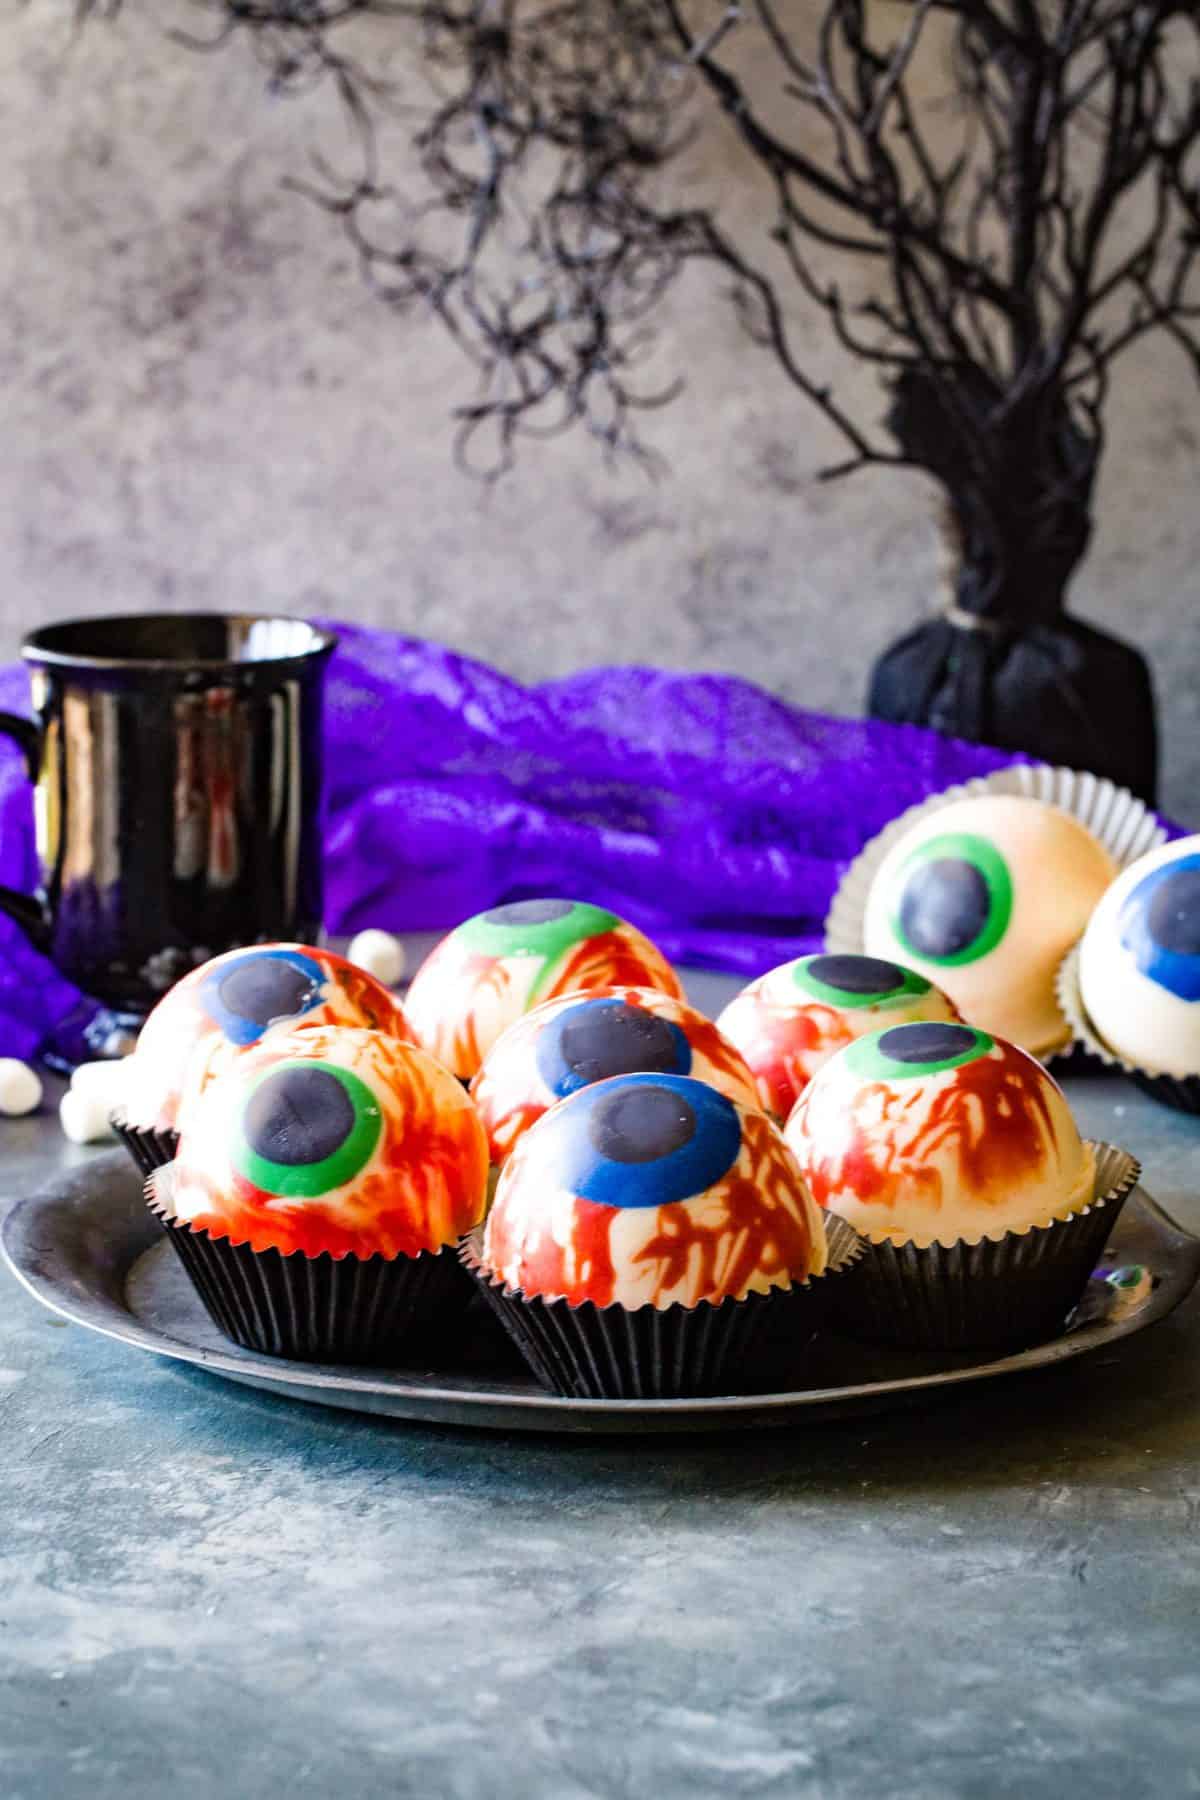
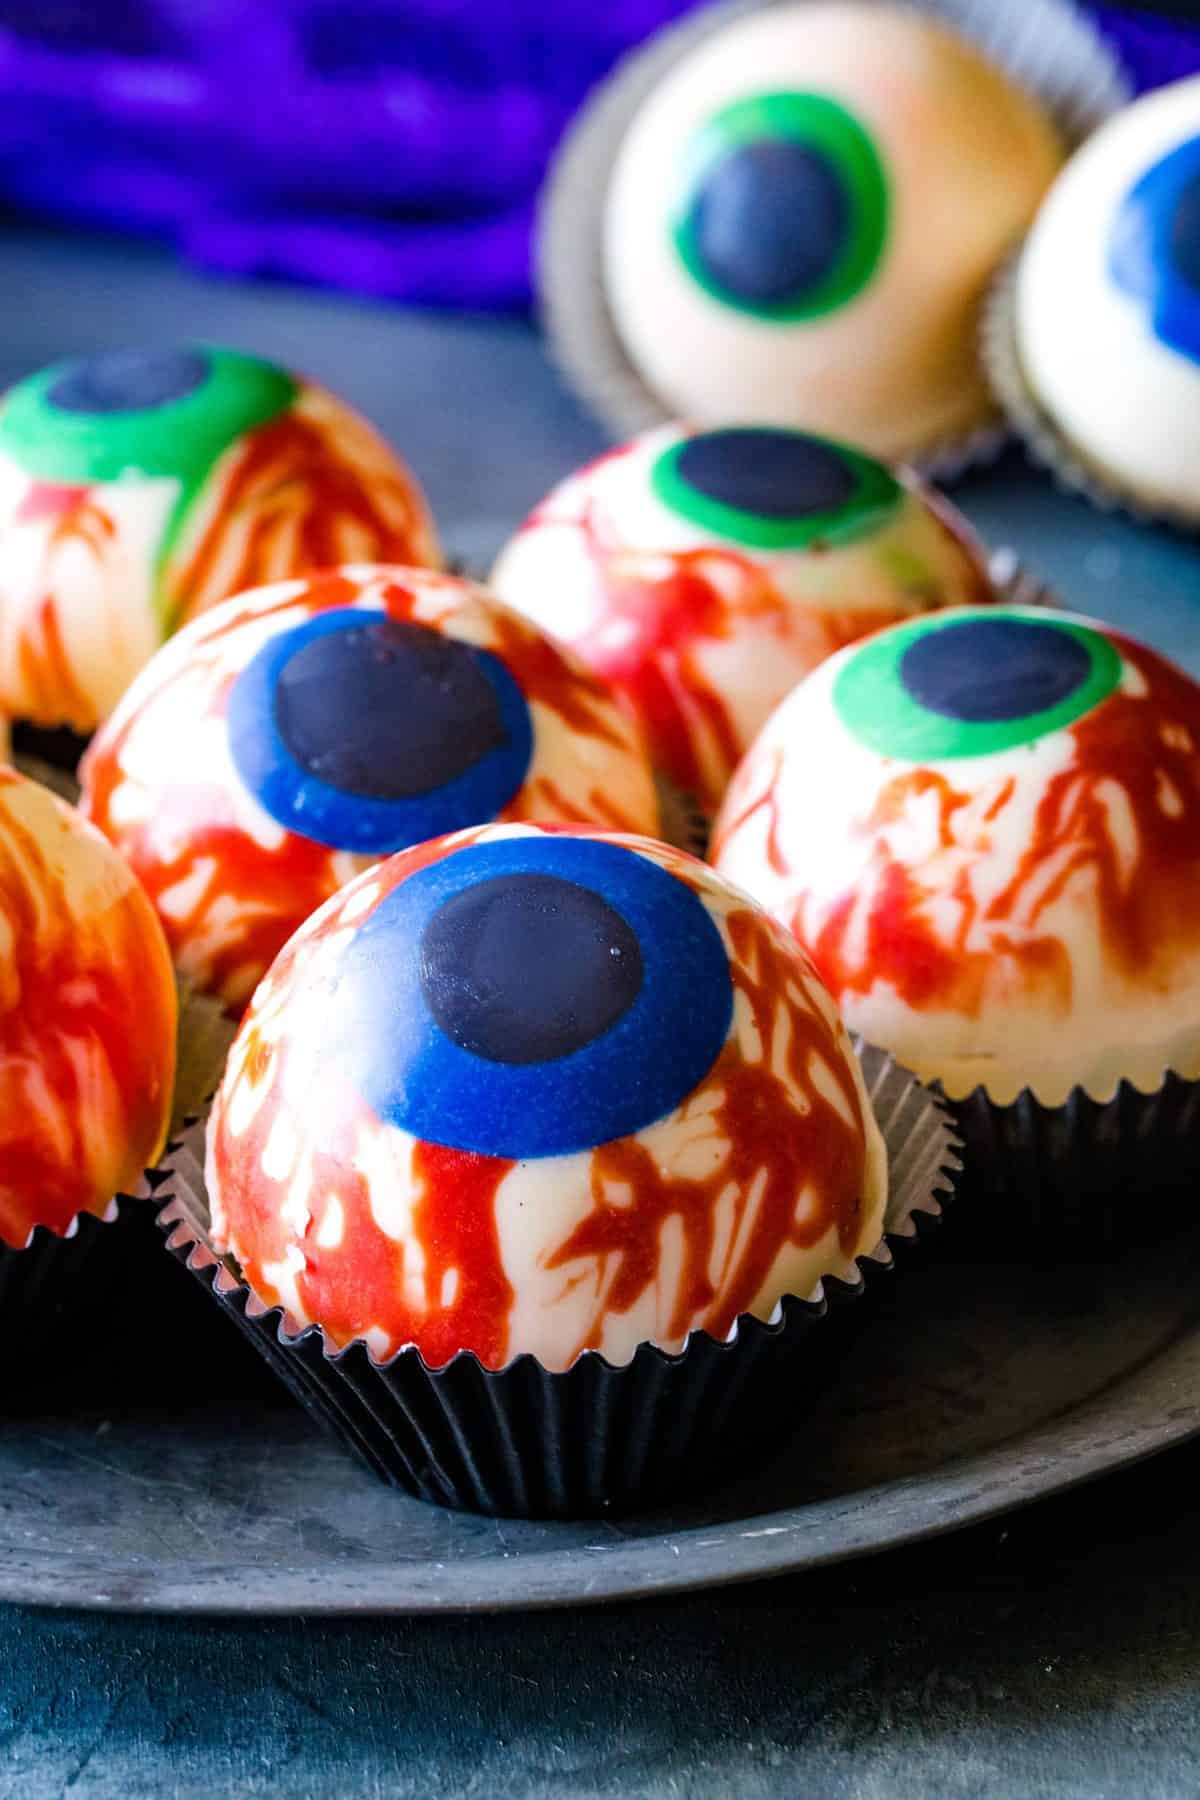
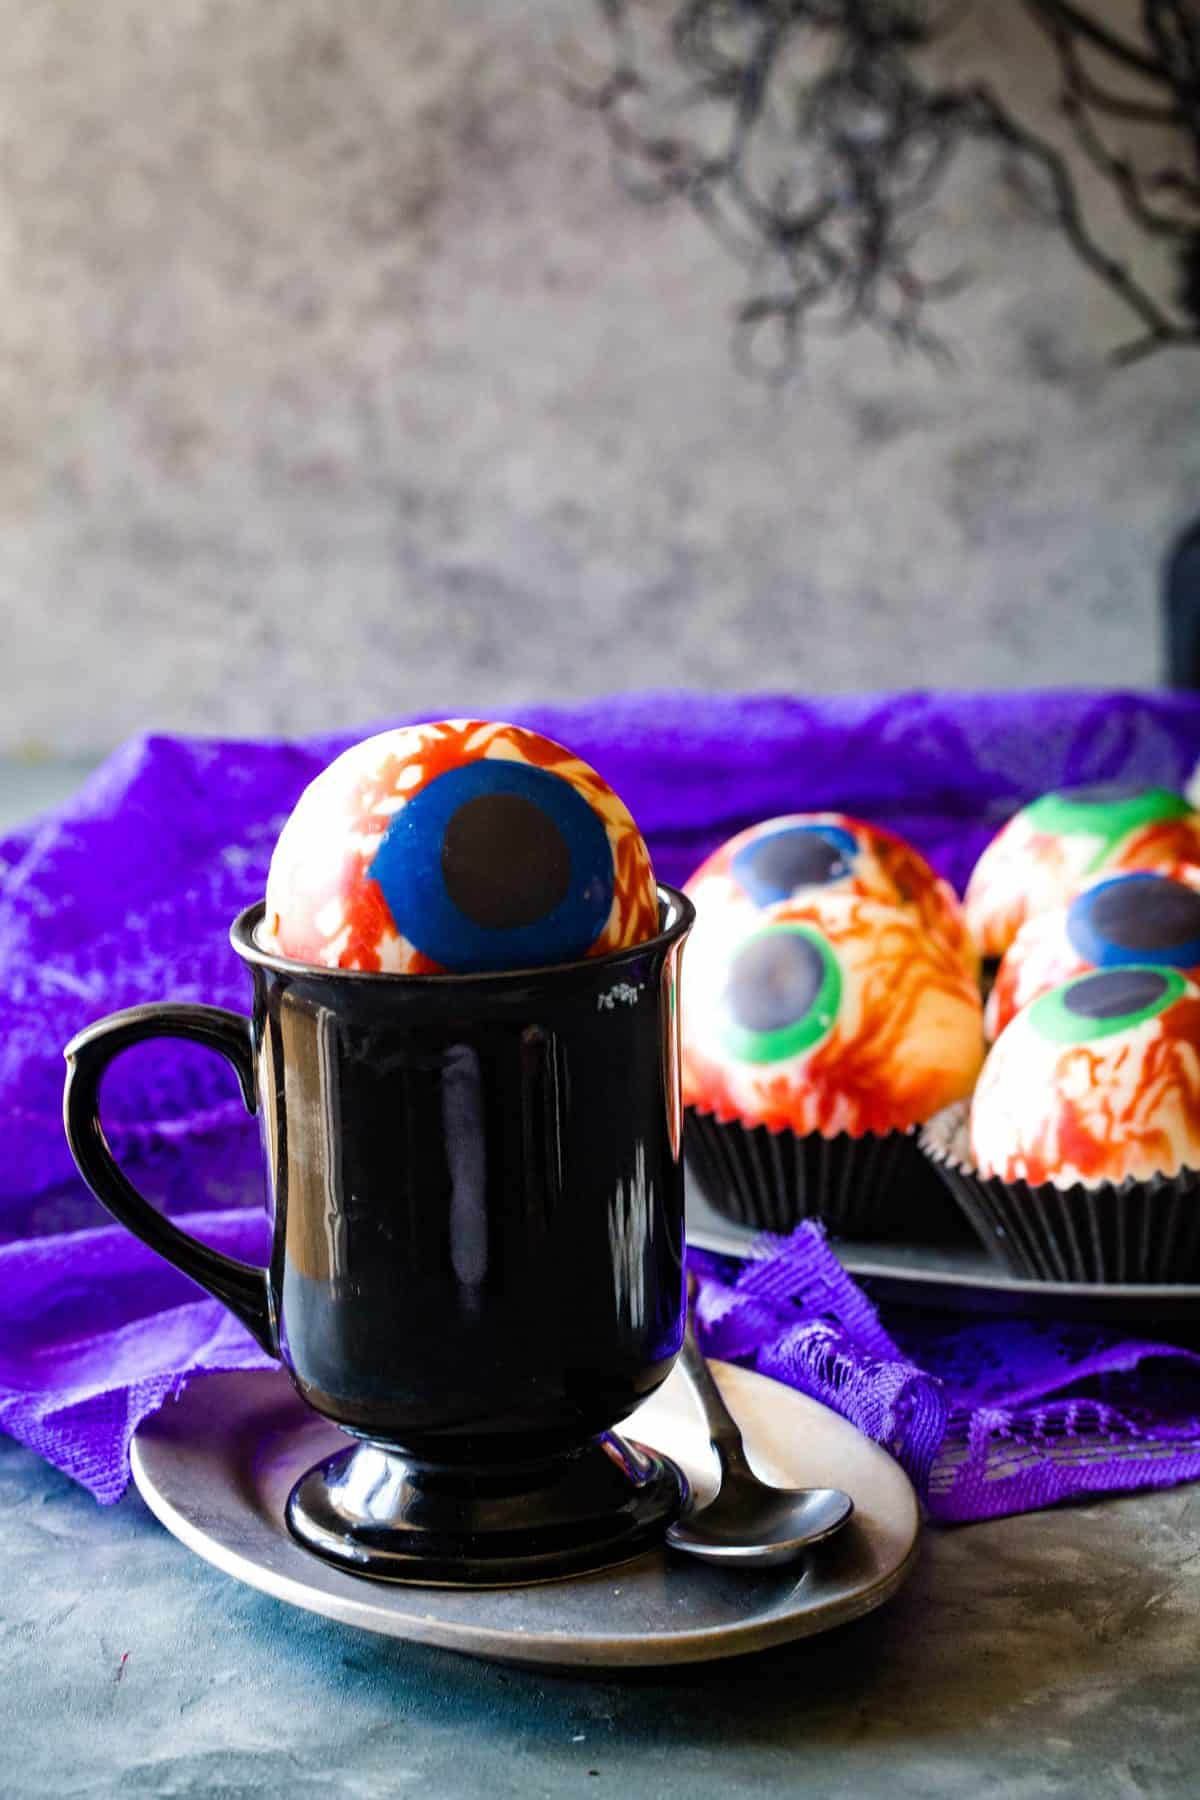
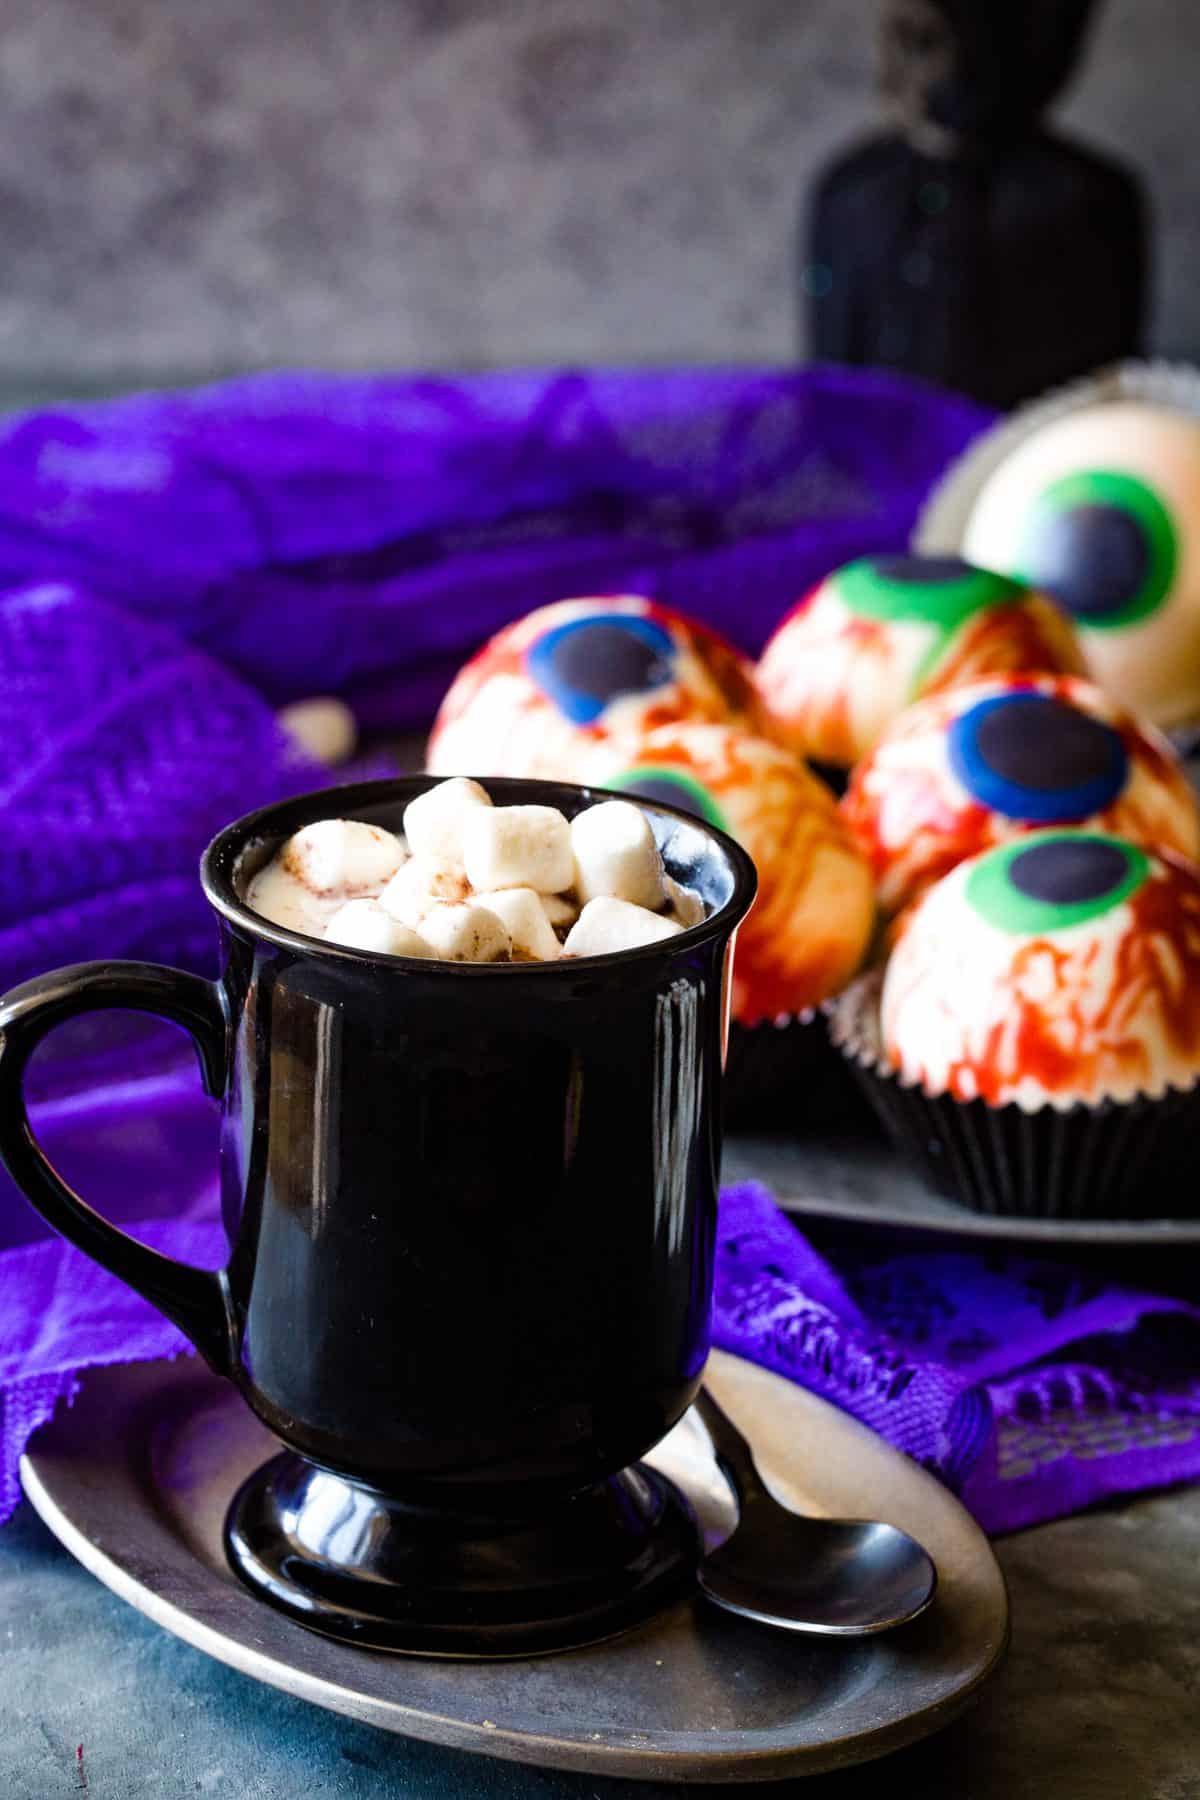
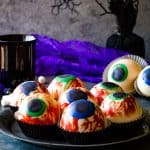
Take that chill off during Halloween festivities with these Eyeball Hot Cocoa Bombs. Made with creamy candy melts, delicious cocoa mix, and tasty mini marshmallows, they’ll be a creepy hit! Watch the realistic chocolate eye melt into some warm milk, and stir to combine for the perfect cold evening drink.
The best part about Halloween is getting to have a blast creating creepy foods and decorations. The kids always get a kick out of it, and it makes me feel like mom of the year when I get that smile out of them.
For many, Halloween is the one time of the year where the spookier the treat, the better. It's an opportunity to embrace the chilling tales, mysterious stories, and deliciously scary treats that define the holiday. Eyeball Hot Cocoa Bombs perfectly capture the essence of Halloween. They surprise and delight with their eerie appearance and then warm the heart (and the hands) with their rich, chocolaty goodness. Whether you're hosting a Halloween party, spending a quiet evening with family, or just enjoying the cold autumn weather, these hot cocoa bombs are a treat that embodies the Halloween spirit in every sip.
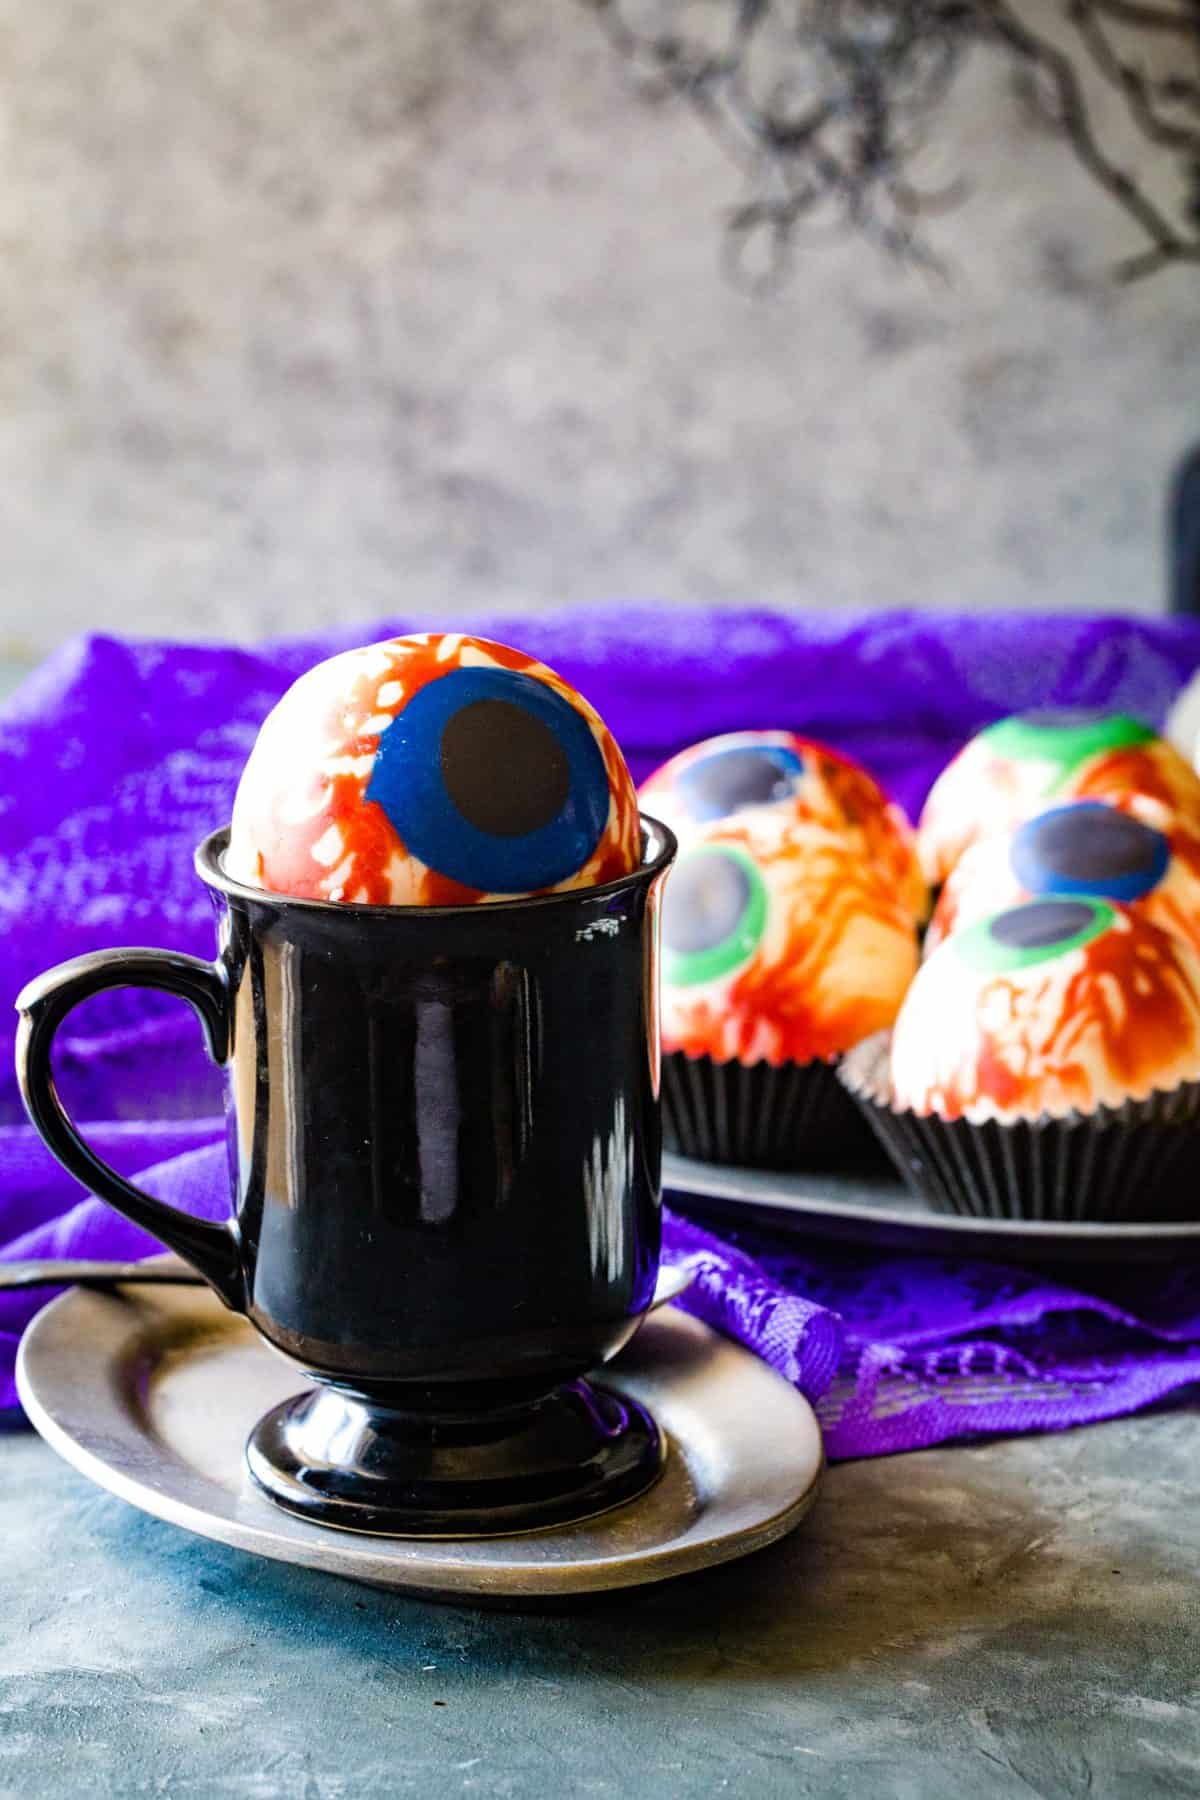
Moreover, the beauty of these cocoa bombs is that they're not just a tasty treat, but also a thrilling experience. The anticipation as the chocolate eye melts, revealing the mini marshmallows inside, adds a dash of Halloween drama to your drink. It's like a mini cauldron bubbling over with magic, making it much more than just a cup of cocoa – it's a performance in a cup of hot chocolate!
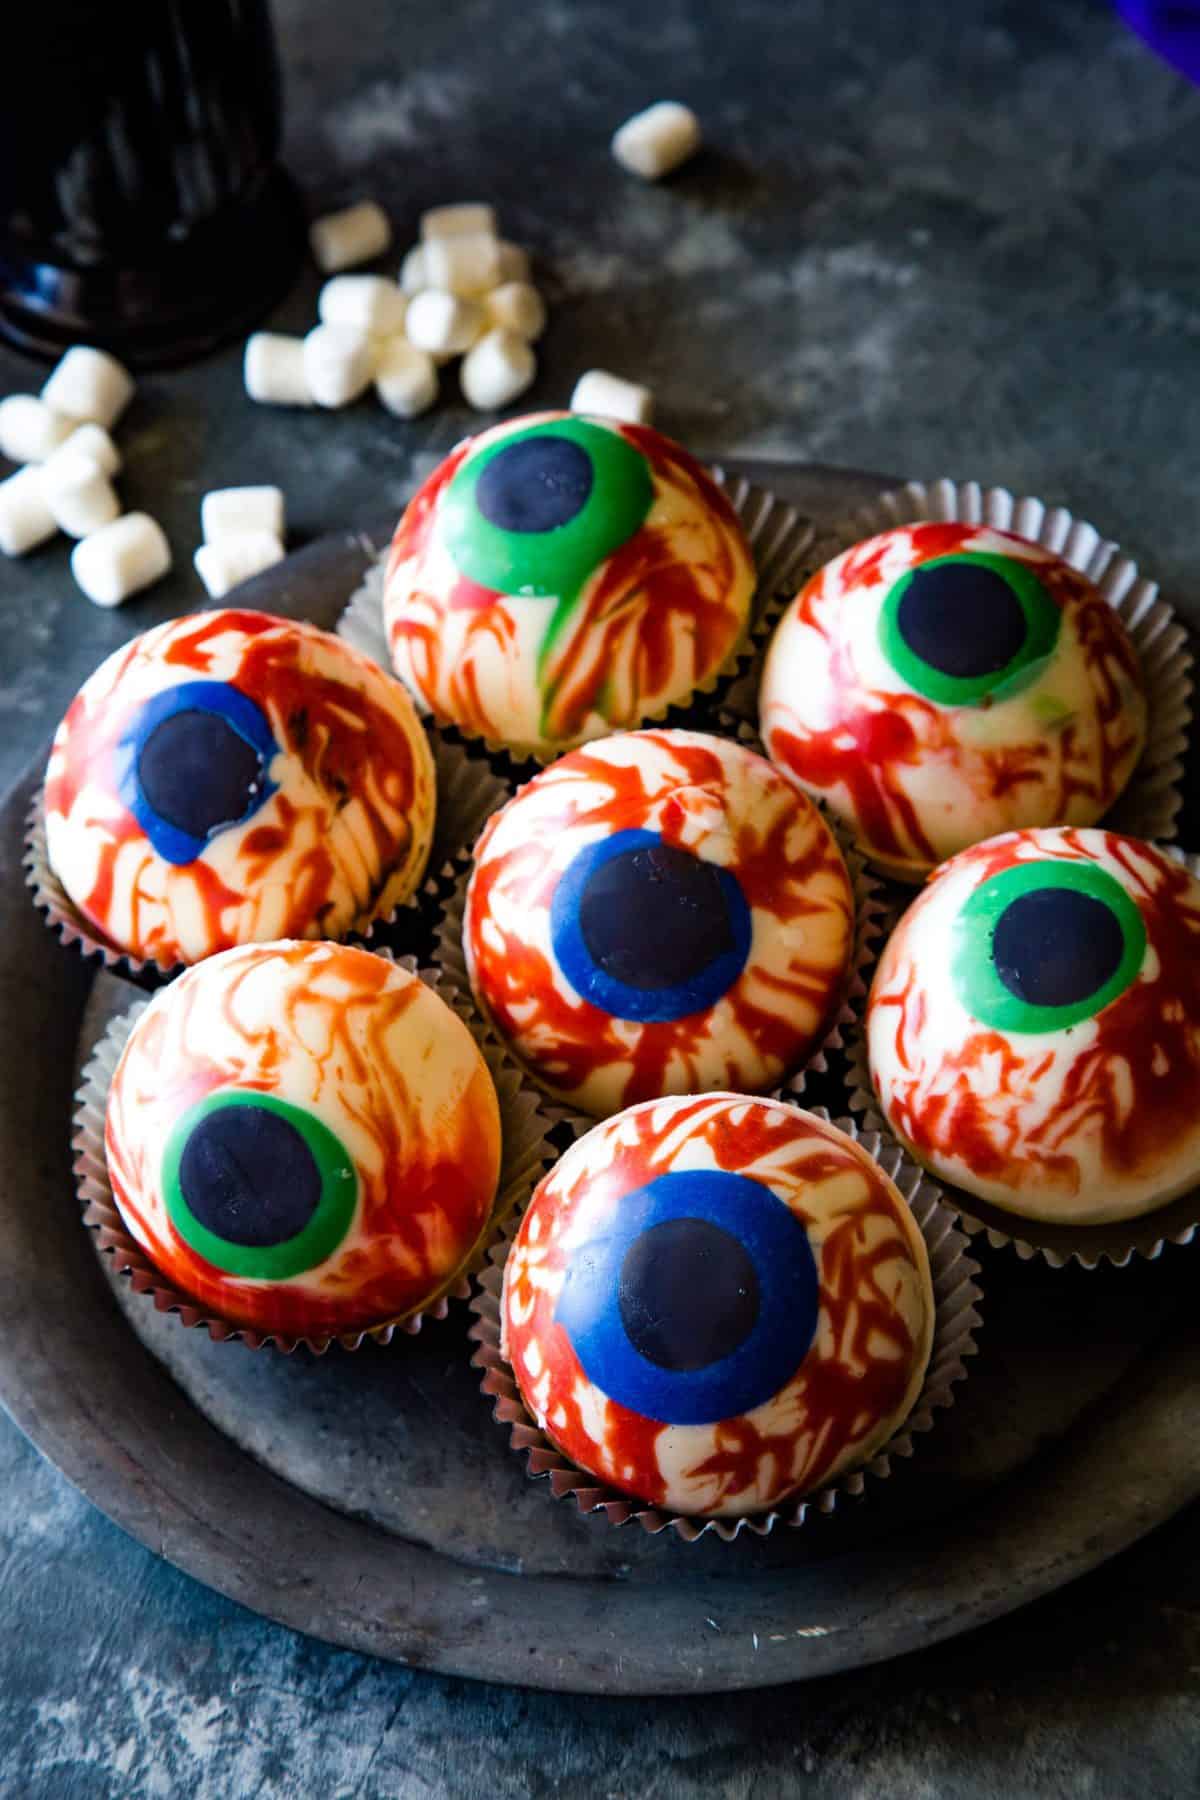
LEARN HOW TO MAKE THESE SPOOKY EYE BALL COCOA BOMBS FOR HALLOWEEN
I tend to start early, decorating bits and pieces of the house, while whipping up recipes like Halloween Dipped Mint Oreos or No Bake Halloween Treats.
When the holiday gets closer, I like to start whipping out the big guns. That’s when I start making recipes like Red Velvet Halloween Cake, Halloween Macarons, or even Witch Finger Cookies!
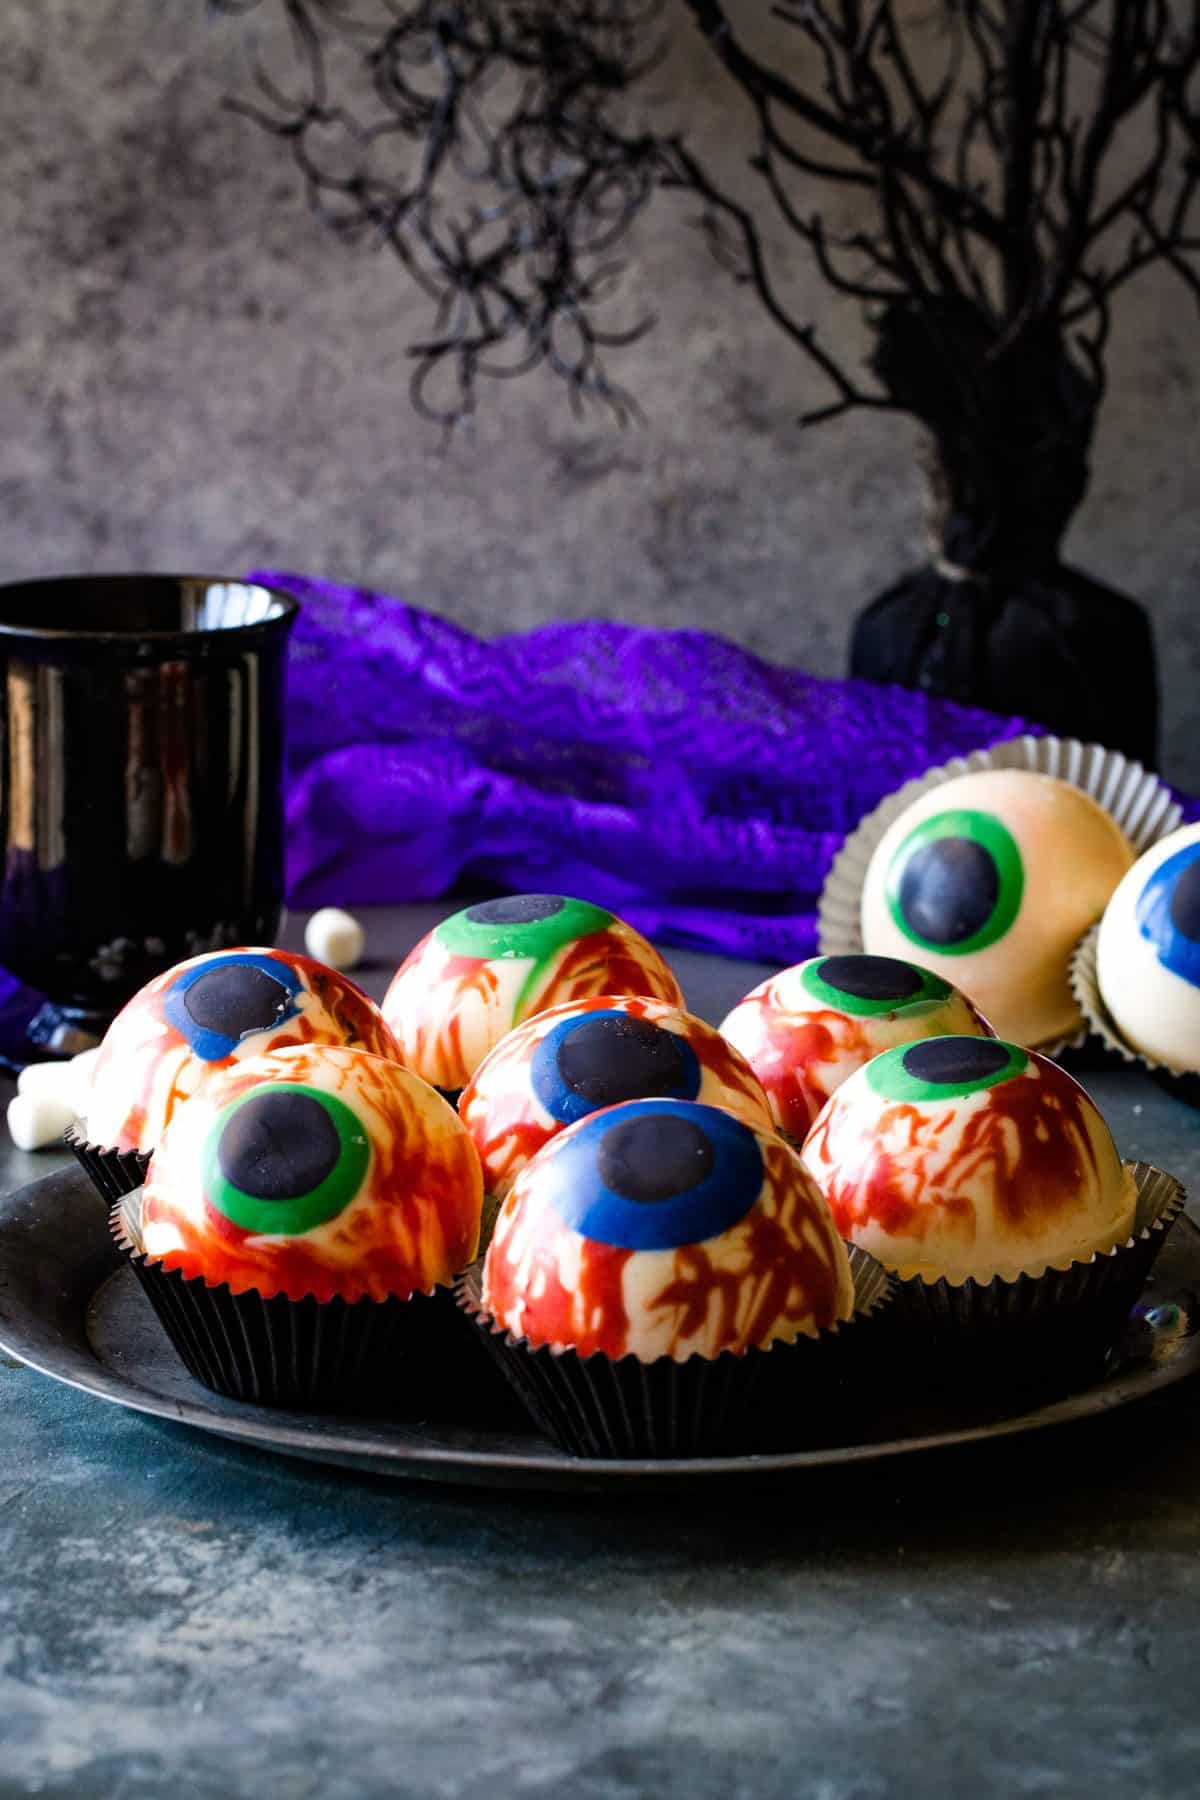
However, I like to stay stocked up on these eye ball hot cocoa bombs because they’re a hit throughout the season. Go ahead, creep your kiddos out starting as soon as possible, and get every ounce of fun out of Halloween.
Spooky Eye-Ball-Bombs Ingredients-
- White Candy Melts
- Red Candy Melts
- Blue Candy Melts
- Green Candy Melts
- Black Candy Melts
- Delicious Hot Cocoa Mix
- Mini Marshmallows
If you prefer to use real chocolate, I reccommend and creamy belgian white chocolate and gel food coloring. Also, you'll need to use a double-boiler to heat the chocolate for best results.
Where to get the molds for Halloween Hot Cocoa Bombs?
I purchased these silicone molds on amazon. There are also plastic molds, and individual molds, but I find that the sphere silicone mold work best. You can also find them at Micheals.
Other tools you will need is a pastry brush (or spoon) and a small pipping bag.
Tips on Working with Chocolate Candy Melts
- Temperature Matters: Always melt chocolate on low heat in a microwave-safe bowl. Too much heat can cause the chocolate to seize, making it unusable.
- Stir Constantly: To ensure even melting and to prevent burning, keep the chocolate moving between each heating interval.
- Thin it Out: If your chocolate is too thick, you can thin it with a bit of shortening or coconut oil. Just a tiny bit will do!
- Avoid Water: Water is chocolate's enemy. Even a tiny drop can cause it to seize up. Always ensure that your tools and bowls are completely dry.
Remember, practice makes perfect, so don't get discouraged if your first few cocoa bombs aren't perfect. With each one, you'll get better and better!
How To Make These Halloween Hot Chocolate Bombs?
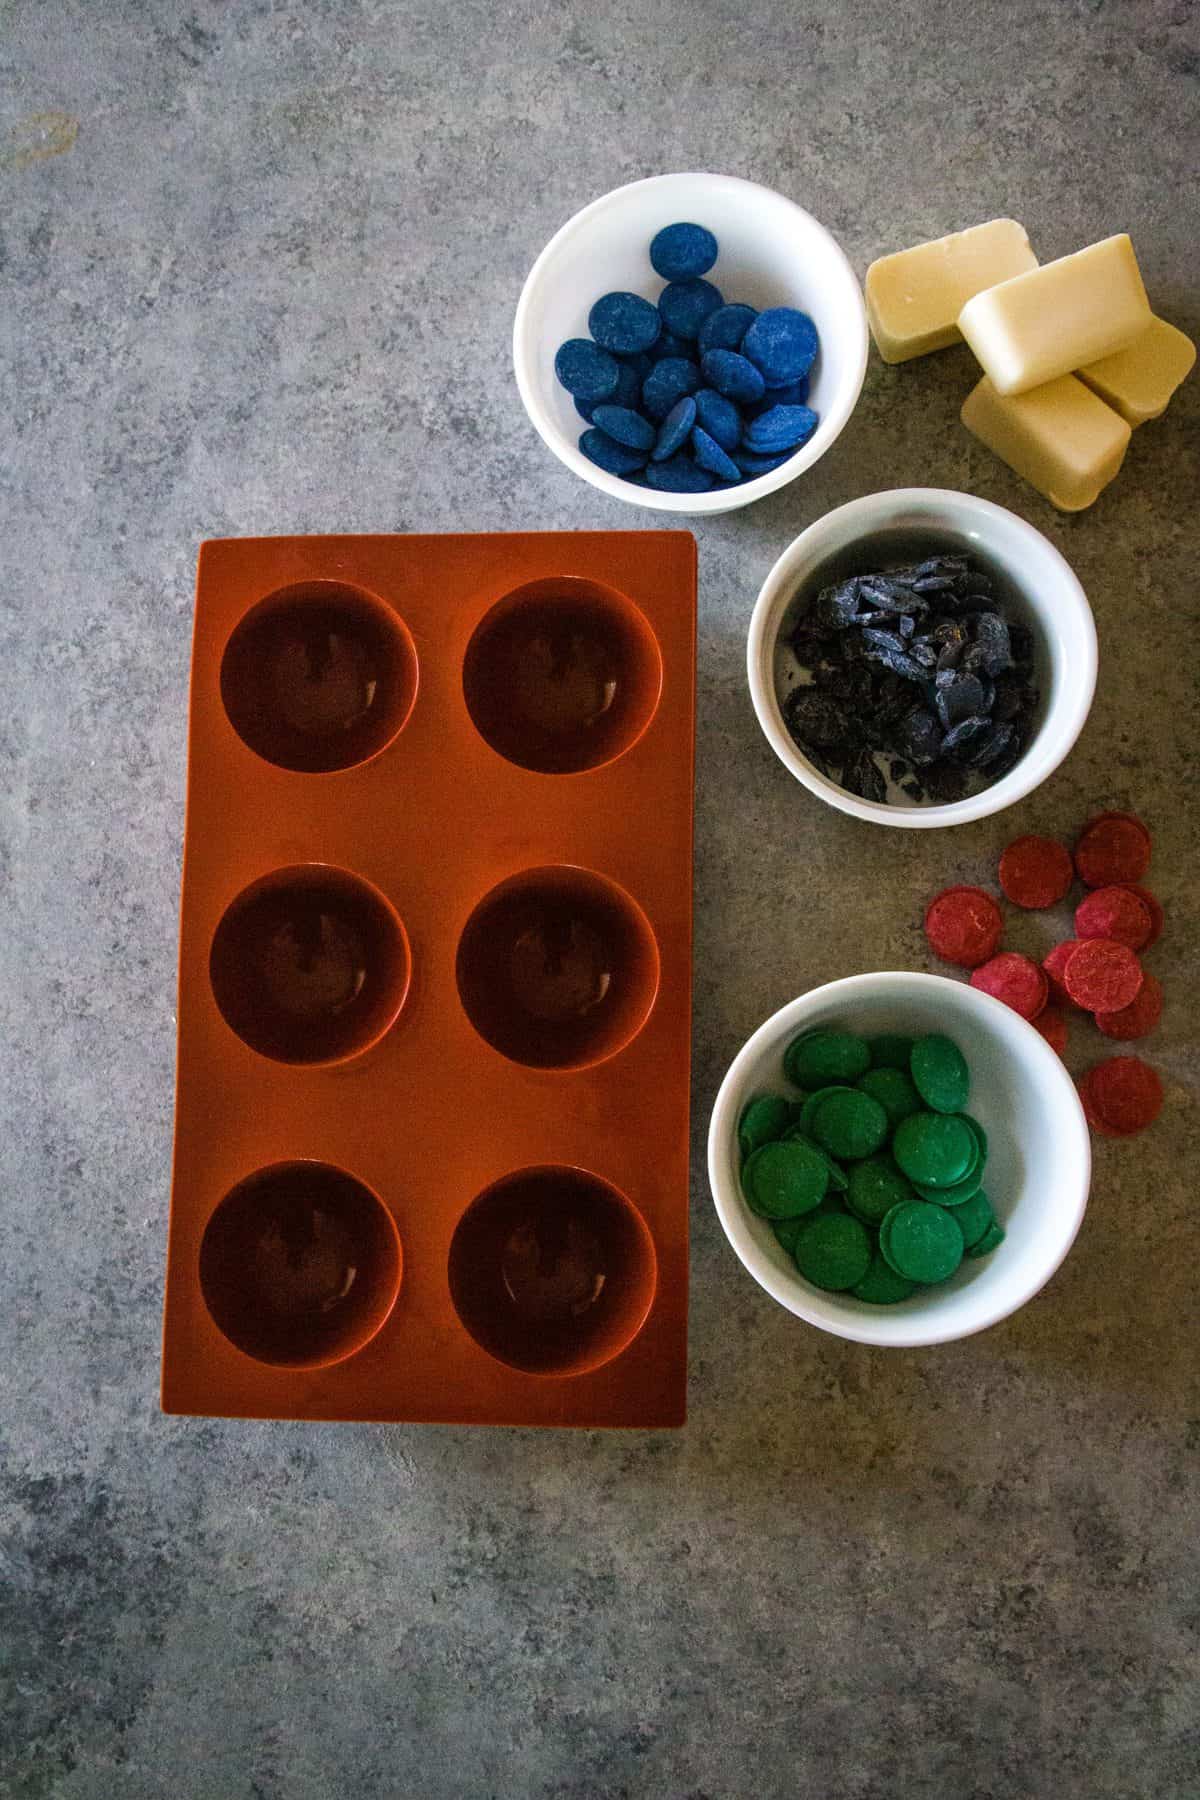
- Melt - Place each color of candy melts in a bowl and melt each color as it’s needed and place it in a frosting bag or baggie with a small tip cut from it.
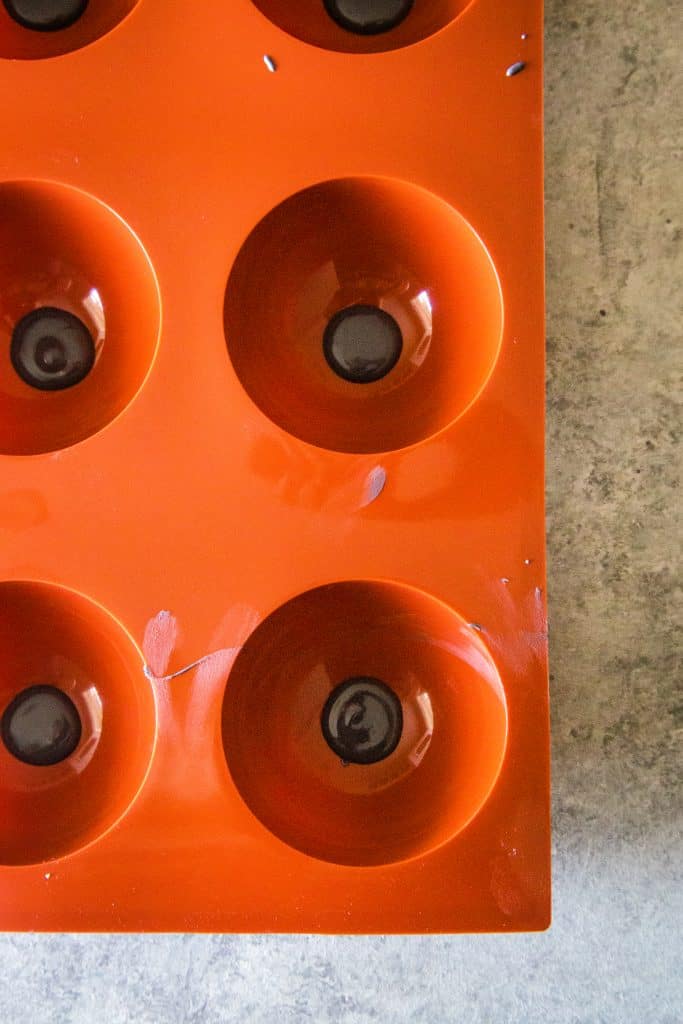
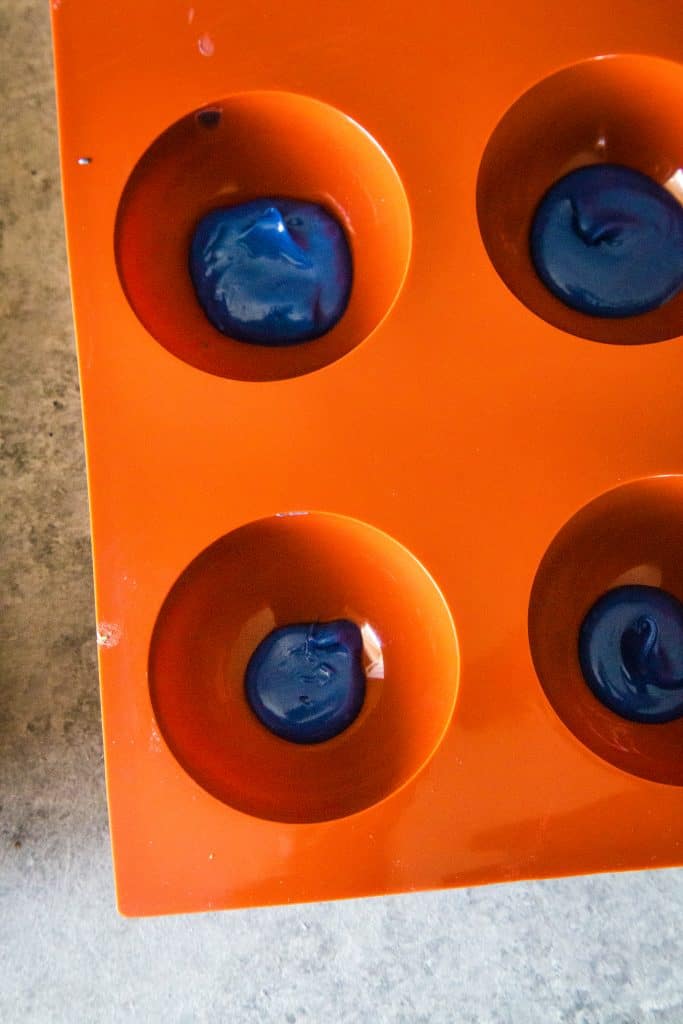
- Make the eye - Place a dime-sized portion of black in one half of the mold then freeze. Add a quarter-sized circle of green or blue chocolate on top of the black candy melt chocolate and freeze again.
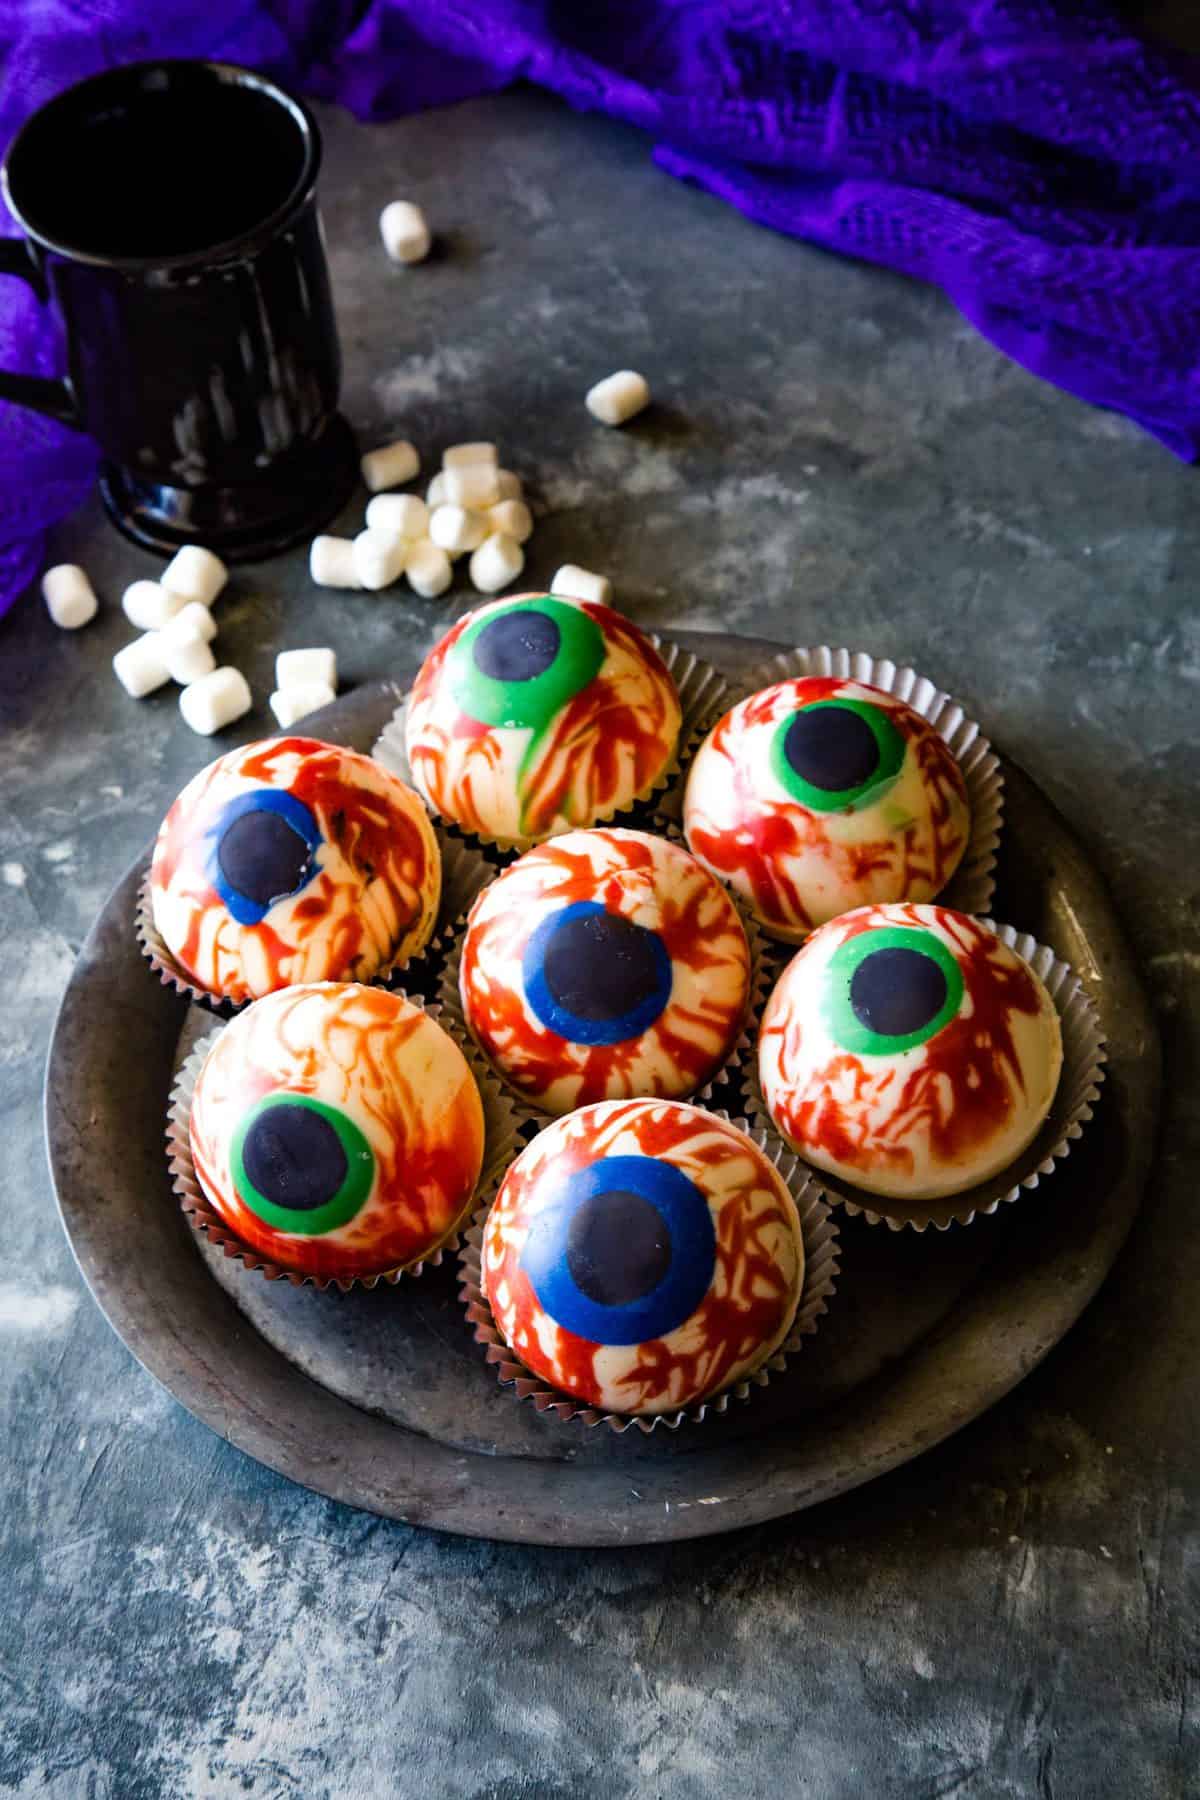
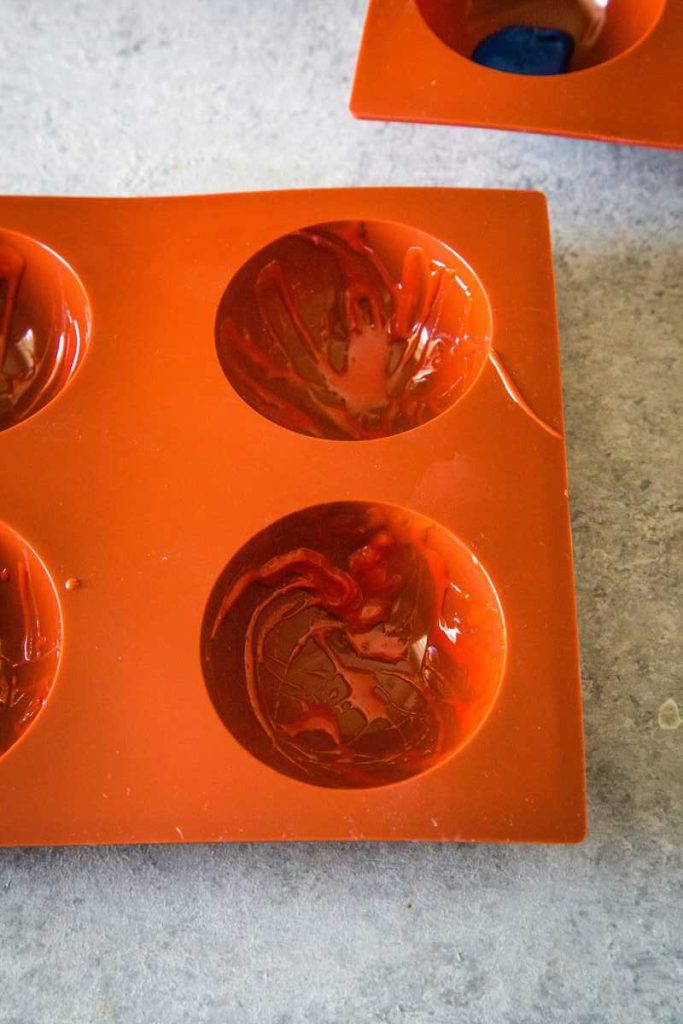
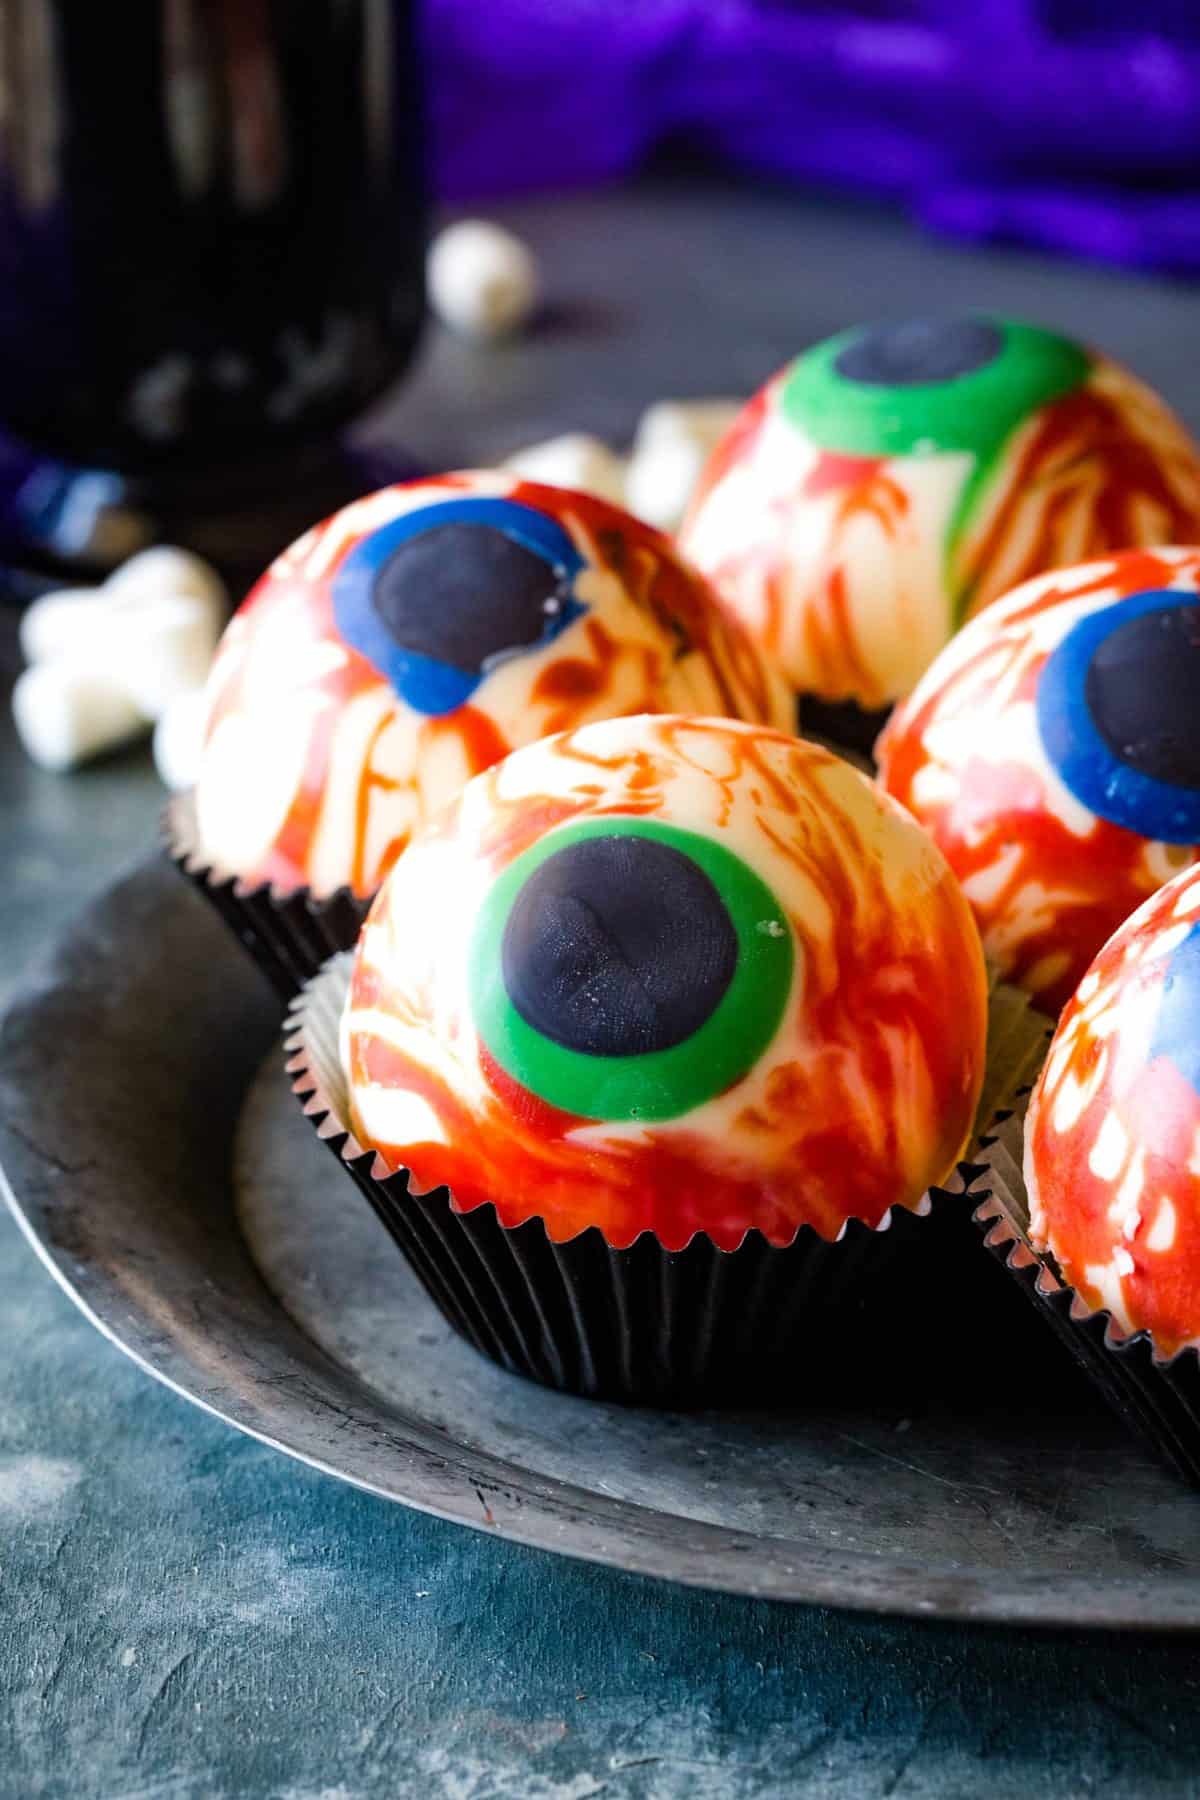
- Finish the design - Add the squiggly red lines, to create the bloodshot eyeballs effect, and freeze once more. Coat all 12 cavities with the white chocolate and freeze for the last time.
- Assemble - Fill one side of the white chocolate spheres with the hot cocoa powder mixture and marshmallows. Warm the open end of the other white chocolate shell side of the cocoa bomb on a heat plate and immediately press against the filled side. Run your finger around the top edges of the ball to create a smooth seal.
- Chill - Chill the finished molds for a few minutes. Add to a hot cup of milk and enjoy!

Tips and Variations
- Keep toothpicks nearby - Toothpicks are a handy tool when making hot chocolate bombs. You use them to manipulate the chocolate, especially for these eyeball cocoa bombs that have multiple colors. You can also use them to help create the bloodshot look.
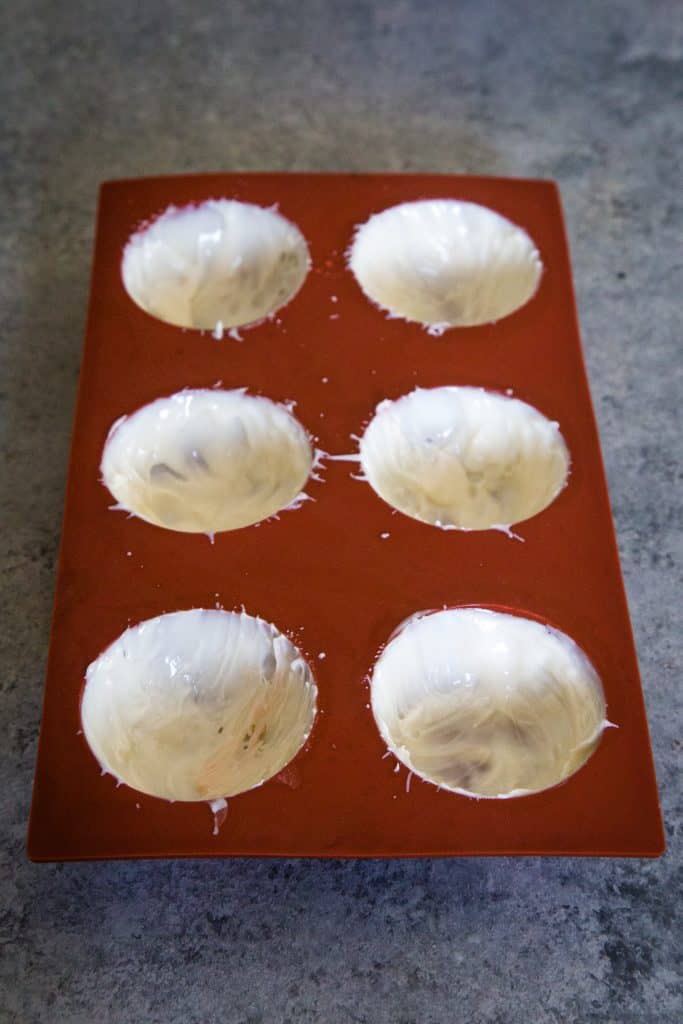
- Apply Thin Layers- Personally I like to use a pastry brush or the back of a spoon to apply a couple of layers of the white chocolate to create a thick layer of white candy melt in the half sphere.
- Use a hot plate - If you want an easier method than heating up a plate in the microwave, you can always use a small hot plate for the task.I’ve also seen people buy candle warmers just for this step of the process as well.
- Always fill the cocoa bombs first - Don’t start trying to melt the edges of the two halves to the bombs without first filling the other half. You want the chocolate to still be in a melted state when attaching it to the other end. If your bomb isn’t filled, you’ll have to melt it a second time, which is a lot of wasted time.
- You have to stir - Some people get the idea you can just add these cocoa bombs to a cup of hot milk and leave it at that. Just like any hot cocoa mix, you’ll have to stir these to get them fully melted and to get them combined thoroughly.
- Don’t use water - In my opinion, water makes these bombs gross. I wouldn’t recommend it. A glass of warm milk combined with the deliciously creamy hot choc is the best!
Common Questions About Eyeball Hot Cocoa Bombs
How to Heat Milk for Cocoa Bombs?
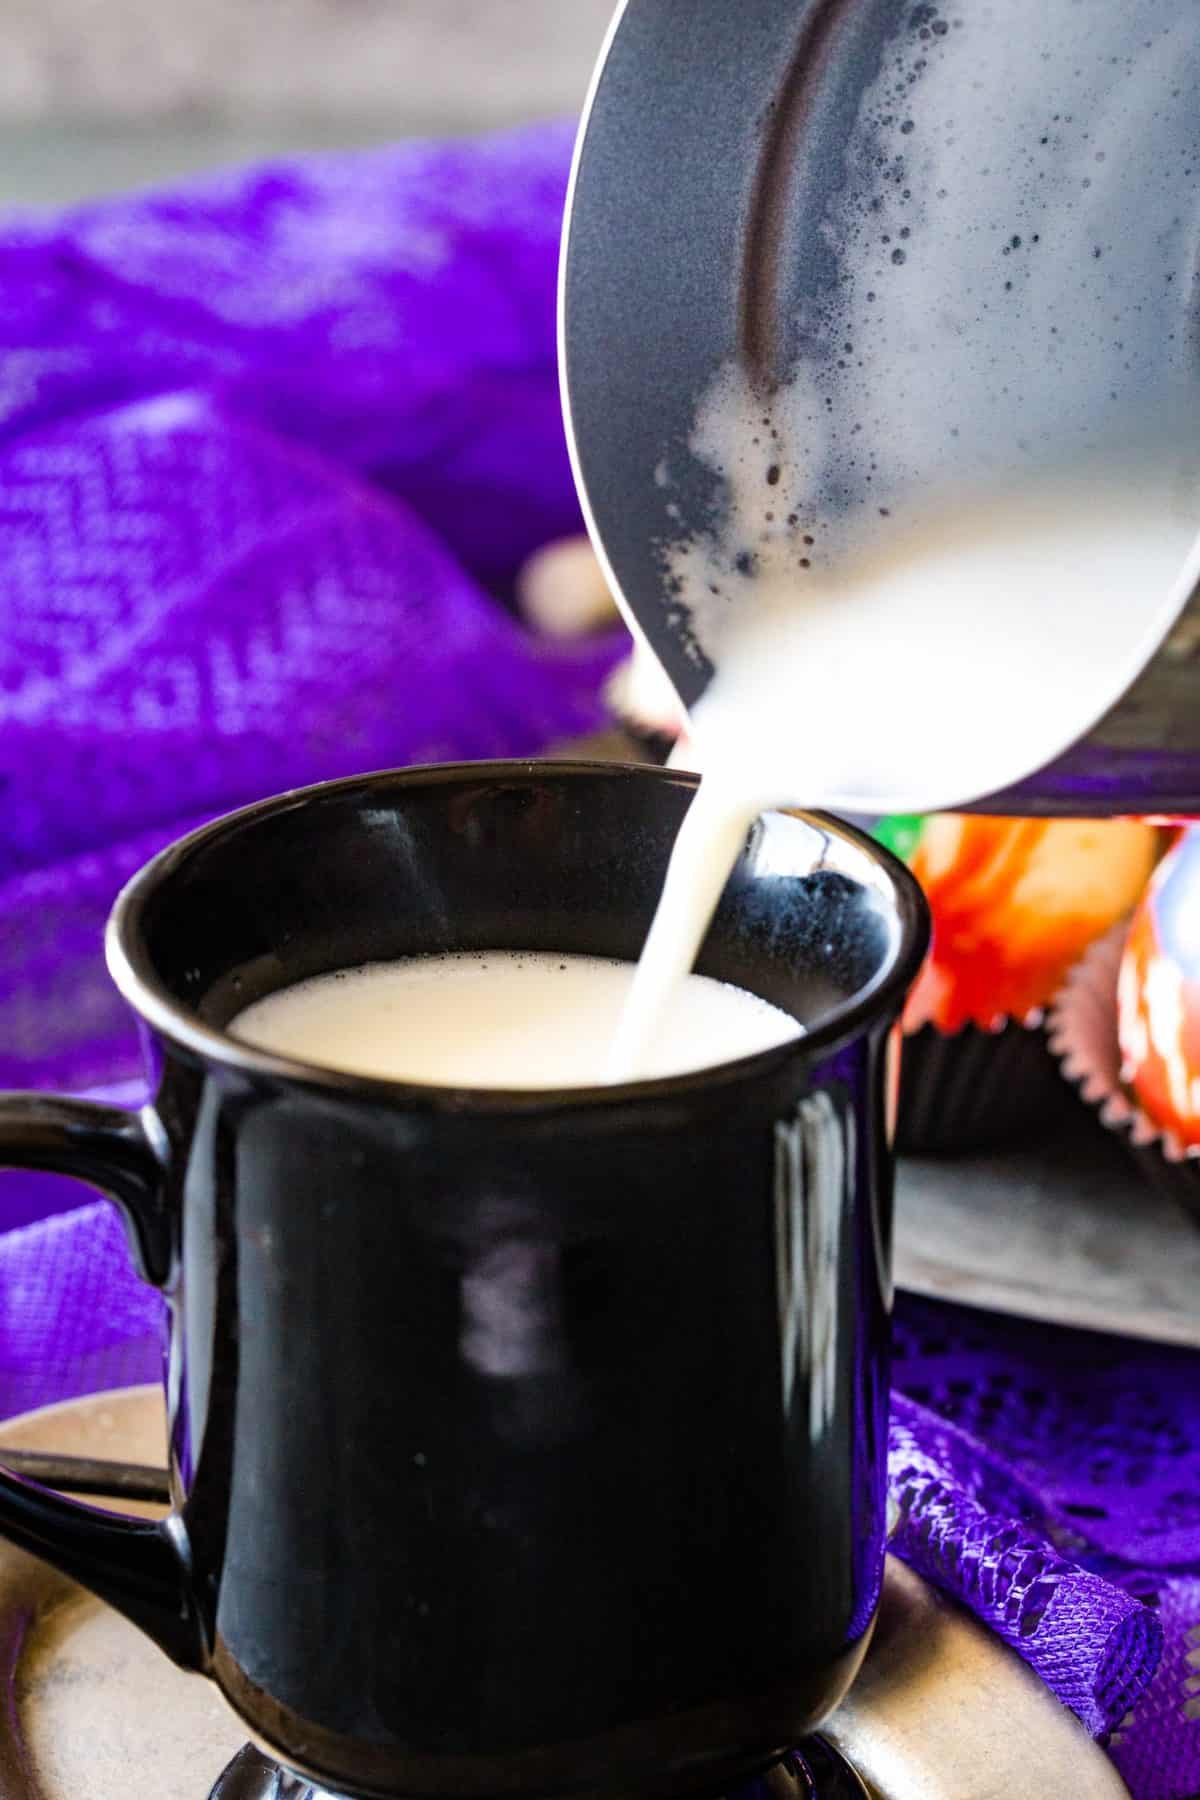
It’s best to slowly heat milk as you don’t want it to curdle. Never boil milk, as this is what causes it to curdle. You can either use a double boiler setup or simply place the milk in a saucepan and slowly heat it. Stir it constantly until very light bubbles start to form on the edges of the pan, or steam is rising off the milk. Again, be sure to use low heat. This is the perfect way to heat milk for cocoa bombs.
What Type of Chocolate is Used to Make Hot Cocoa Bombs?
All kinds of chocolate have been used to make varying types of hot cocoa bombs. Candy melts, which are basically easier to melt down and use white chocolate, are a common first choice. However, your run of the milk chocolate chips or baking chips would work great as well. The new trend are colorful hot chocolate bombs, which is why candy melts have become so popular in the use of making them. This is because it’s very difficult to color white chocolate without oil based food dyes, which aren’t easily found in stores.
How Do I Store Hot Cocoa Bombs?
Store your Eyeball Hot Cocoa Bombs in a cool, dry place, preferably in an airtight container. If you're in a warmer climate, consider refrigerating them to prevent the chocolate from melting, but always let them come to room temperature before using to ensure the best melting experience.
Can I Gift the Eyeball Hot Cocoa Bombs?
Absolutely! These cocoa bombs make for a wonderful Halloween gift. Simply place them in a decorative box or bag, perhaps with a fun spooky tag or note, and you've got a unique gift that's sure to impress. You can also pair them with a cute Halloween-themed mug for an extra special touch.
Halloween Hot Cocoa Bomb Fillings: Spooky & Delightful Ideas
Hot cocoa bombs are versatile, and you can get creative with the fillings, especially for Halloween. Here are some spooky and delightful ideas for Halloween-themed hot cocoa bomb fillings:
- Candy Corn: A quintessential Halloween candy that adds sweetness and a pop of color.
- Crushed Oreos: This can mimic the look of dark soil, perfect for a graveyard-themed bomb. Even better if you use the orange-filled Halloween Oreos.
- Edible Glitter: In Halloween colors like orange, black, and purple to add a magical sparkle to the drink.
- Mini Halloween Gummies: Think gummy worms, gummy spiders, or any creepy-crawly gummies. They'll float up when the bomb melts, adding a surprising element.
- Pumpkin Spice: A pinch of this popular fall flavor can give a unique twist to the hot cocoa.
- Pop Rocks: This will give a fizzy surprise when the bomb is melted, offering a 'witch's brew' feel.
- Cinnamon Sticks: These can act as witch's broomsticks or simply add a warm cinnamon flavor.
- Caramel Bits: Caramel is a popular flavor in the fall, and its smooth, rich taste complements chocolate well.
- Mini Marshmallows with Faces: Use an edible marker to draw ghostly faces on white mini marshmallows or pumpkin faces on orange ones.
- Chopped Nuts: Pecans or hazelnuts can add a bit of crunch and nutty flavor.
- Edible Sugar Eyes: You can find these spooky eyeballs in the baking aisle around Halloween, and they'd be perfect for an extra eerie touch.
- Halloween Sprinkles: Skulls, bats, pumpkins, and more – there's a variety of Halloween-themed sprinkles available.
- Shaped Chocolate: Such as chocolate skulls, mummies, or bats that will melt and float when the bomb is dissolved.
- Marshmallow Bones or Ghost Shapes: These can float to the surface when the bomb melts.
- Colorful Drizzles: Use candy melts in Halloween colors like orange, purple, or green to drizzle inside the bomb for colorful streaks when melted.
- Chili Powder or Cayenne: For those who want a hint of heat in their cocoa, reminiscent of the "chocolate caliente" spicy hot chocolates.
Remember, you can mix and match these fillings to create your unique concoction. Whatever you choose, make sure the fillings are safe to consume when heated and complement the overall flavor of the hot cocoa. Happy brewing!
Please feel free to share your experience with making these Eyeball Hot Cocoa Bombs in the comments below or on social media!
More Halloween Recipes You’re Sure to Love:
- Halloween Cupcakes
- Frankenstein Peanut Butter Cookies
- Graveyard Pudding Cups
- Candy Corn Cookies
- Halloween Face Pie Dip
- 2 cups White Candy Melts
- ¼ cups Red Candy Melts
- ¼ cups Blue Candy Melts
- ¼ cups Green Candy Melts
- ¼ cups Black Candy Melts
- 2 cups Hot Chocolate Mix
- 3 cups Mini Marshmallows
-
Place each of the candy melts in separate microwave safe bowls and melt in the microwave per the directions on the package.
-
Place the red, black, blue and green melted candy melts into separate zipper-top bags or piping bags, with a very small corner cut out.
-
Drizzle a small quarter-sized circular spot of black candy melt into the bottom of each of 6 the molds. If the chocolate is not in a distinct circle, you can swirl the chocolate with a toothpick to smooth the edges to make it more of a circle. Place the molds in the freezer for 3-5 minutes to allow the chocolate to set.
-
Remove the mold from the freezer and drizzle a small amount of blue or green candy melts over the black dot, letting it drizzle over the edge of the black, to create the colorful portion of the eye hape, again using a toothpick to ensure that the shape is circular, if desired.
-
With the red candy melts, cut off the tiniest corner of your zipper-top bag or piping bag, then drizzle the veiny squiggle shapes over the entirety of the six molds with the colorful chocolate, overlapping and randomly located in every direction. Place the molds in the freezer for 3-5 minutes to allow the chocolate to set.
-
Remove the mold from the freezer and place 1 tablespoon melted white candy melts into one half of a bomb mold and, using the bottom of your tablespoon measuring spoon, press the chocolate up the sides of the mold, keeping it thick but even. Repeat with all 12 bomb mold halves, both the pre-made colorful molds and the molds yet unused.
-
Place the chocolate filled bomb molds into the freezer for 5 minutes.
-
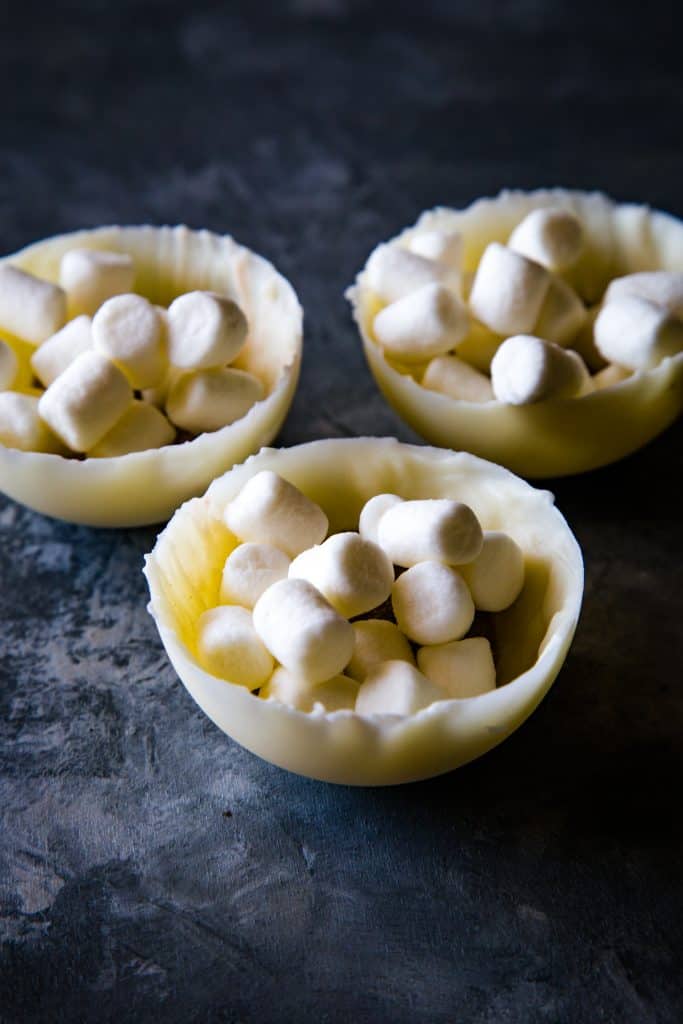
Remove molds from the freezer and gently peel the molds away from the chocolate, leaving the chocolate cups loose.
-
Fill the colorful 6 molds with 2 tablespoon hot chocolate mix and 6-8 mini marshmallows.
-
Heat a plate or a flat-bottom bowl in the microwave until the surface of the plate is warm to the touch.
-
Press one of the empty bomb halves open-side-down onto the flat portion of the warm plate for about 10 seconds. This will gently melt the rim of the chocolate cup.
-
Immediately press this warmed edge chocolate cup to the top of one of the filled cups. This will join the two halves of the hot cocoa bomb. If desired, add more of the chocolate melts to help shore-up that joint.
-
Place the hot cocoa bombs into the freezer for 5 minutes to get them to set, then remove and store in an airtight container until you’re ready to use.
-
To use the hot cocoa bombs, place them in a mug and pour 2 cups hot milk over the top. Stir until the hot cocoa bombs are completely melted and enjoy!
Leave a Reply