
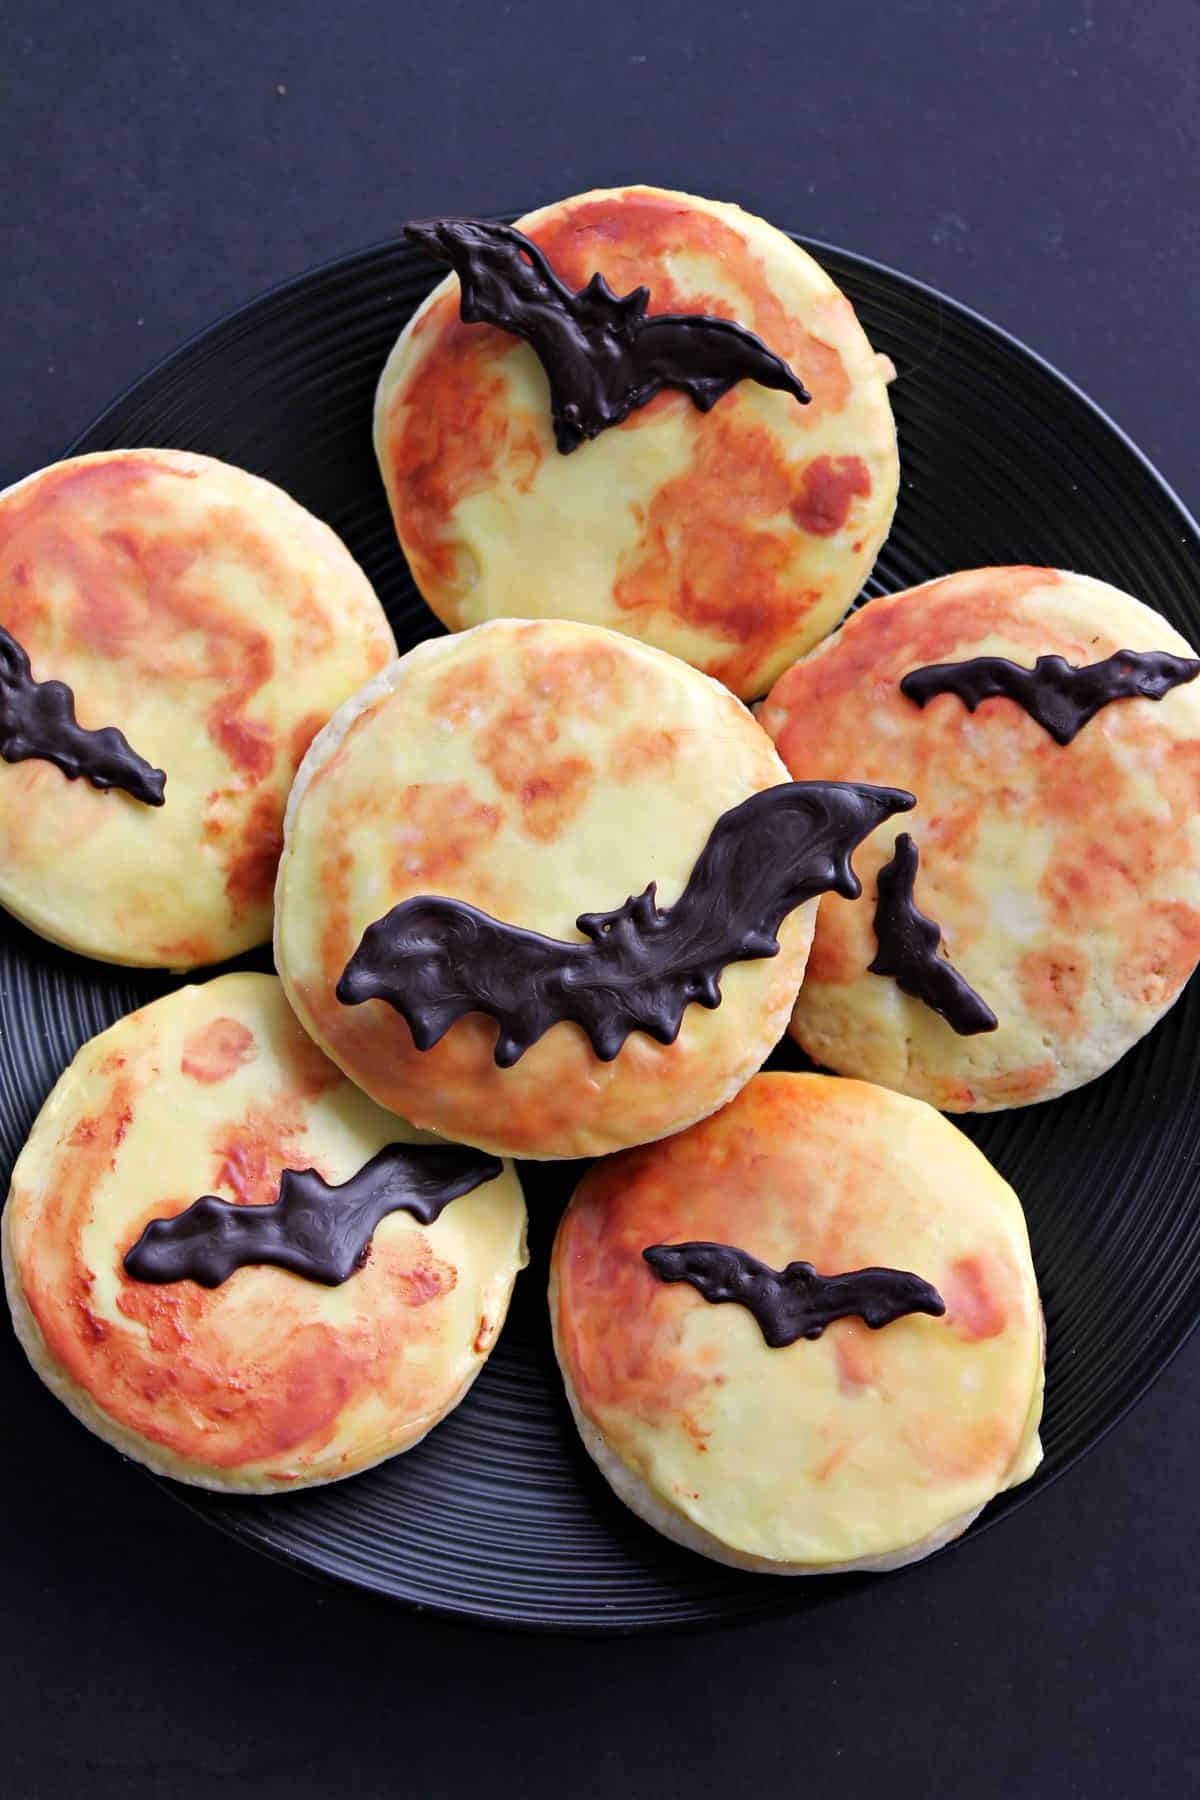
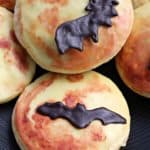
I love baking cookies. I also love doing art projects, and I really love Halloween. And I am always looking for opportunities to combine these three loves into one activity, so I am very excited to share this recipe for Harvest Moon Sugar Cookies. They are delicious Halloween masterpieces that are as fun to make as they are to eat!
Why You'll Love Harvest Moon Sugar Cookies
This is a great project to do with the kids on a rainy afternoon. Mine enjoy rolling out the dough and cutting out the moon shapes while I piped the bats, and we all had a great time painting the harvest moons.
For a fun Halloween party activity, bake the cookies and mix up the icing in advance. Then set up a decoration station, where kids and grown-ups alike can pipe their own bats, mix up custom colors and "paint" their harvest moons.
They taste amazing, too! Thanks to the addition of sour cream, these sugar cookies are moist and flavorful. In fact, they are so good they just might get eaten the moment they are decorated. You may want to think about making a double batch just in case.
Tips for Decorating Harvest Moon Sugar Cookies
Tip #1: When piping the bats, if the icing starts to hardens in the pastry bag, place it inside a zipper-type plastic bag, press the air out, close it, and put it in a glass of hot water with the tip facing down. Be careful not to get any water in the chocolate.
Tip #2: As you start to mix your colors into the icing, start with just one drop of coloring, stir in and evaluate. Then add additional drops, one at a time, mixing after each new drop until you reach the desired color.
Tip #3: Use tools such as a new soft paintbrush, pastry brush, or a piece of sponge to add designs and texture to your harvest moon. Get creative!
Looking for more fun and festive Halloween treats? Check out these Halloween Root Beer Floats and my eye-catching Halloween Deviled Eggs recipe.
Want More Cookie Recipes?
Try these perfect-for-fall Pumpkin Chocolate Chip Cookies or this delicious recipe for Brookies — Brownie Cookies.
- 2 ounces good quality dark chocolate
- Bat silhouettes one or several shapes, easily printed from clipart found online 1-3 inches
- ½ cup butter softened
- ¾ cup white sugar
- 1 egg
- ½ teaspoon vanilla
- ½ teaspoon orange extract
- Zest from one large orange
- 2 ½ cups flour
- ½ teaspoon salt
- ½ teaspoon baking powder
- ½ teaspoon baking soda
- ⅔ cup sour cream
- 1 ½ cups powdered sugar
- 1 teaspoon meringue powder This is optional, but will produce a firmer icing
- 3 tablespoons water
- ½ teaspoon vanilla
- Yellow orange, red, and brown food colors (unsweetened cocoa may be substituted for brown)
-
Cover a baking sheet or piece of cardboard with parchment.
-
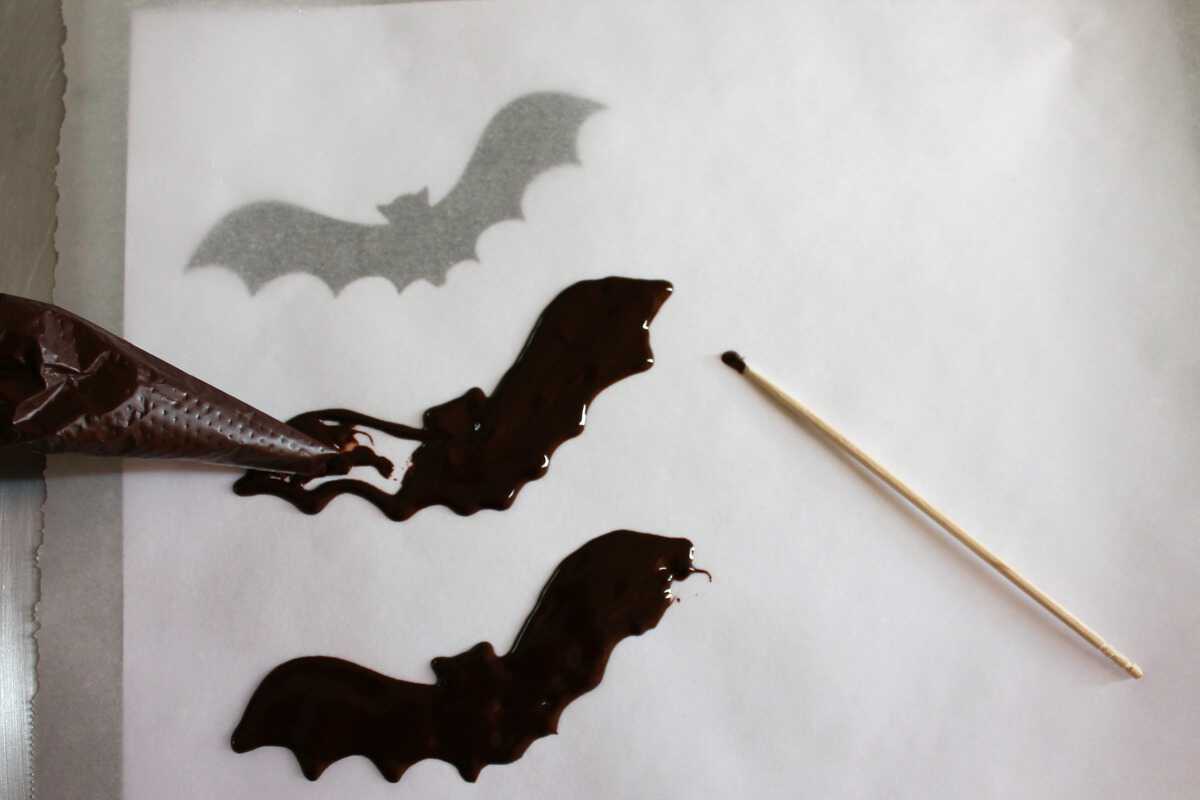
Melt chocolate in a small cup in the microwave at 15-second intervals, stirring often, or in a small pan at lowest heat on the stove. Put melted chocolate in a small disposable pastry bag or zipper-type plastic bag and cut a tiny opening at the tip for piping.
-
Place bat silhouette(s) under parchment. Pipe the outline with chocolate and then fill in the rest of the bat. Use a toothpick or the tip of the bag to help fill in all holes. Slide silhouette to the next spot if you’re just using one. Make 18 bats - or more if you’re putting two small bats on each cookie. Place in refrigerator or freezer until needed. Hint: if the icing hardens in the pastry bag while you’re working, place the pastry bag inside a zipper-type plastic bag, press the air out, close it, and put it tip down in a glass of hot water. Be careful not to get any water in the chocolate.
-
In a large bowl, beat butter and white sugar until soft and fluffy.
-
Add egg and beat well.
-
Mix in vanilla, orange extract, and orange zest.
-
In a small bowl, sift flour, salt, baking powder, and baking soda. Add half of the dry mixture to the butter mixture and stir until mostly incorporated. Dough will be stiff.
-
Stir in half of the sour cream.
-
Stir in remaining flour, then remaining sour cream. Cover and chill for 1 hour.
-
Preheat oven to 375 F
-
Roll dough out approximately ⅓-inch thick between 2 sheets of lightly floured parchment.
-
Cut out 3-inch circles, spacing them close together. Lift each one gently with a thin spatula and place 1 inch apart on an ungreased baking sheet. Bake for 10 minutes, until bottoms are lightly browned. Slide cookies onto a cooling rack immediately.
-
In a small bowl, combine powdered sugar, meringue powder, water, and vanilla. Add yellow food coloring, one drop at a time, until you achieve the color you want.
-
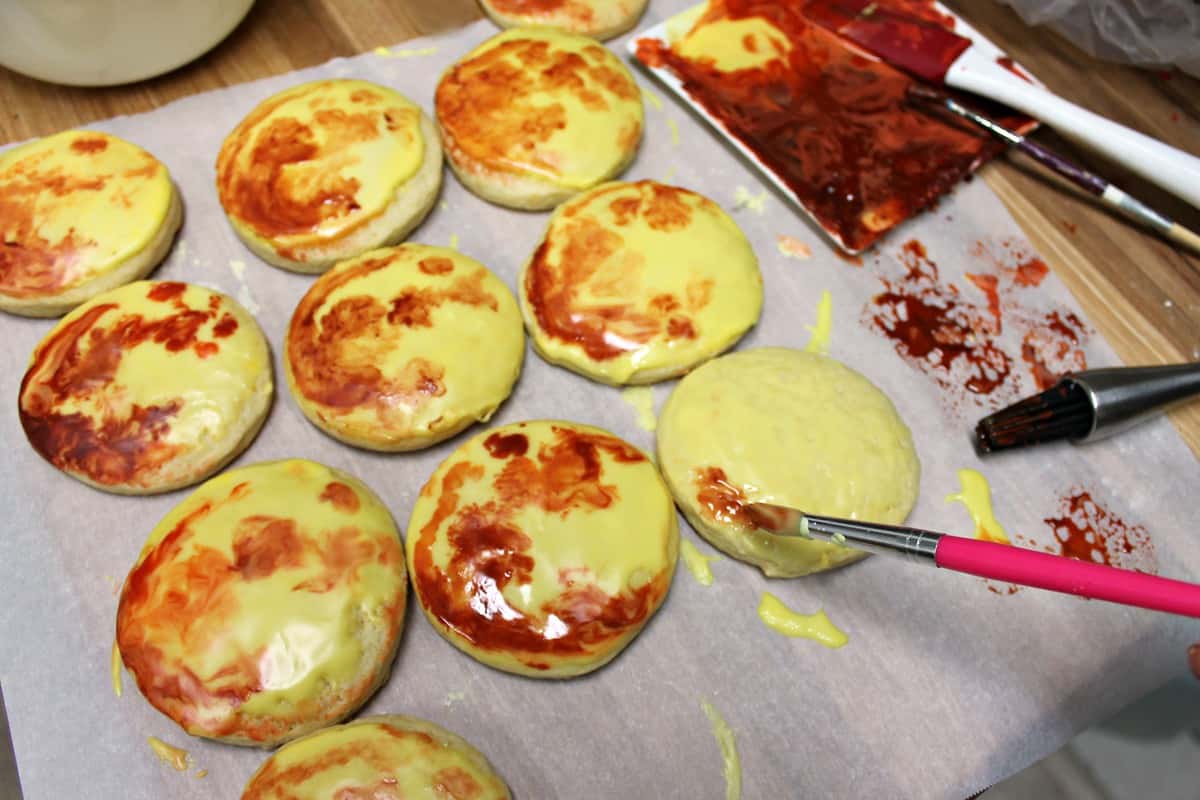
Remove 2 tablespoons of the yellow icing and place in a small bowl or plate. Set bowl of yellow icing aside. Add a little water to the 2 tablespoons of icing to thin it slightly, then create a palette of colors by adding orange, red, and brown coloring.
-
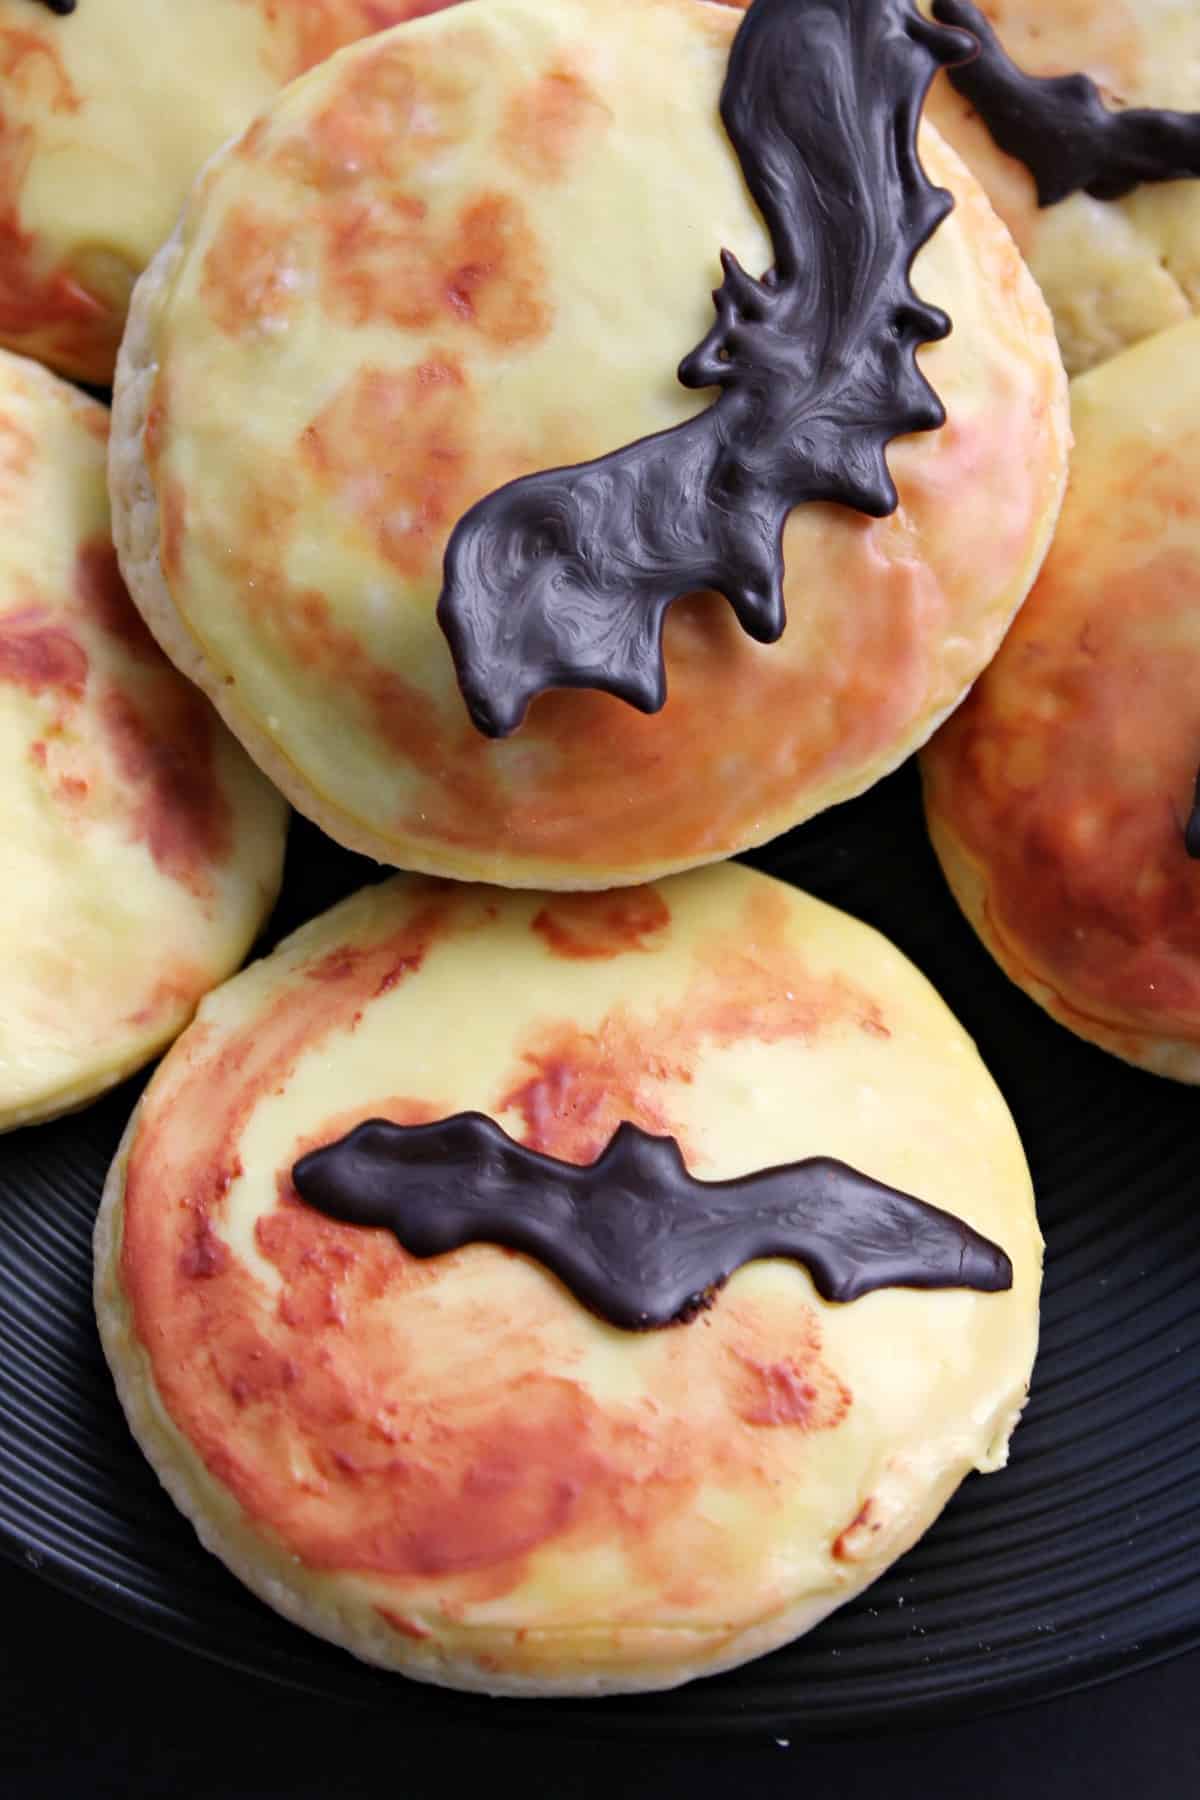
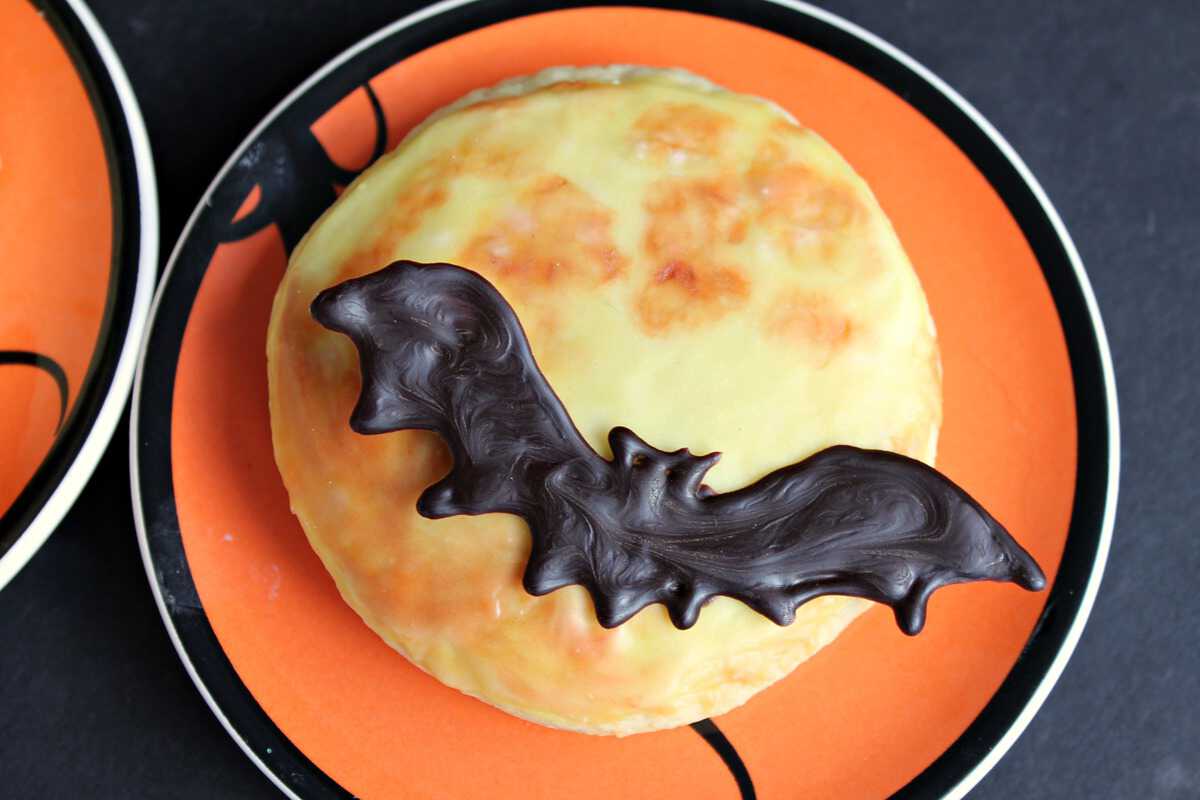
For best results, work with one cookie at a time. By adding the darker colors before the yellow icing dries you will achieve a surreal, marbled look. Dip the top of the cookie in icing (or use a spatula or knife if you prefer) and scrape gently on the edge of the bowl to create a thin coating.
-
With a photo of a full moon in front of you for inspiration, use a soft paintbrush, pastry brush, piece of sponge, or your finger to add designs resembling moon craters. Place on a baking sheet.
-
Carefully lift a bat (a thin spatula works well for this) and place on the cookie. Repeat!
-
Once icing is completely dry, cover the cookies and store at room temperature.
Leave a Reply