
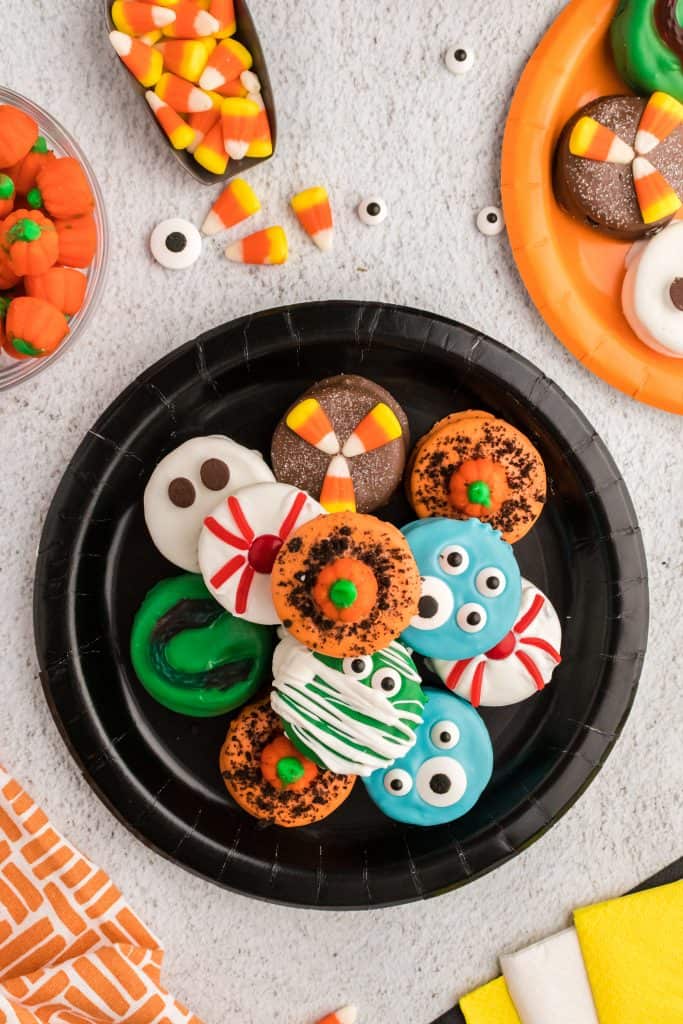
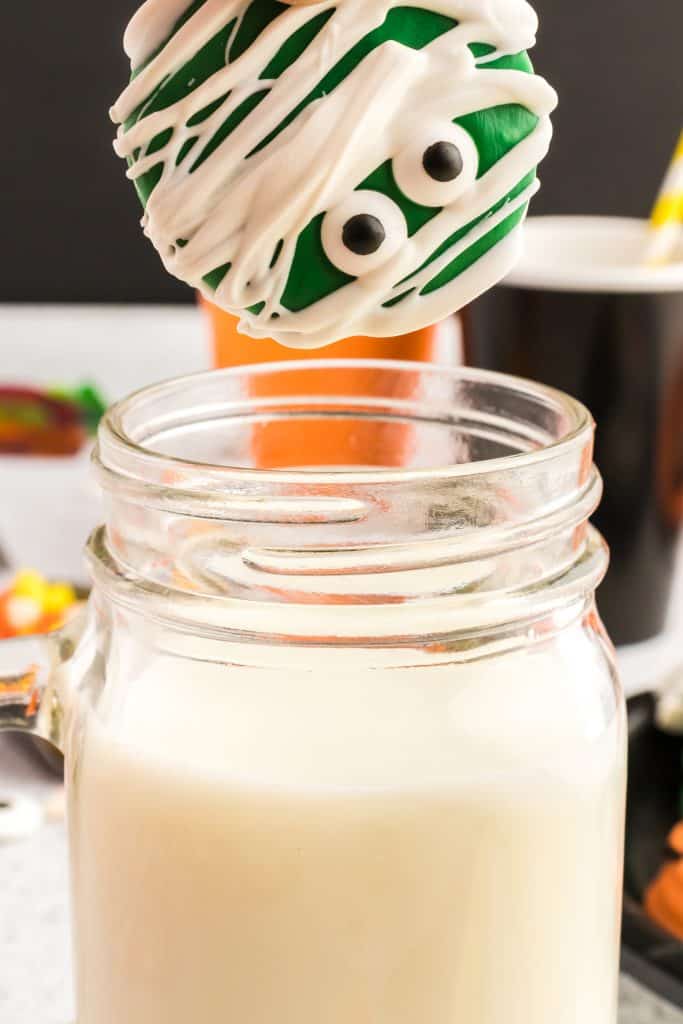
Get into the spooky and festive spirit with these Halloween Dipped Mint Oreos. This recipe includes decadent mint Oreos dipped in various colors of melted chocolate. Finished off with candy eyes and other creepy candies for the perfect, easy treat.

I’m obsessed with Halloween. I know that’s probably cliche, but I don’t care. I love everything about fall, and Halloween is just the biggest perk for the season. I mean, who doesn’t love candy, crazy get-ups, and treats like Frankenstein Peanut Butter Cookies or Halloween cupcakes?! For all the parents out there, don’t forget to toss in a Poison Apple Halloween cocktail.
I know very few people who don’t squeal at the mention of Halloween and start geeking out. It’s a fun time of the year where people can show their weird sides without worrying about it. I know I sure do! I think one of my favorite parts is seeing all the smiles this time of year. It never gets old, and the recipes don’t either!
How Do You Make Dipped Oreos from Scratch?
- Prep - Line a baking sheet with wax or parchment paper.
- Melt - Melt each candy melt in the microwave, as needed.
- Dip - Dip the Oreo in the desired color and coat well. Place on the prepared pan.
- Decorate - Decorate with the desired candies.
- Dry - Place the Halloween Oreos in the fridge or freezer for a few minutes to dry. Serve and enjoy!
Tips and Variations
- How do I thin chocolate that’s too thick? - You can add vegetable shortening or coconut oil to the chocolate to thin it out. If the chocolate is too thick, the end result will be an ugly Halloween Oreo and we don’t want that.
- Get extra green and white candy melts - If you plan on making all the various Oreo designs, you’ll want more of the white and green candy melts. They’re used in more designs.
- How long does it take dipped Oreos to dry? - I usually slip them in the fridge for about 10 minutes. They rarely need longer than this as the chocolate dries pretty quickly. That’s why they’re such a quick and easy Halloween treat.
- Swap out the Oreo flavors - You can swap out the mint Oreos for any other Oreo you prefer.
- Can I use normal chocolate? - You can definitely forgo using candy melts. However, if you want fun colors, you’ll need to get some oil based food dye to color the white chocolate chips. Water based food dye will seize the chocolate, just as a fair warning.
Common Questions About Halloween Dipped Mint Oreos
How Far in Advance Can You Make Dipped Oreos?
One of the big perks about chocolate dipped Oreos is that they last up to 2-3 weeks. This means you can make them way in advance if need be. I recommend making them no more than a couple days out because, as with anything, they’re the best when fresher. However, nobody will notice either way. I mean, it’s Oreos and chocolate. Just be sure to store them properly and you’re good to go.
Can I Use a Mold for Chocolate Dipped Oreos?
Yes, you definitely can. In fact, it might be easier for making sure your Oreos turn out pretty. When “free dipping” Oreos, they can turn out uneven and thicker/thinner in certain spots. With a mold, these problems aren’t as prevalent. So, if you have a mold, definitely use it as it will save you some time and grief.

Please feel free to share your experience with making these Halloween Dipped Mint Oreos in the comments below or on social media!
More Oreo Recipes You’re Sure to Love:
- Halloween Face Pie Dip
- Halloween Deviled Eggs
- Halloween Root Beer Floats
- No Bake Halloween Treats
- Red Velvet Halloween Cake

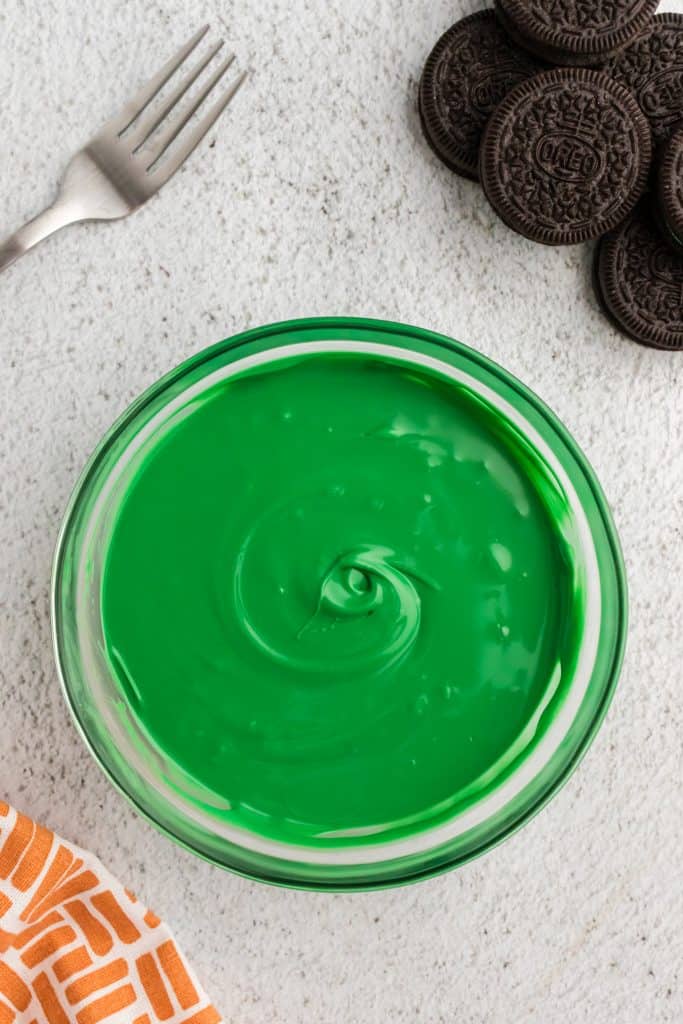
- 5 10-12 ounce bags of different colored candy melts (I used Wilton): white, green, brown, orange, and blue
- 1 package of Mint Oreos
- Candy eyeballs
- Gummy worms
- Red pull ‘n’ peel licorice
- M&Ms
- Pumpkin candies
- Chocolate chips
- Candy corn
- Silver sanding sugar
-
Line a cookie sheet with wax paper.
-
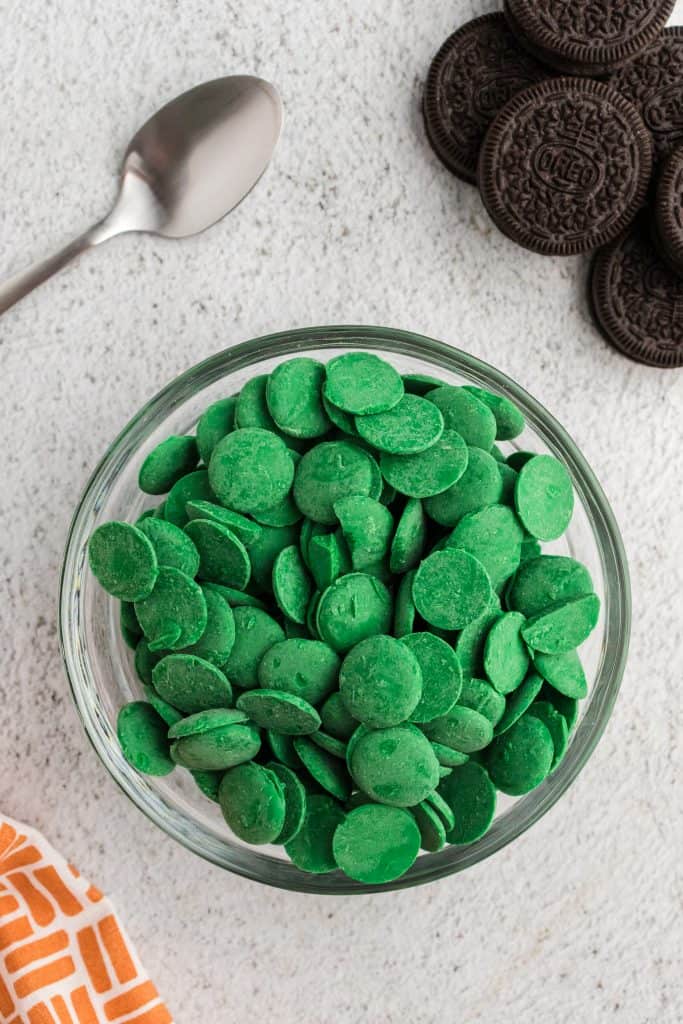
In a small microwavable bowl, pour a half bag (about 1 cup) of one-color candy melts. Follow the heating instructions on back of package (half a bag makes about 8-10 Oreos).
-
You may need to use more than a ½ bag of green and white melts since they are each used for multiple cookie styles.
-
Make sure melted candy is smooth. If candy is too thick or is not melting, add one teaspoon of vegetable shortening and stir until you get your desired consistency. Coating should still be thick enough to stay on Oreo.
-
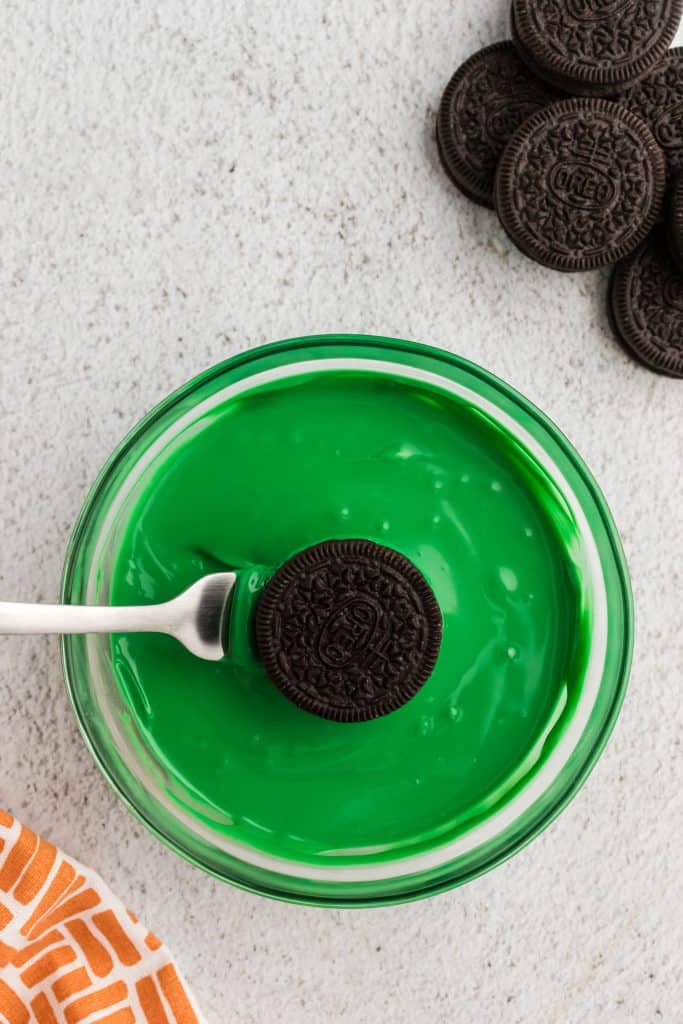
Take a Mint Oreo from the package and place one side into the coating.
-
With a fork, flip the Oreo onto the opposite side.
-
Using a spoon, scoop the coating onto the Oreo until it is completely covered.
-
With a fork, lift the Oreo out of the bowl and gently shake to let any excess coating drip off while also waiting for the coating on top to become smooth.
-
Place the Oreo onto the wax paper and add any decorations while the coating is still warm.
-
Continue dipping and decorating your cookies until you’ve reached the desired number of cookies with that color. I use one color at a time so that the candy melts don’t harden.
-
Repeat with other desired colors of candy melts.
-
For quickest results, put the tray of Oreos in a refrigerator for 10 minutes, or until the coating has hardened.
-
Serve chilled or at room temperature with milk, if desired.
-
Store in the fridge or at room temperature in an airtight container for up to two weeks.
How do I make each Oreo?
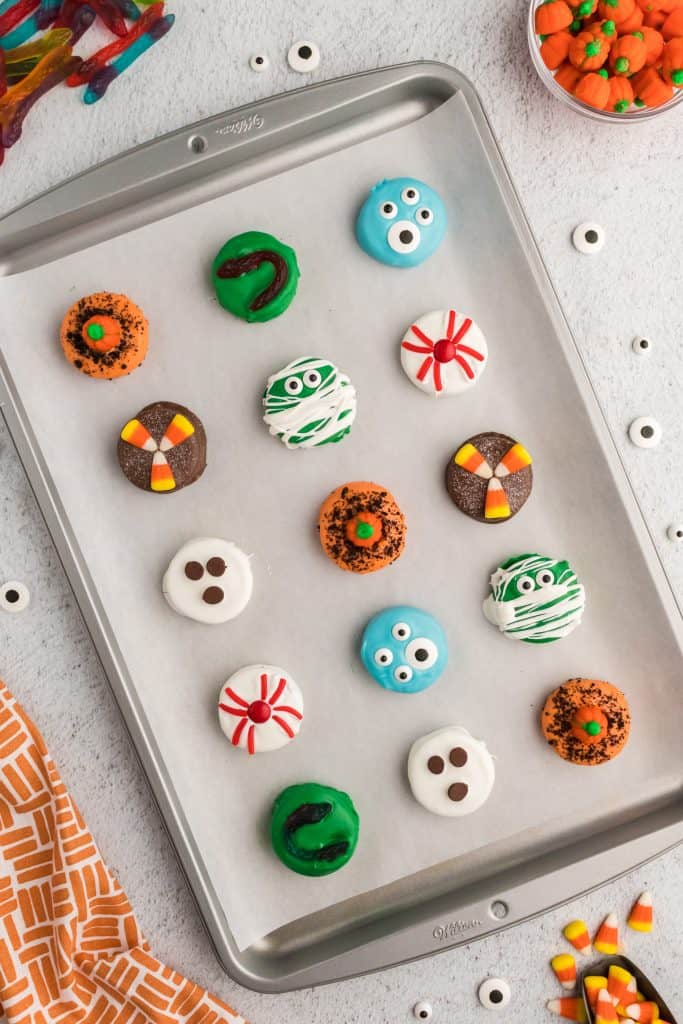
- Pumpkin Patch Oreo:
- Orange candy melts
- Crushed Oreo crumbs, pumpkin candy
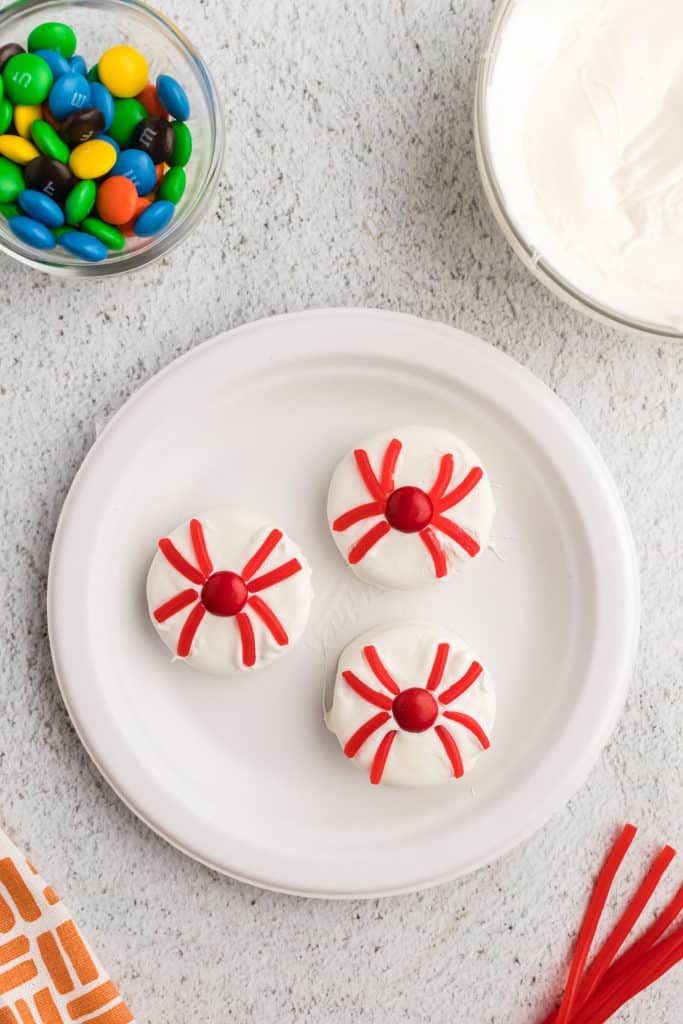
- Red Spider Oreo:
- White candy melts
- Red M&M, pull ‘n’ peel licorice for legs. Legs can be shaped once the coating barely starts to harden.
- Ghost Oreo:
- White candy melts
- Chocolate chips (break off the tip so they lay flat)
- Snake Oreo:
- Green candy melts
- Gummy worm
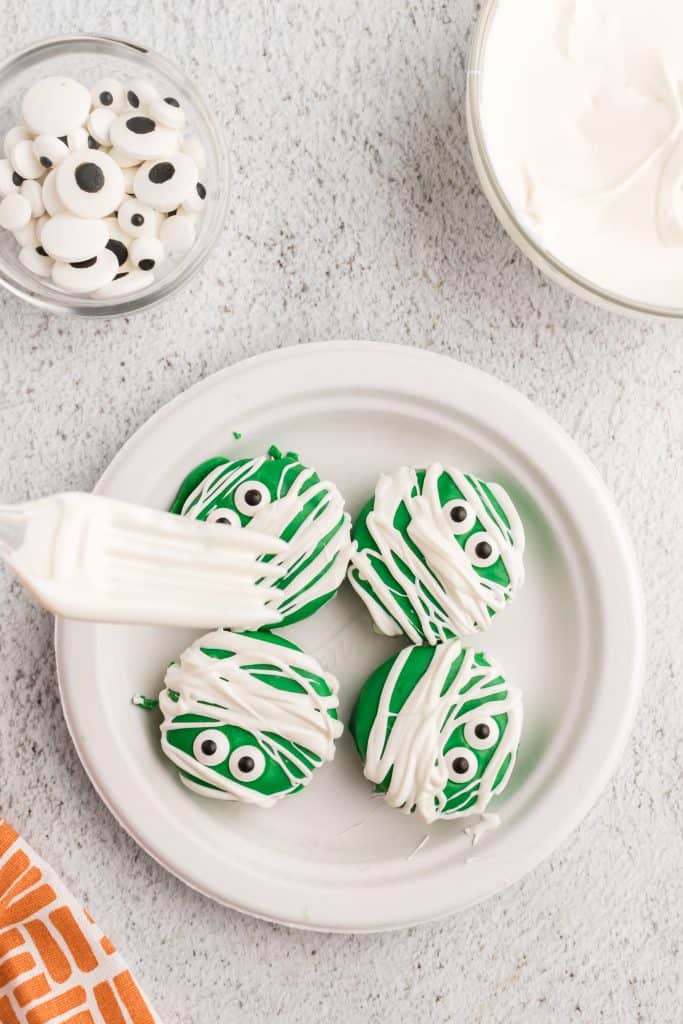
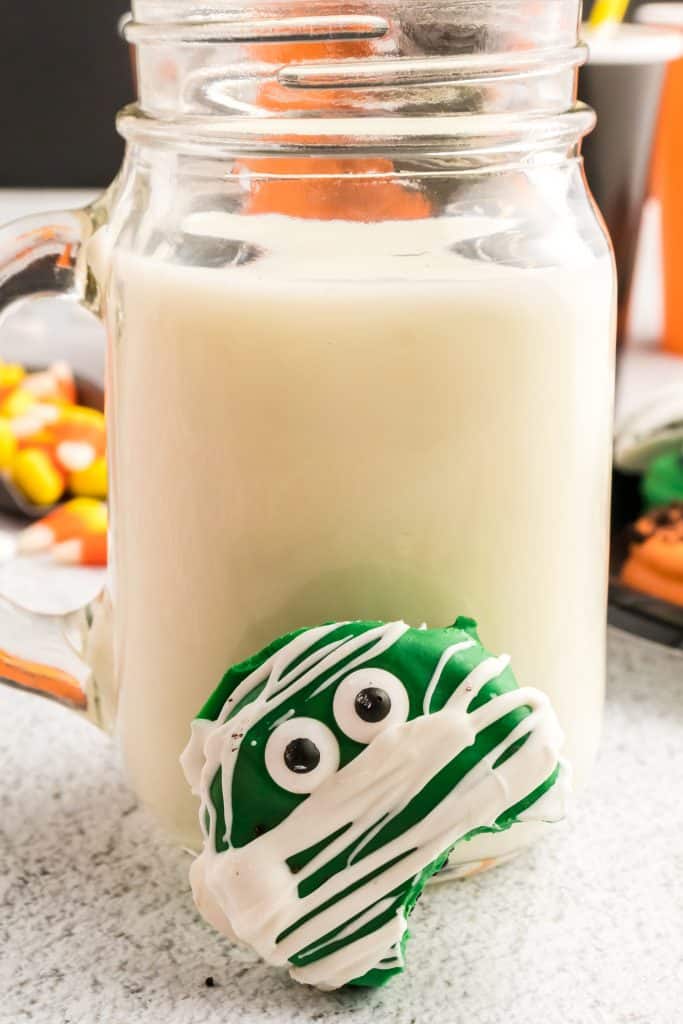
- Mummy Oreo:
- Green candy melts
- White candy melts for drizzling
- Candy eyeballs, let cool, then drizzle white candy melts
- Candy Corn Oreo:
- Brown candy melts
- Candy corns, silver sanding sugar
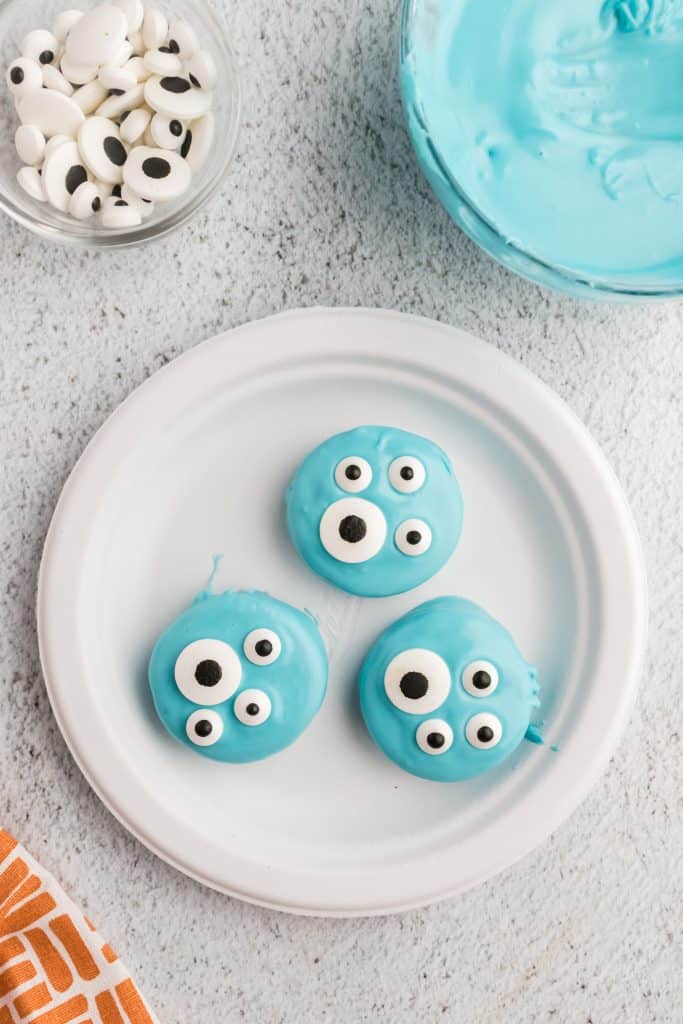
- Blue Monster:
- Blue candy melts
- Candy eyeballs
Leave a Reply