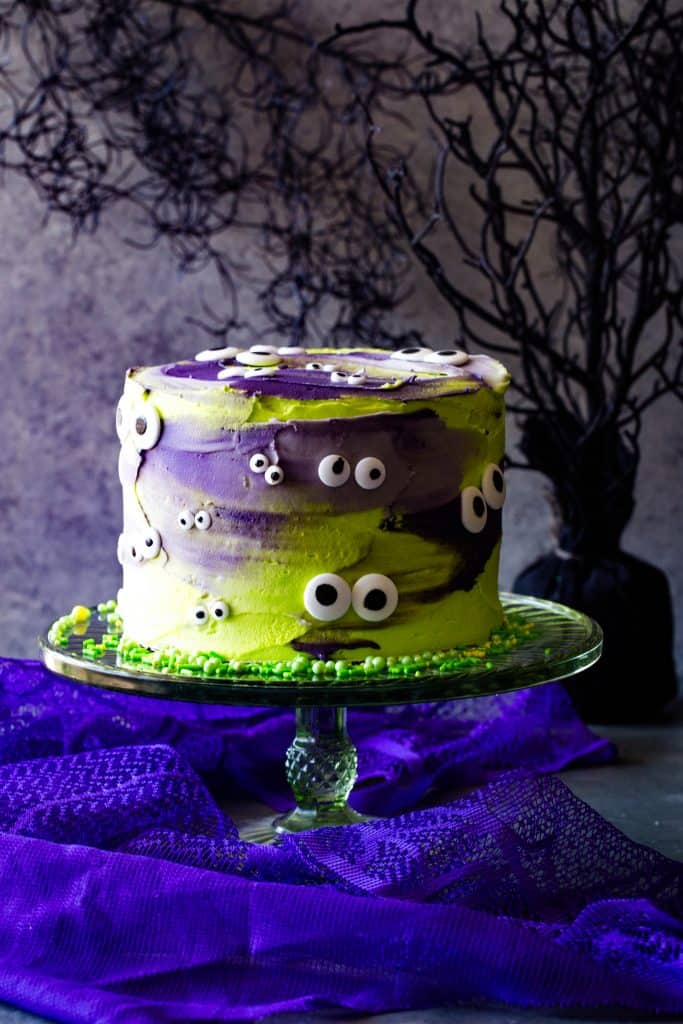
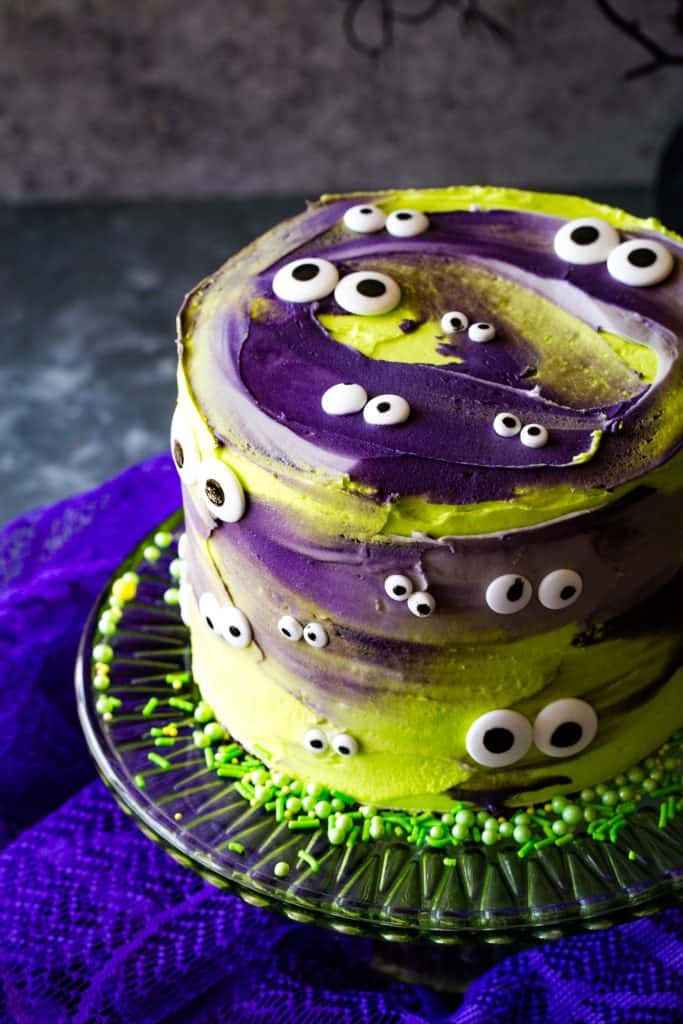
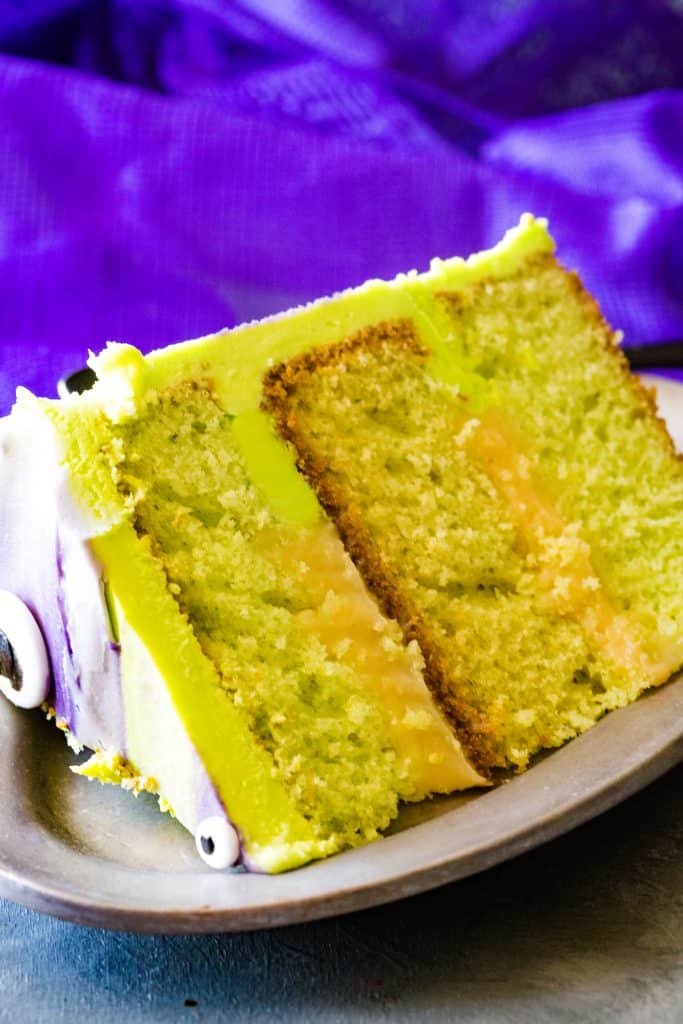
Get nice and festive when you create this Monster Halloween Cake. Layers of soft, vanilla cake, covered in a creamy, meringue frosting, and filled with a citrus curd. Not to mention, plenty of neon green, grey, purple, and giant eyes to boot!
You guys, I just can’t handle my excitement at this point...fall is almost here!! Halloween decor and ideas have already started taking over the stores and internet. I’m like a kid in a candy shop.
Sorry for being cliche there, but seriously, I’m already whipping up my Halloween Cupcakes, Frankenstein Peanut Butter Cookies, and Graveyard Pudding Cups. I’m startin’ early!
I’m not ashamed. Some people have their Christmas, I have my fall/Halloween. No apologies here! Don’t deny it, you’re just begging to jump in feet first and I’m officially inviting you to jump in with me.
Start by making this absolutely adorable monster Halloween cake. As far as layered cakes go, it can’t get any easier. No fancy frosting tips needed, let’s go!
How Do You Make a Halloween Cake from Scratch?
- Prep - Preheat the oven. Grease and flour your cake pans.
- Make the batter - Beat butter, oil, and sugar together before adding eggs one at a time, then the vanilla. In a separate bowl, mix together dry ingredients and slowly incorporate into the wet ingredients, along with the buttermilk.
- Bake - Spoon evenly into pans and bake for 20 minutes. Cool for 10 minutes, then invert onto a cooling rack.
- Make the frosting - Using a double boiler method, whisk the egg whites and sugar until dissolved. Move to the mixer and beat until stiff peaks form. Add in butter. Switch to the paddle attachment, add in vanilla and salt, then beat again.
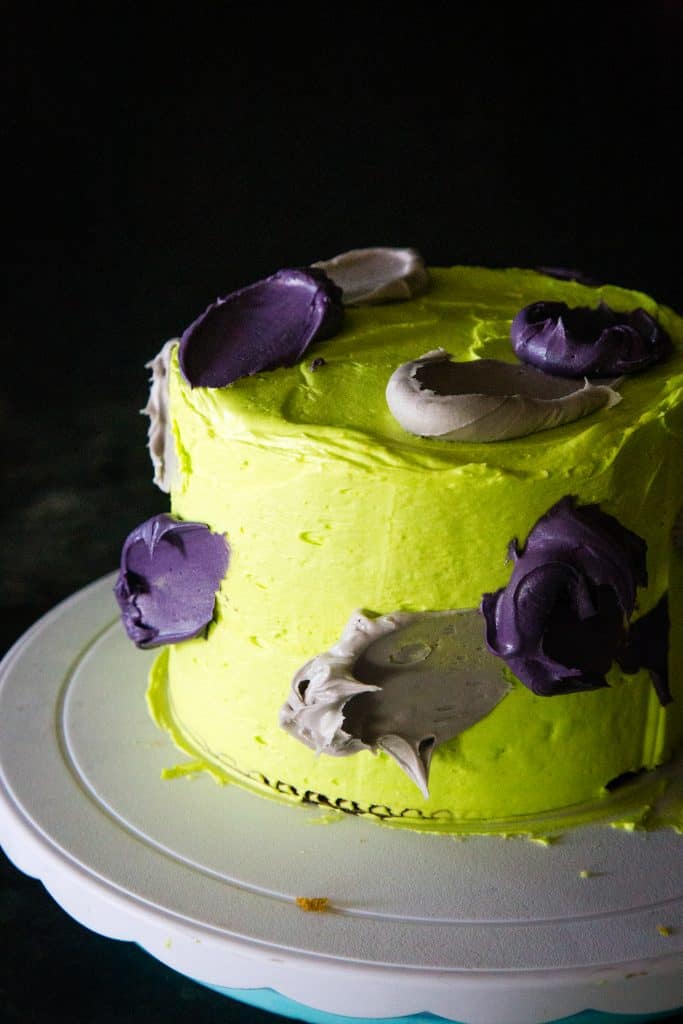
- Color the frosting - Color ½ cup frosting grey, and another ½ cup purple. The rest, color green. Place the green in a piping back and cut the tip.
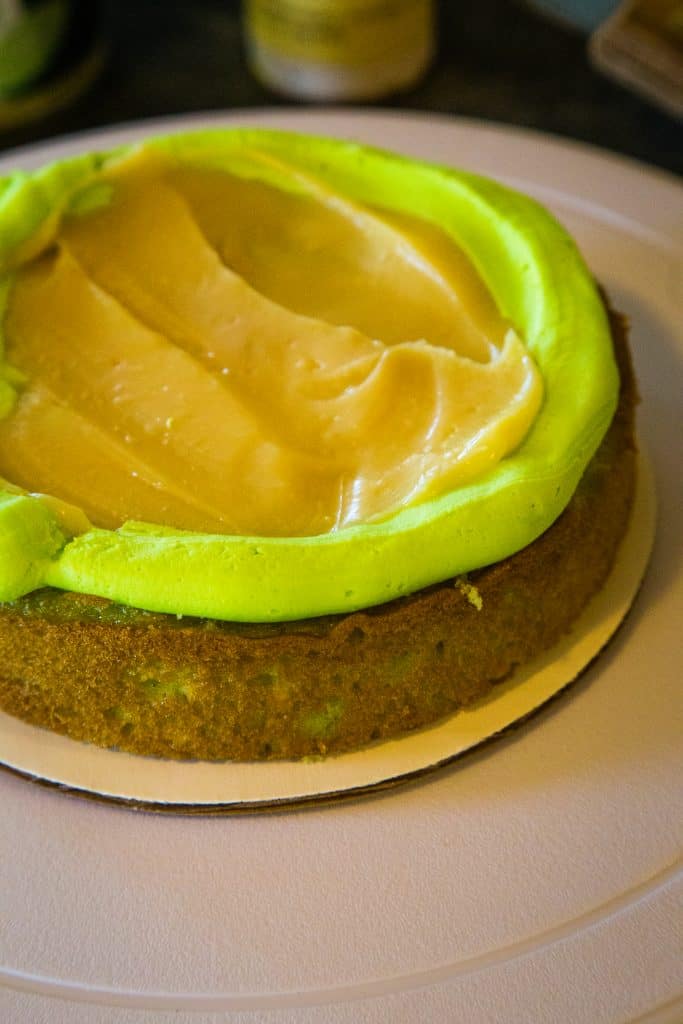
- Assemble the cake - Level the cake and place a ring of frosting on the top, filling in the middle with the curd. Place the next layer on top. Coat in a thin layer of frosting and chill before applying the normal layer of green frosting. Add spoonfuls of the grey and purple frosting around the cake, and add the eyes.
Tips and Variations
- Use a mixer - It’s truly in your best interest to use a mixer for the frosting portion of this recipe. Not only is it quicker, but it produces a much better consistency for this kind of frosting recipe.
- When to remove meringue frosting from heat - You’ll want to check your egg white and sugar mixture by rubbing a bit of the mixture between your fingers. If you don’t feel any sugar granules, and it’s soft or silky, you’re good to go.
- How to tell if a cake is done - I like to use a toothpick inserted into the thickest, middle portion of the cake. If it comes out clean, they’re ready to come out of the oven.
- A crumb coat is important - Putting a thin layer of frosting on the cake, after assembled, and letting it chill is a vital step. Otherwise, you’ll end up with crumbs all in your frosting, and smoothing your frosting will be a pain.
- Use cake strips for easier cake leveling - If you want to skip the step where you use a knife to level the cake, you can use cake strips. These are soaked in water, and wrapped around the cake pan and left on during the baking process. This leaves the top of the cake flat for easier stacking. I would check the level of the cake, just in case though.
Common Questions About Monster Halloween Cake
What is a Layered Cake Called?
There is no fancy name for layered cakes. They tend to have the name “sandwich cake” from time to time, but “layered cake” is the most popular title. A layered cake is simply layers of cake and frosting or filling, such as a curd. There can be as many layers as preferred, although 2 and 3 layers are the most common (like this monster cake).
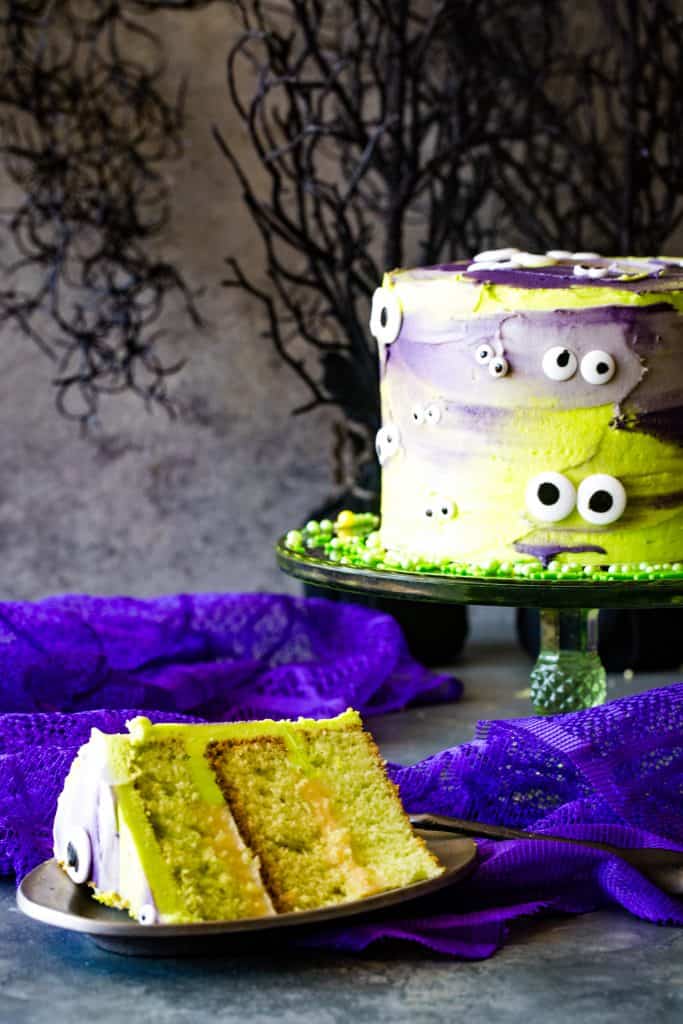
Please feel free to share your experience with making this Monster Halloween Cake in the comments below or on social media!
More Halloween Recipes You’re Sure to Love:
- Halloween Dipped Mint Oreos
- Halloween Root Beer Floats
- No Bake Halloween Treats 4 Ways
- Red Velvet Halloween Cake
- Halloween Macarons
- 1 cup unsalted butter room temperature
- ½ cup vegetable oil
- 2 ½ cups granulated sugar
- 5 large eggs room temperature
- 2 teaspoons vanilla extract
- 3 cups all-purpose flour
- 2 teaspoons baking powder
- ½ teaspoon baking soda
- ¼ teaspoon salt
- 1 cup buttermilk room temperature
- 5-6 drops neon green food coloring
- 4 large egg whites at room temperature
- 1 cup granulated sugar
- ¾ cups unsalted butter softened 1 ½ sticks, cut into 1⁄2” cubes
- ½ teaspoon vanilla extract
- Pinch of salt optional
- Neon green purple, grey food dye
- Candy eyes
- 1 cup lime curd or lemon curd
-
Preheat oven to 350 degrees. Grease and flour three 6-inch or two 9-inch cake pans.
-
In the bowl of your mixer, beat together butter, oil, and sugar until pale and fluffy (2-3 minutes).
-
Scrape down the sides of the bowl and add eggs, one at a time, beating thoroughly before each addition. Stir in vanilla extract.
-
In a separate bowl, whisk together the remaining dry ingredients.
-
Gradually alternate adding the dry mixture and the buttermilk to the butter/egg mixture (3 flour additions, 2 buttermilk additions), mixing only until just combined. Stir in green food coloring.
-
Evenly spoon batter into prepared pans. Bake cakes for 20-22 minutes or until a toothpick is inserted in the center and comes out clean. Cool cakes in pans for 10 minutes then invert onto a cooling rack to cool completely.
-
In a large HEAT-PROOF mixing bowl (preferably the metal bowl of a standing mixer), add the egg whites sugar.
-
Select a saucepan that the heat proof mixing bowl can set on top of, but not fall into. Fill this saucepan with several inches of water and bring to a low boil.
-
Place the mixing bowl with egg whites and sugar over the boiling water (similar to a double boiler set-up). Whisk the egg whites while heating until the sugar is completely dissolved - the egg whites will be warm to the touch and if you rub a bit of the egg whites between your fingers, it will be smooth. You should not feel any sugar granules. Remove from heat.
-
Attach mixing bowl to the standing mixer. With the WHISK attachment, beat egg white mixture on HIGH speed for 6-8 minutes. The egg whites will cool and beat into a glossy meringue with stiff peaks. Feel the bottom of the mixing bowl to ensure it is cool to the touch before proceeding on.
-
When the meringue has formed stiff peaks and is cooled, add the butter - 1-2 cubes at a time. Mix each addition into the meringue completely (still using the WHISK attachment) until incorporated. Continue adding 1-2 cubes of butter at a time until it is all combined.
-
Scrape down the sides of the bowl and switch out the whisk for the PADDLE attachment. Add vanilla extract and a pinch of salt.
-
Beat on the LOWEST speed using the PADDLE attachment for 4-5 minutes or until the airy mixture becomes smooth and thick like a gorgeous frosting. (see notes below for troubleshooting consistency issues).
-
Remove 1 cup of frosting and divide it into two bowls. Mix one bowl with grey frosting and the other bowl with purple frosting. Cover bowls with plastic wrap and set aside.
-
Add neon green coloring to the remaining frosting. Spoon into a large piping bag.
-
Level the cakes by using a serrated knife to remove the domes.
-
Place the first layer of the cake on a cardboard cake round or cake stand.
-
Clip the tip of the piping bag and pipe a ring around the perimeter of the cake. Spread ½ a cup of lime curd on the cake on the inside of the piped perimeter. Repeat with the second layer.
-
Top cake with final layer.
-
Spread a thin layer of frosting around the outside of the cake to create a crumb coat. Refrigerate or freeze the cake for 20-30 minutes.
-
Once cold, pipe a generous amount of neon green frosting around the outside of the cake. Run a cake scraper along the edge of the cake to flatten out the frosting and remove excess.
-
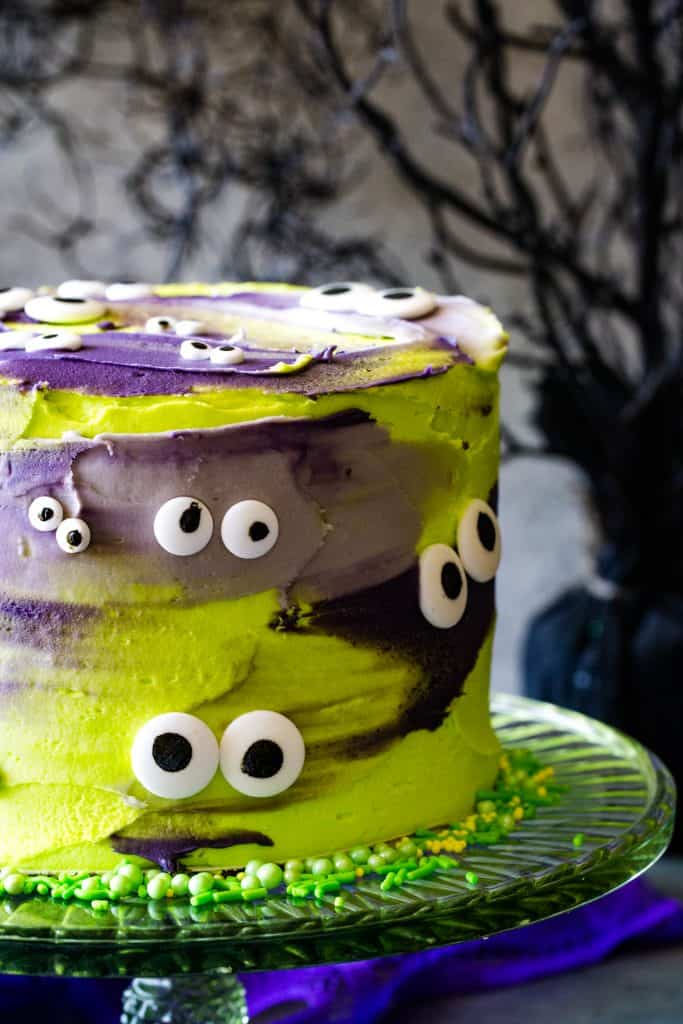
Using the back of a spoon or offset spatula, scrape spoonfuls of grey and purple frosting around the cake. Once again, run the cake scraper along the edge and top of the cake to flatten out the frosting and remove excess.
-
Gently press eyeballs around the cake.
-
Serve immediately or refrigerate until 30 minutes before serving.

Leave a Reply