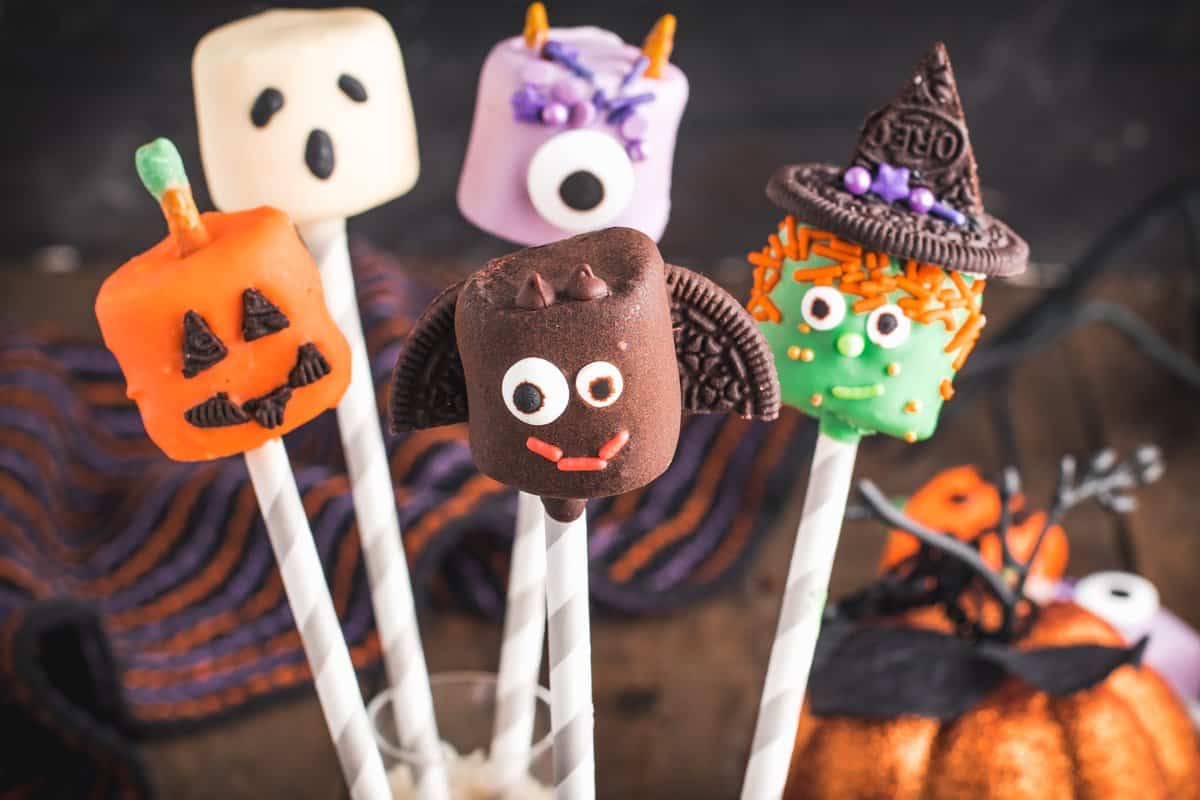
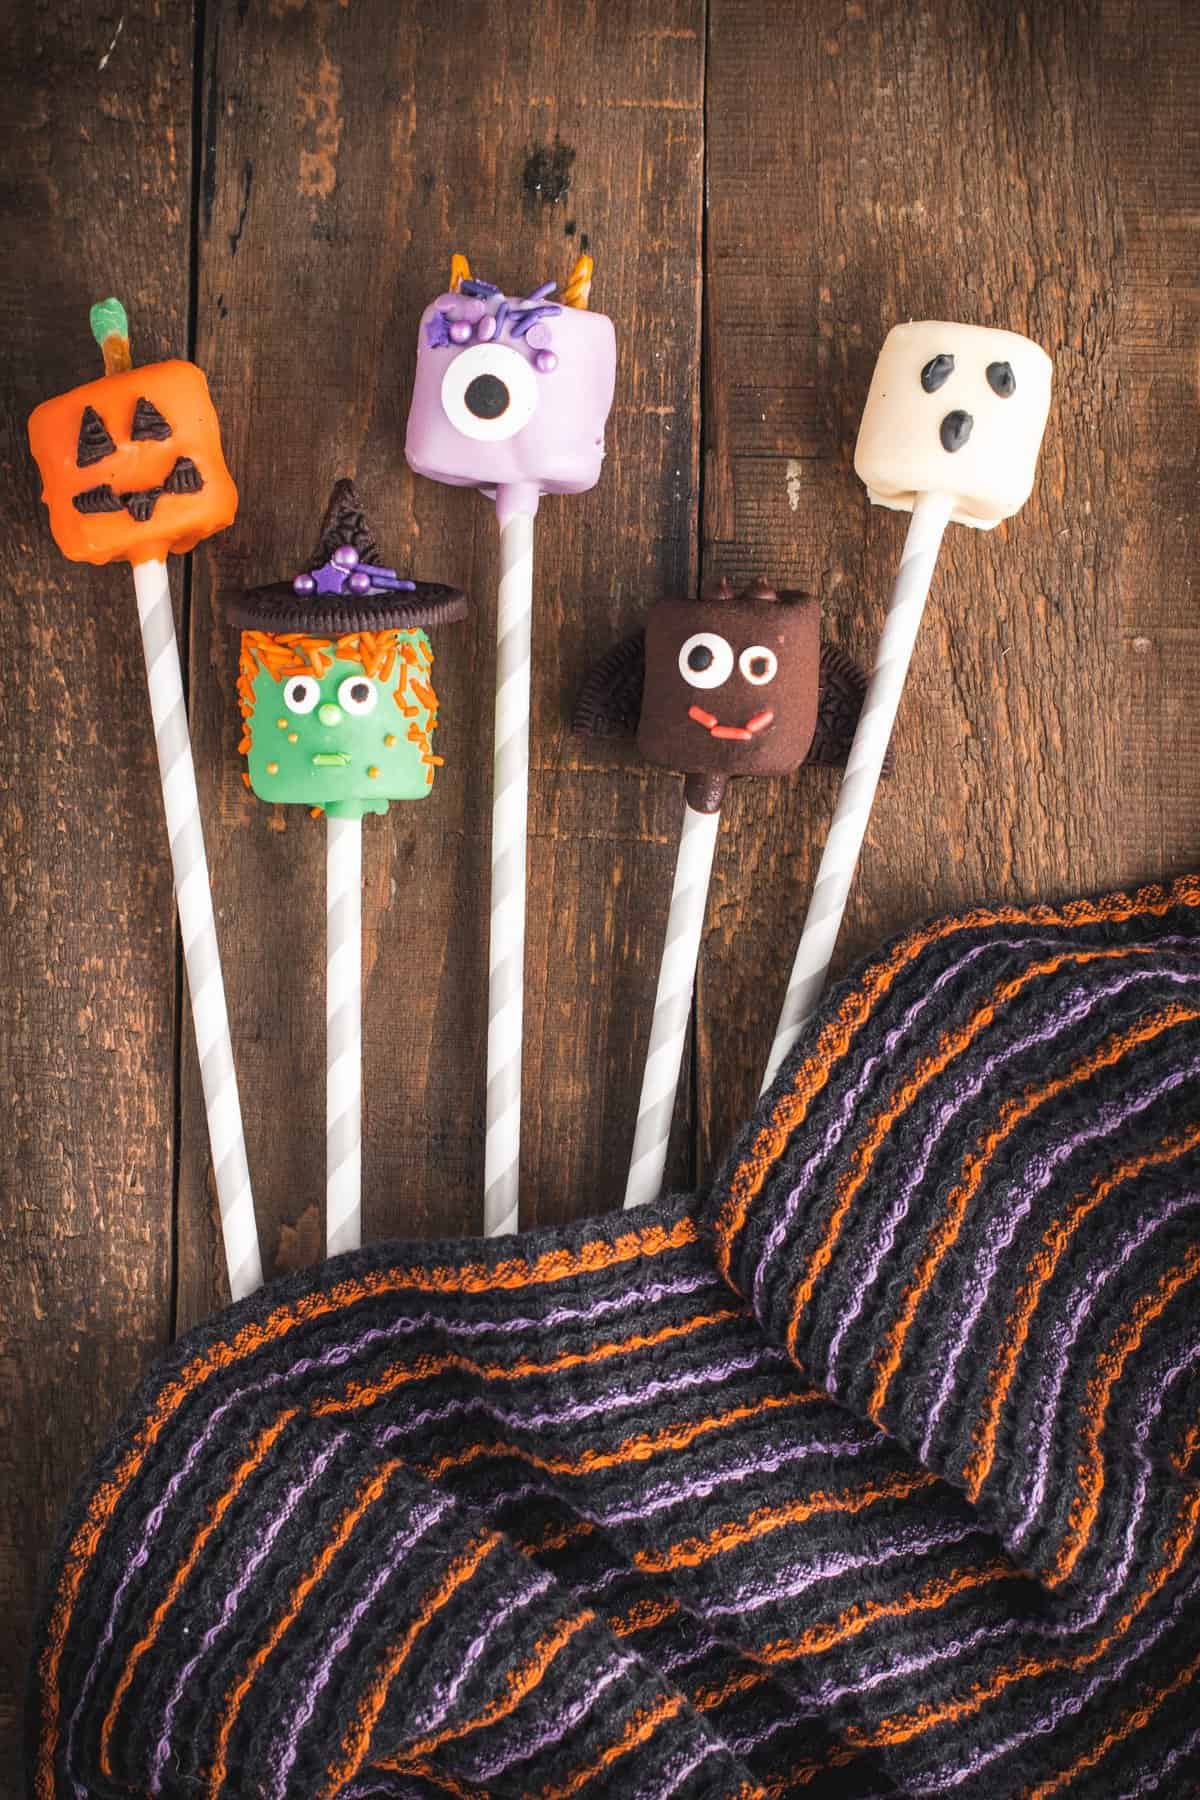
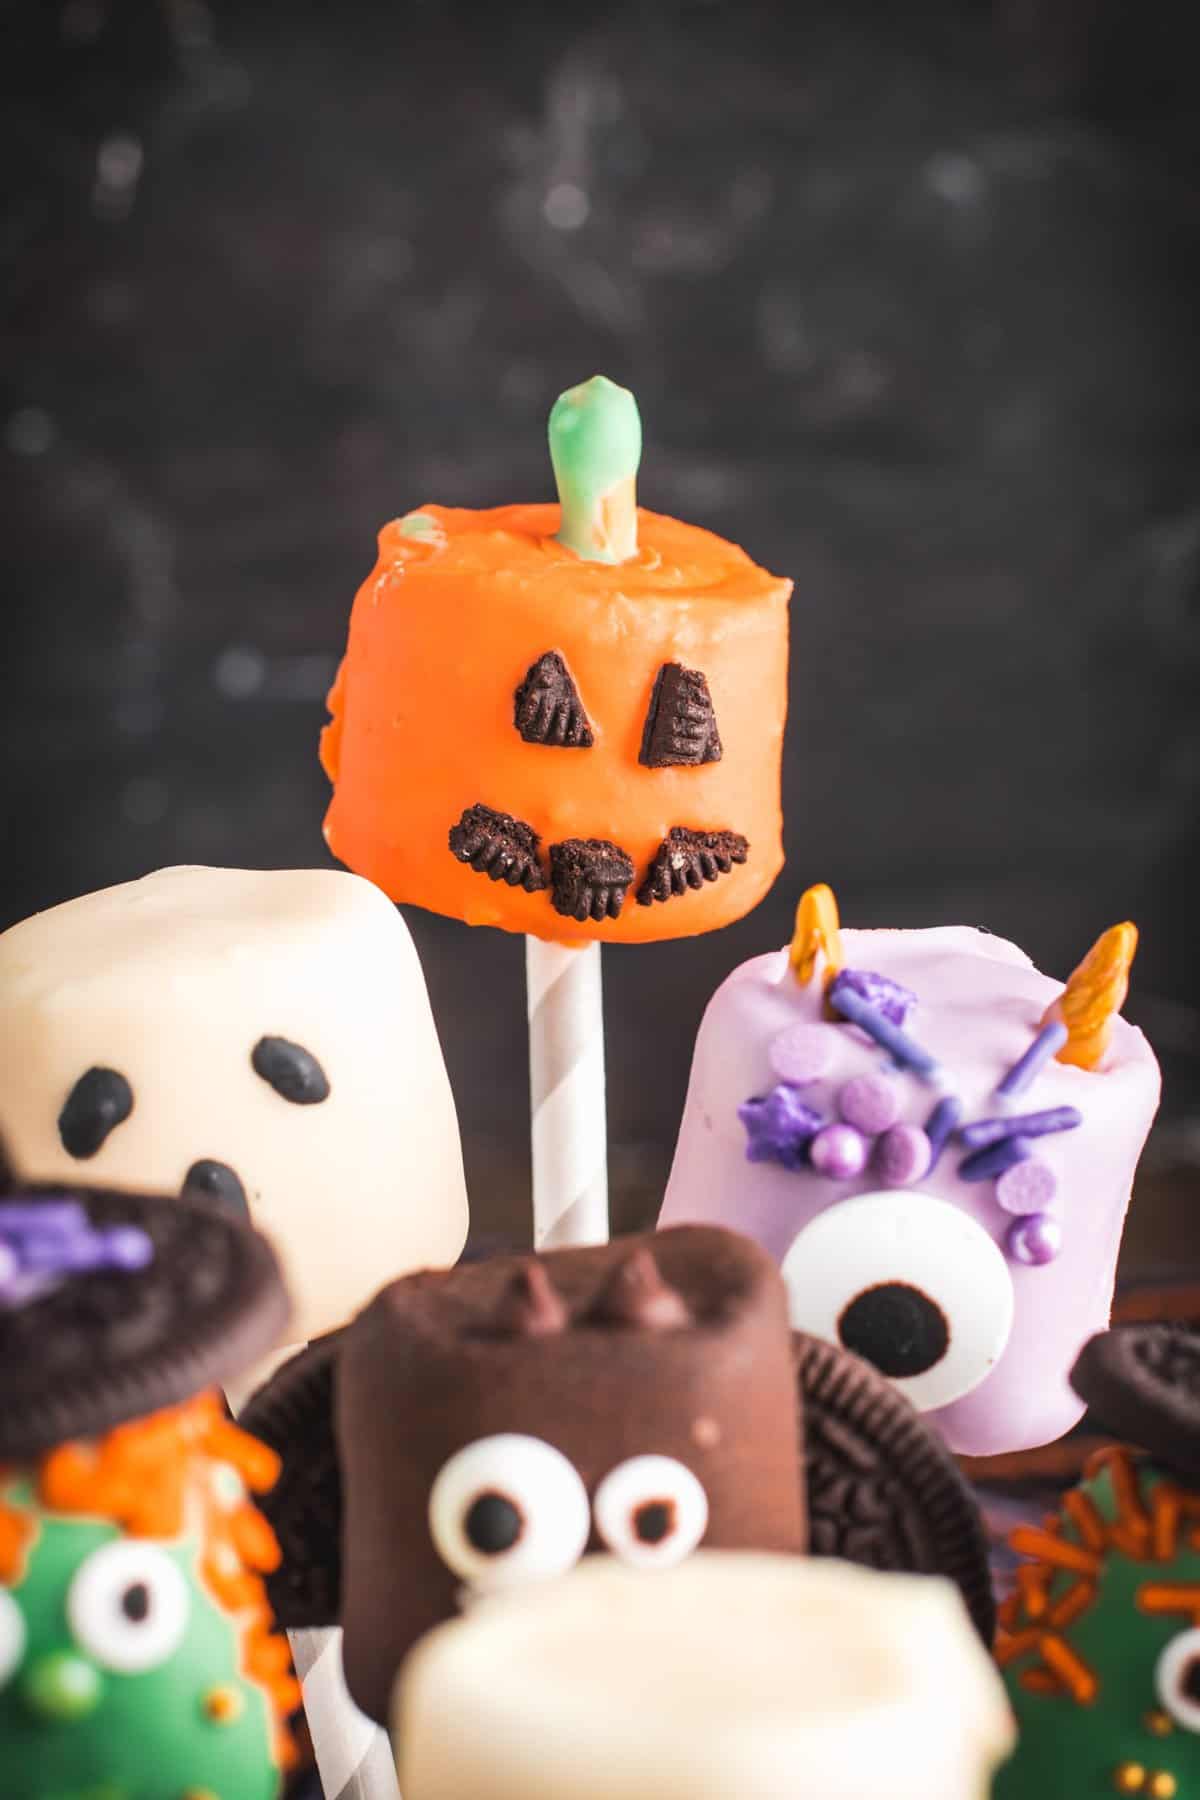
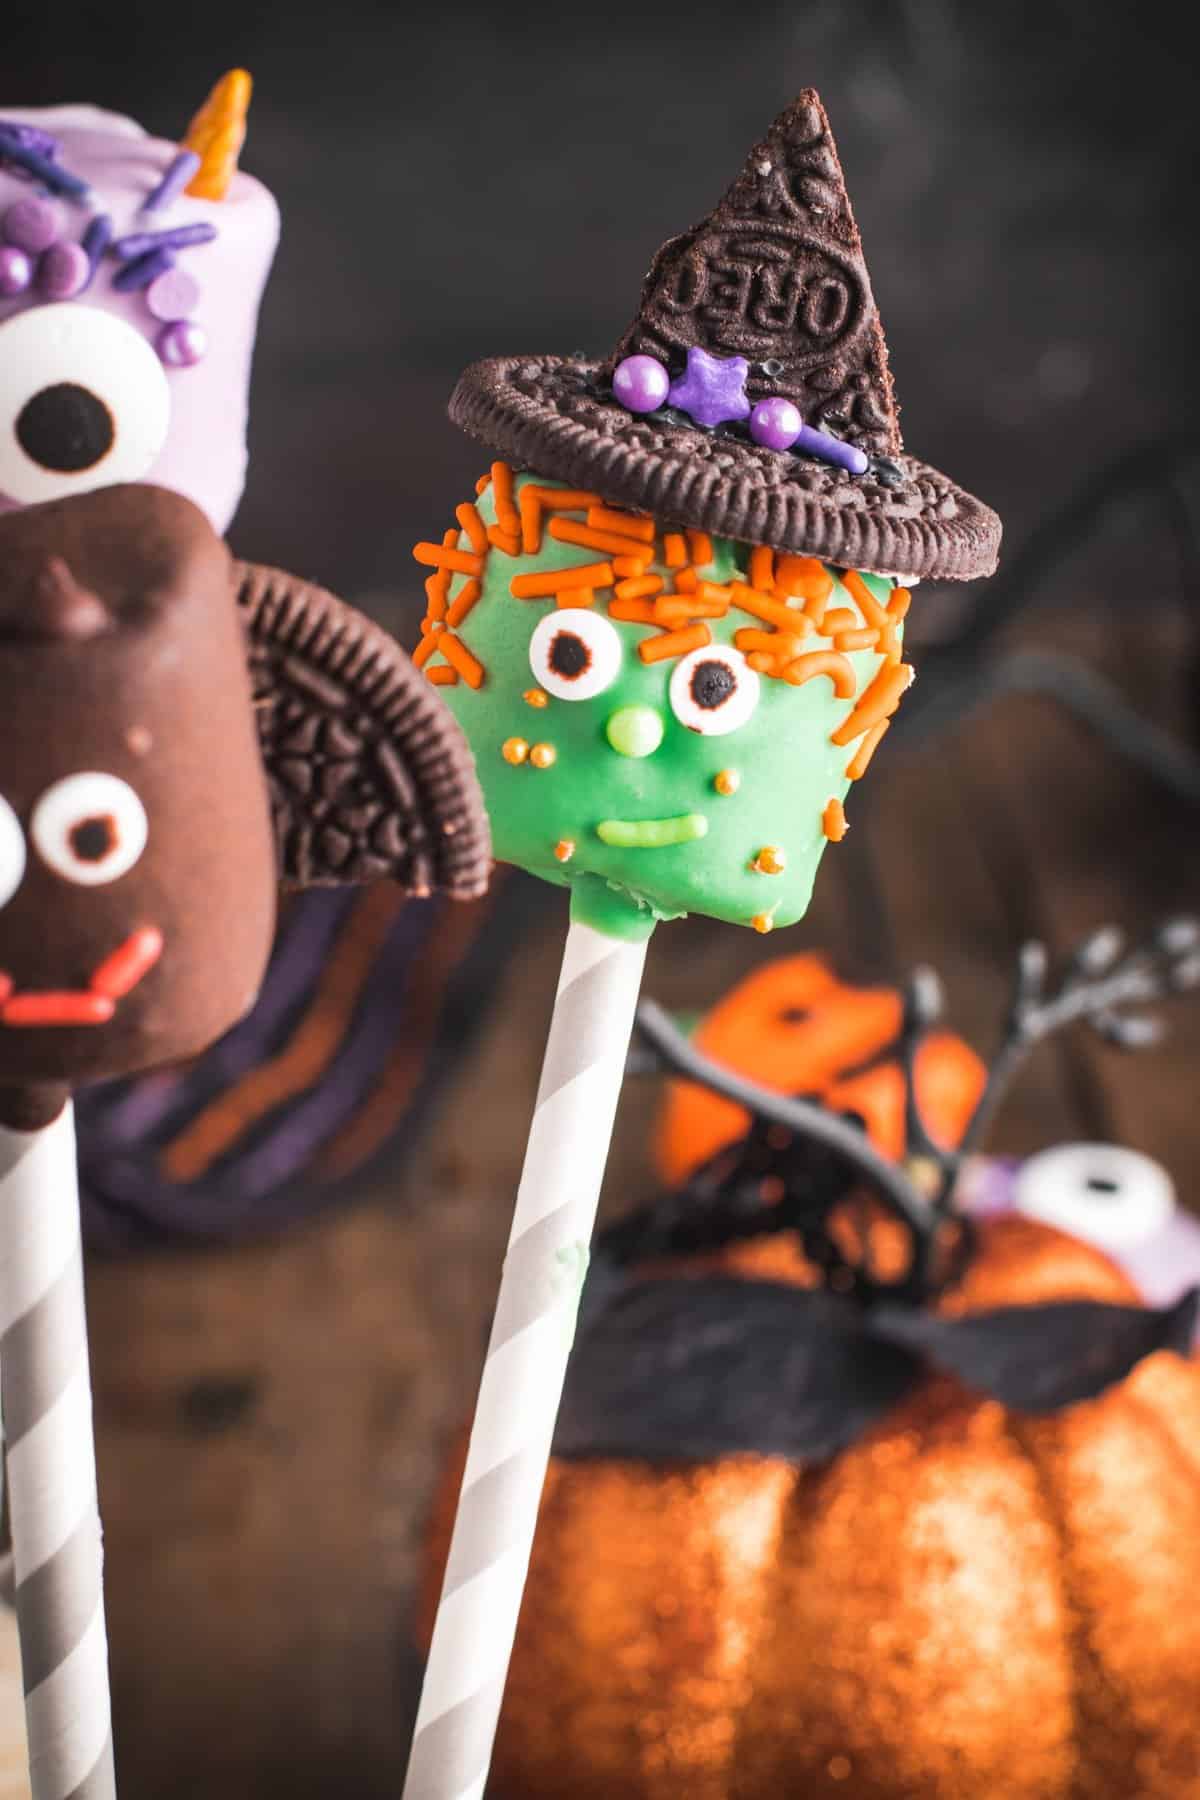
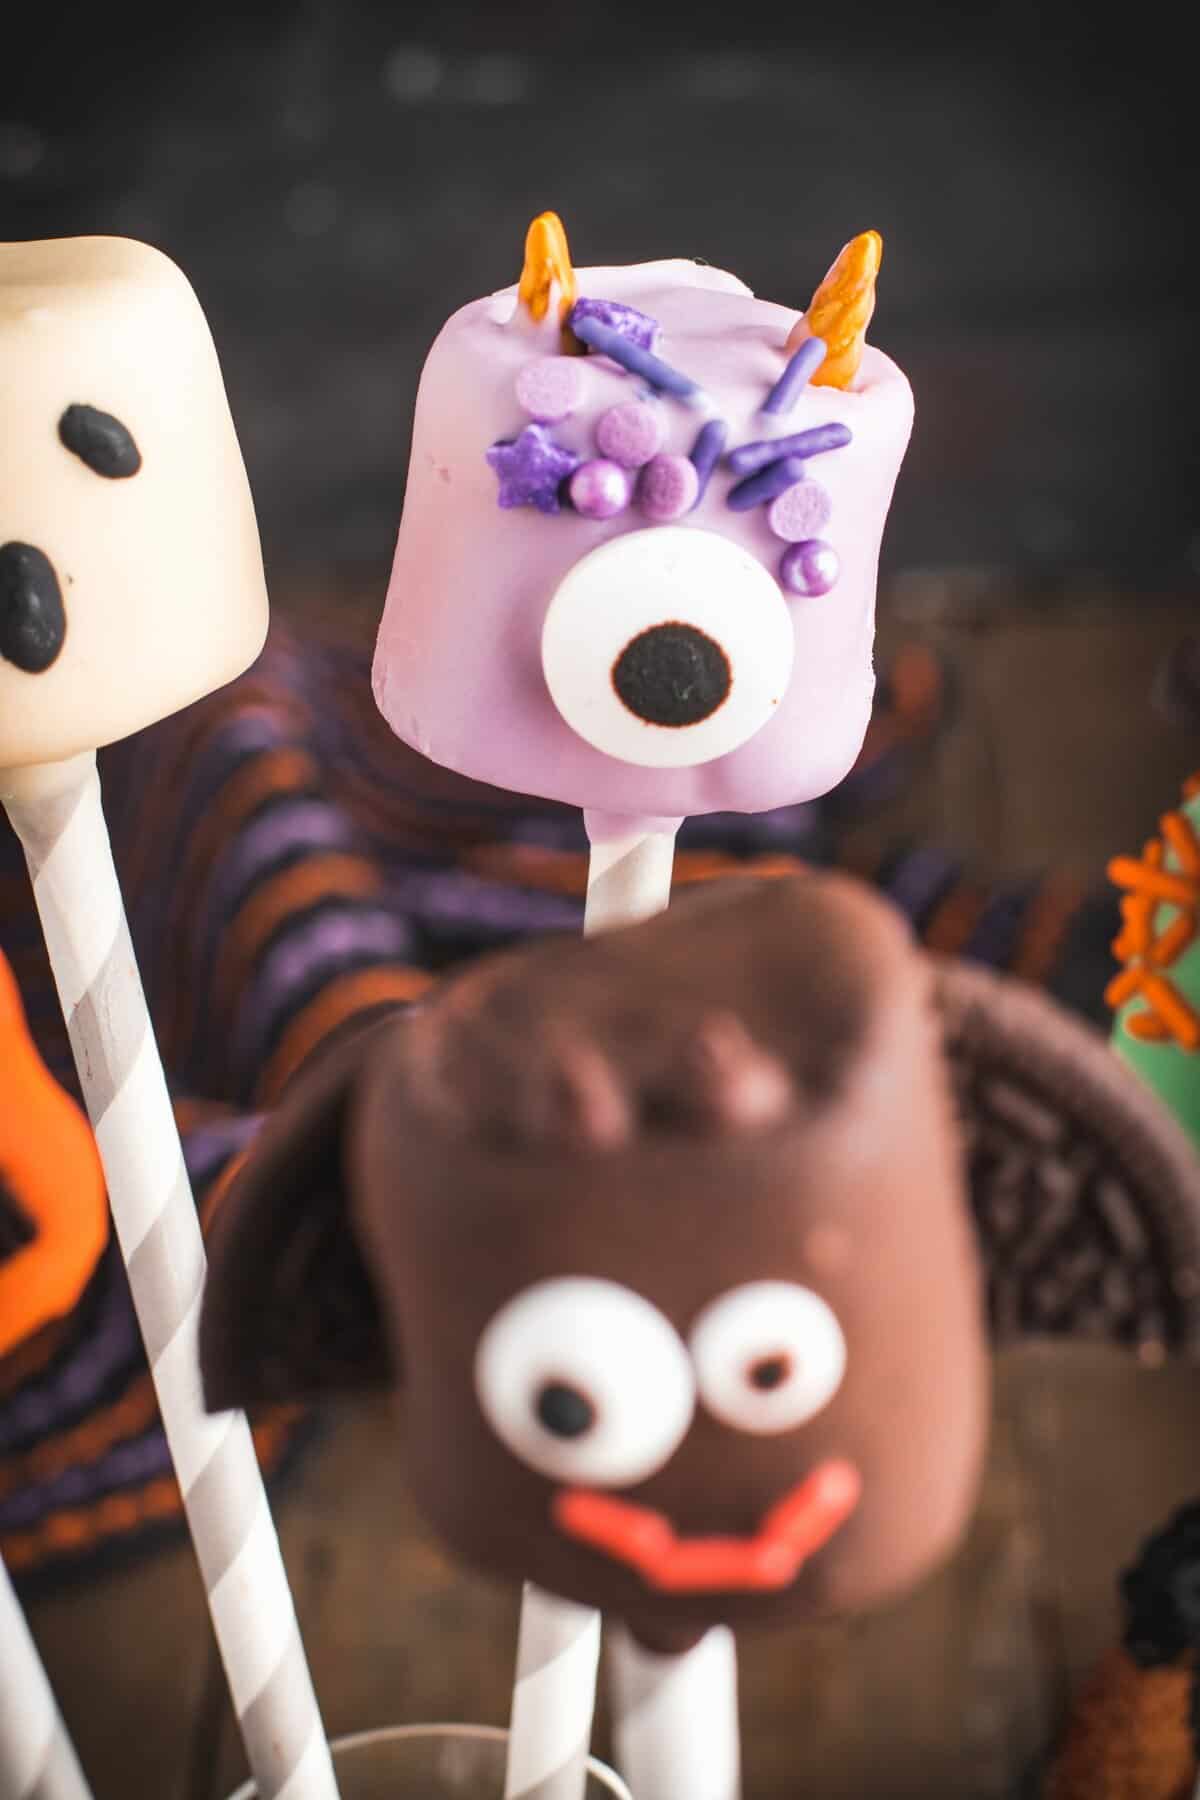
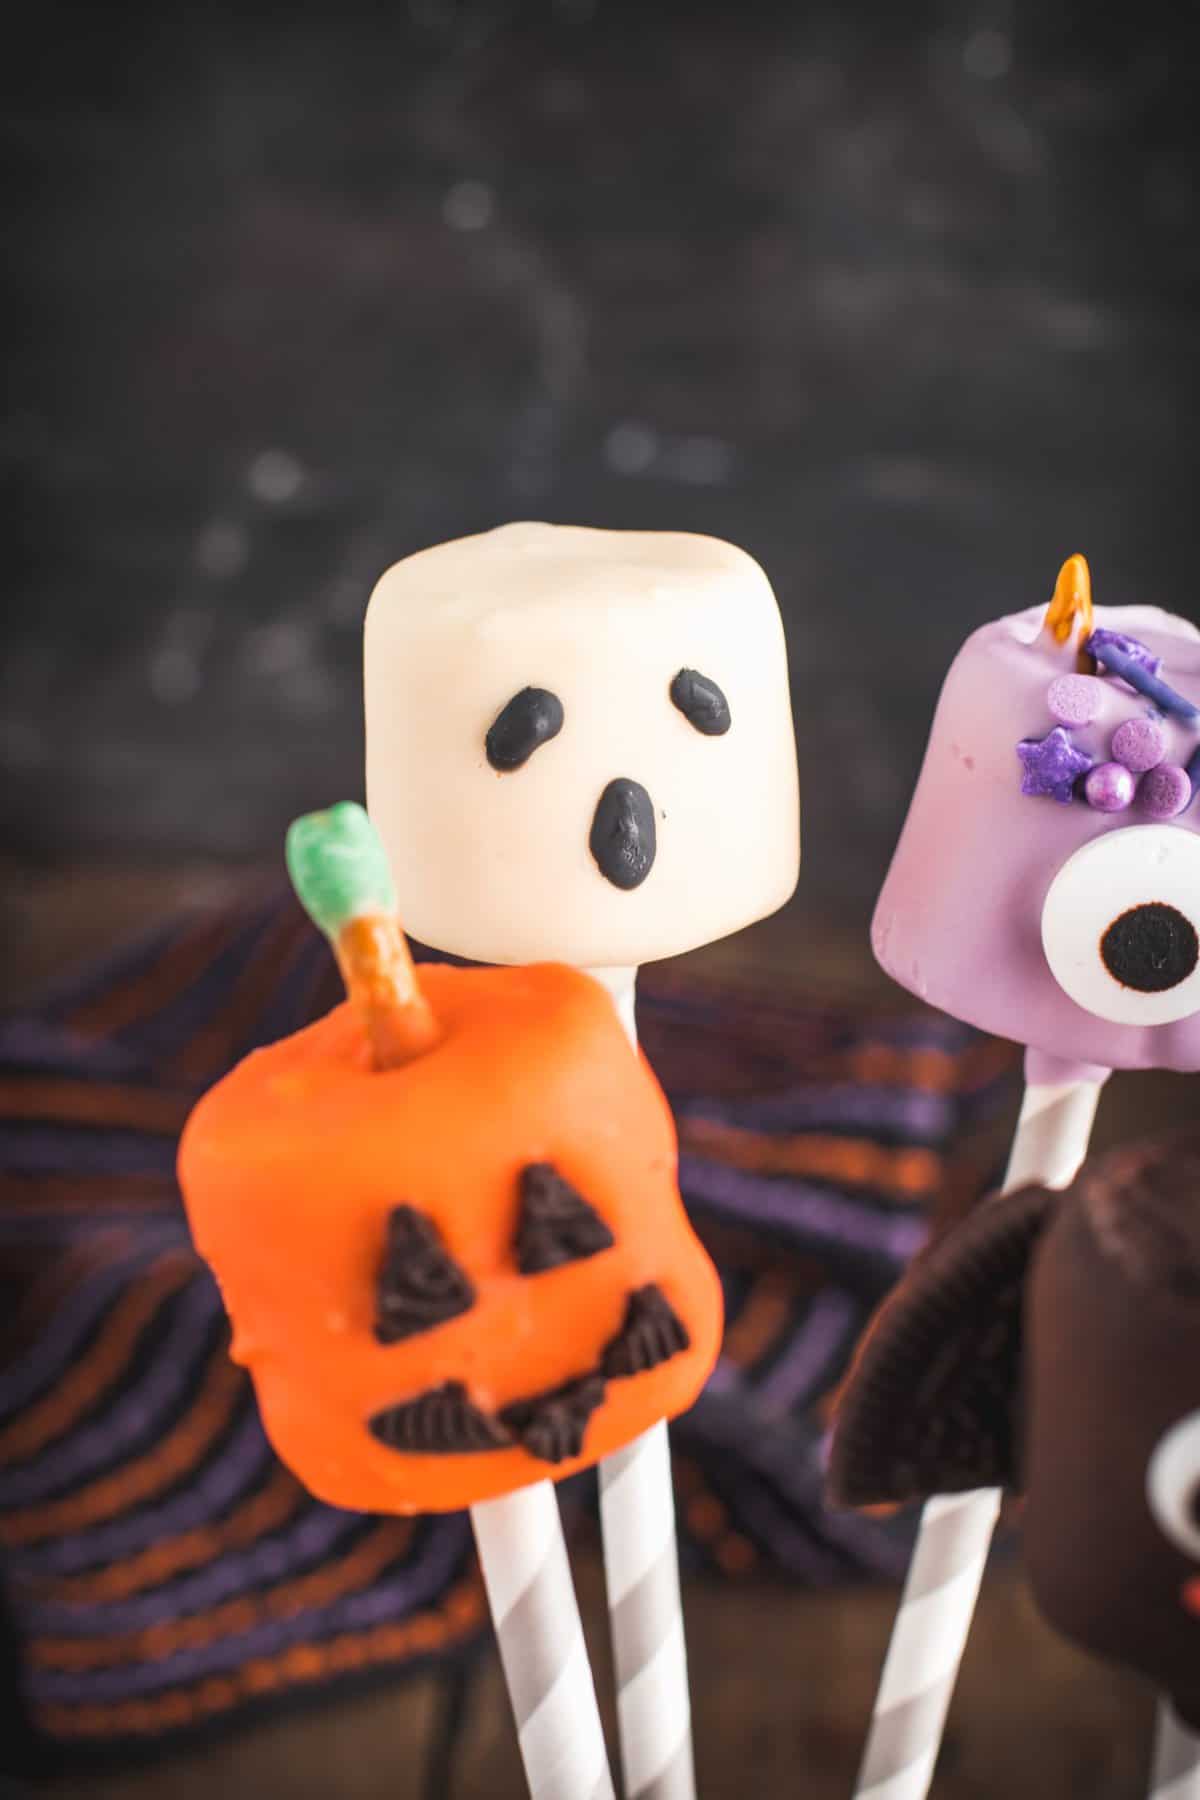
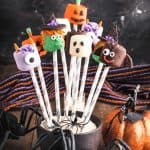
Regular marshmallows are given a monstrous makeover thanks to delicious Belgian chocolate and a few simple ingredients to create your favorite freaky friends including a Ghost, Witch, Bat, Jack-o-Lantern, and Monster for a fun Halloween dessert!
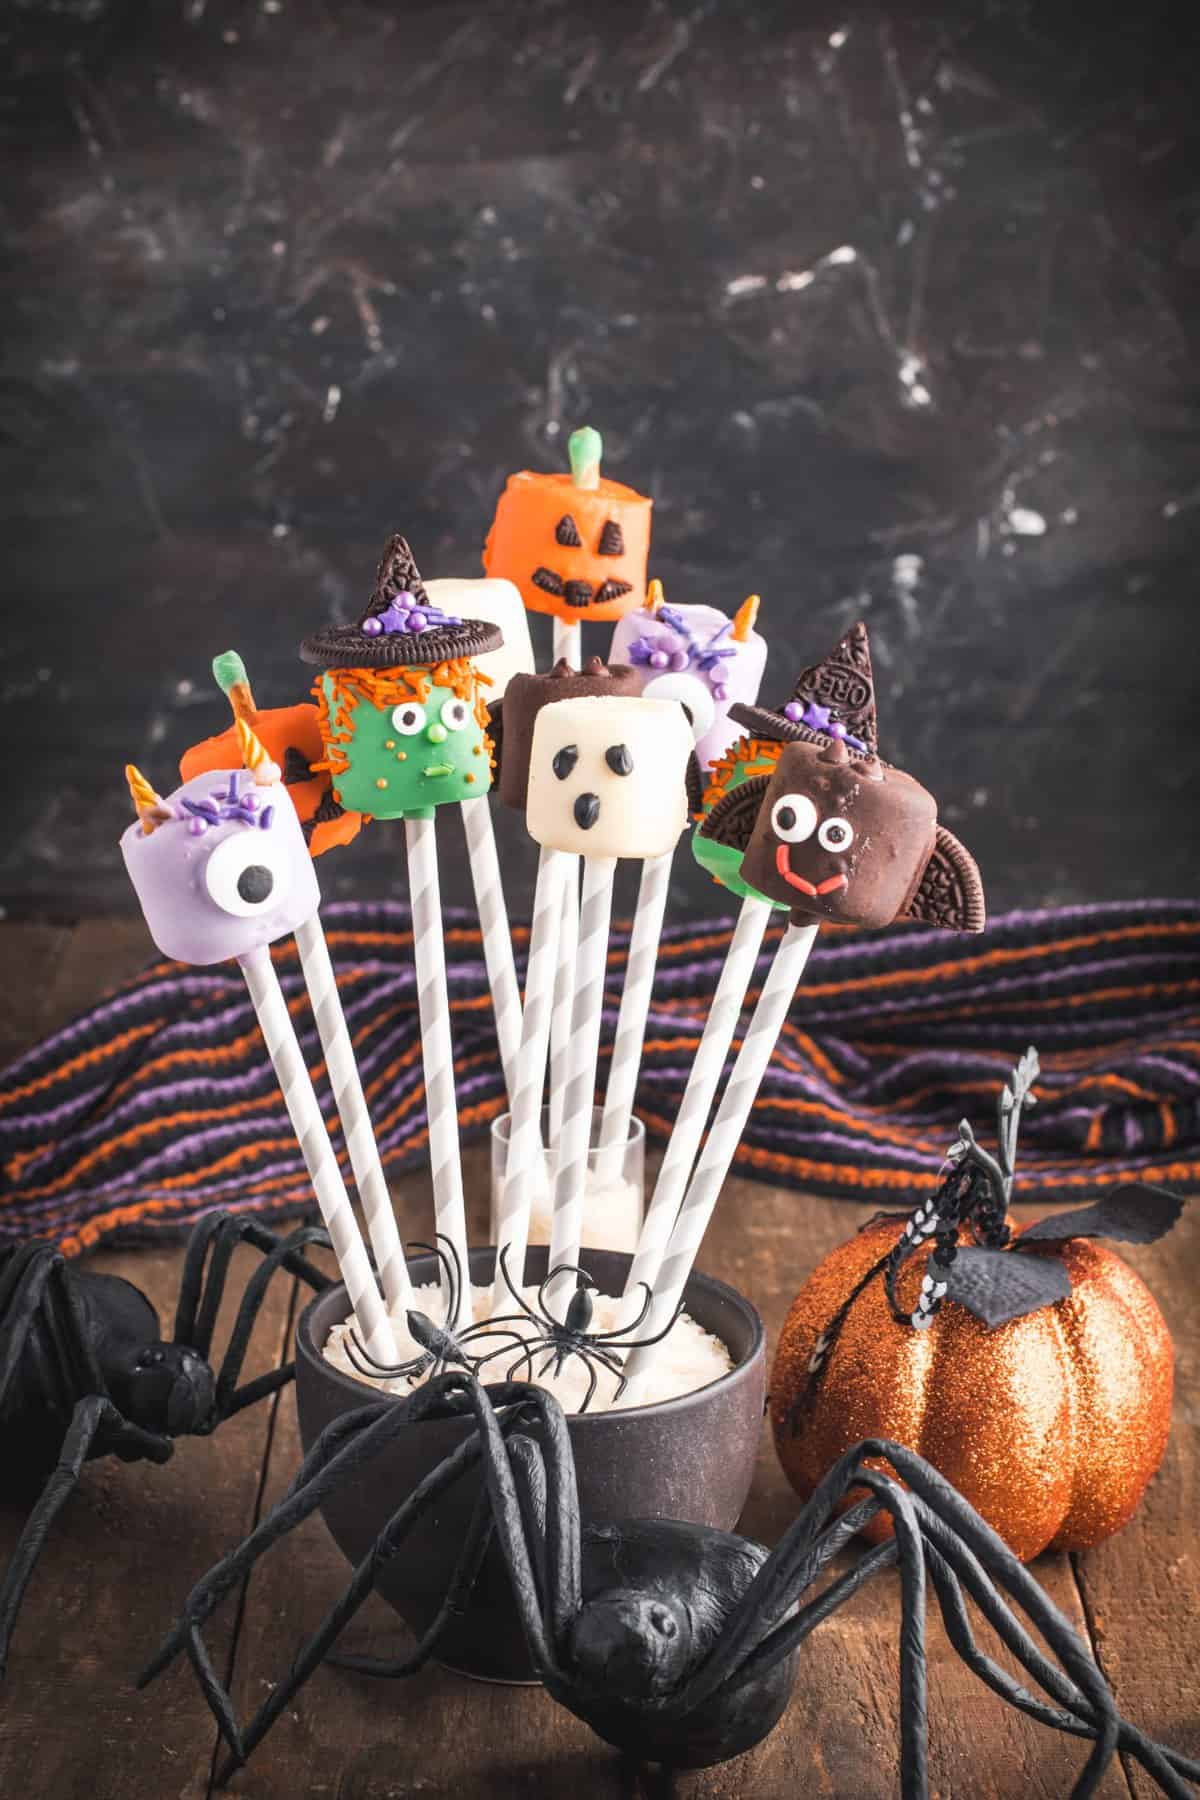
Halloween can be a crazy time of year between creating costumes, hanging the home décor and then party prep on top. It’s one of my favorite times of the year as the whole family can get creative and I can whip up some of my fave fall recipes such as my Frankenstein Peanut Butter Cookies or my Halloween Jalapeno Mummies.
That’s why I love these Halloween marshmallows – they’re easy, they’re quick but they are guaranteed to brighten your buffet table or impress your trick or treaters. This kid-friendly recipe also means your little ghouls and gals can join in with the dipping and decorating.
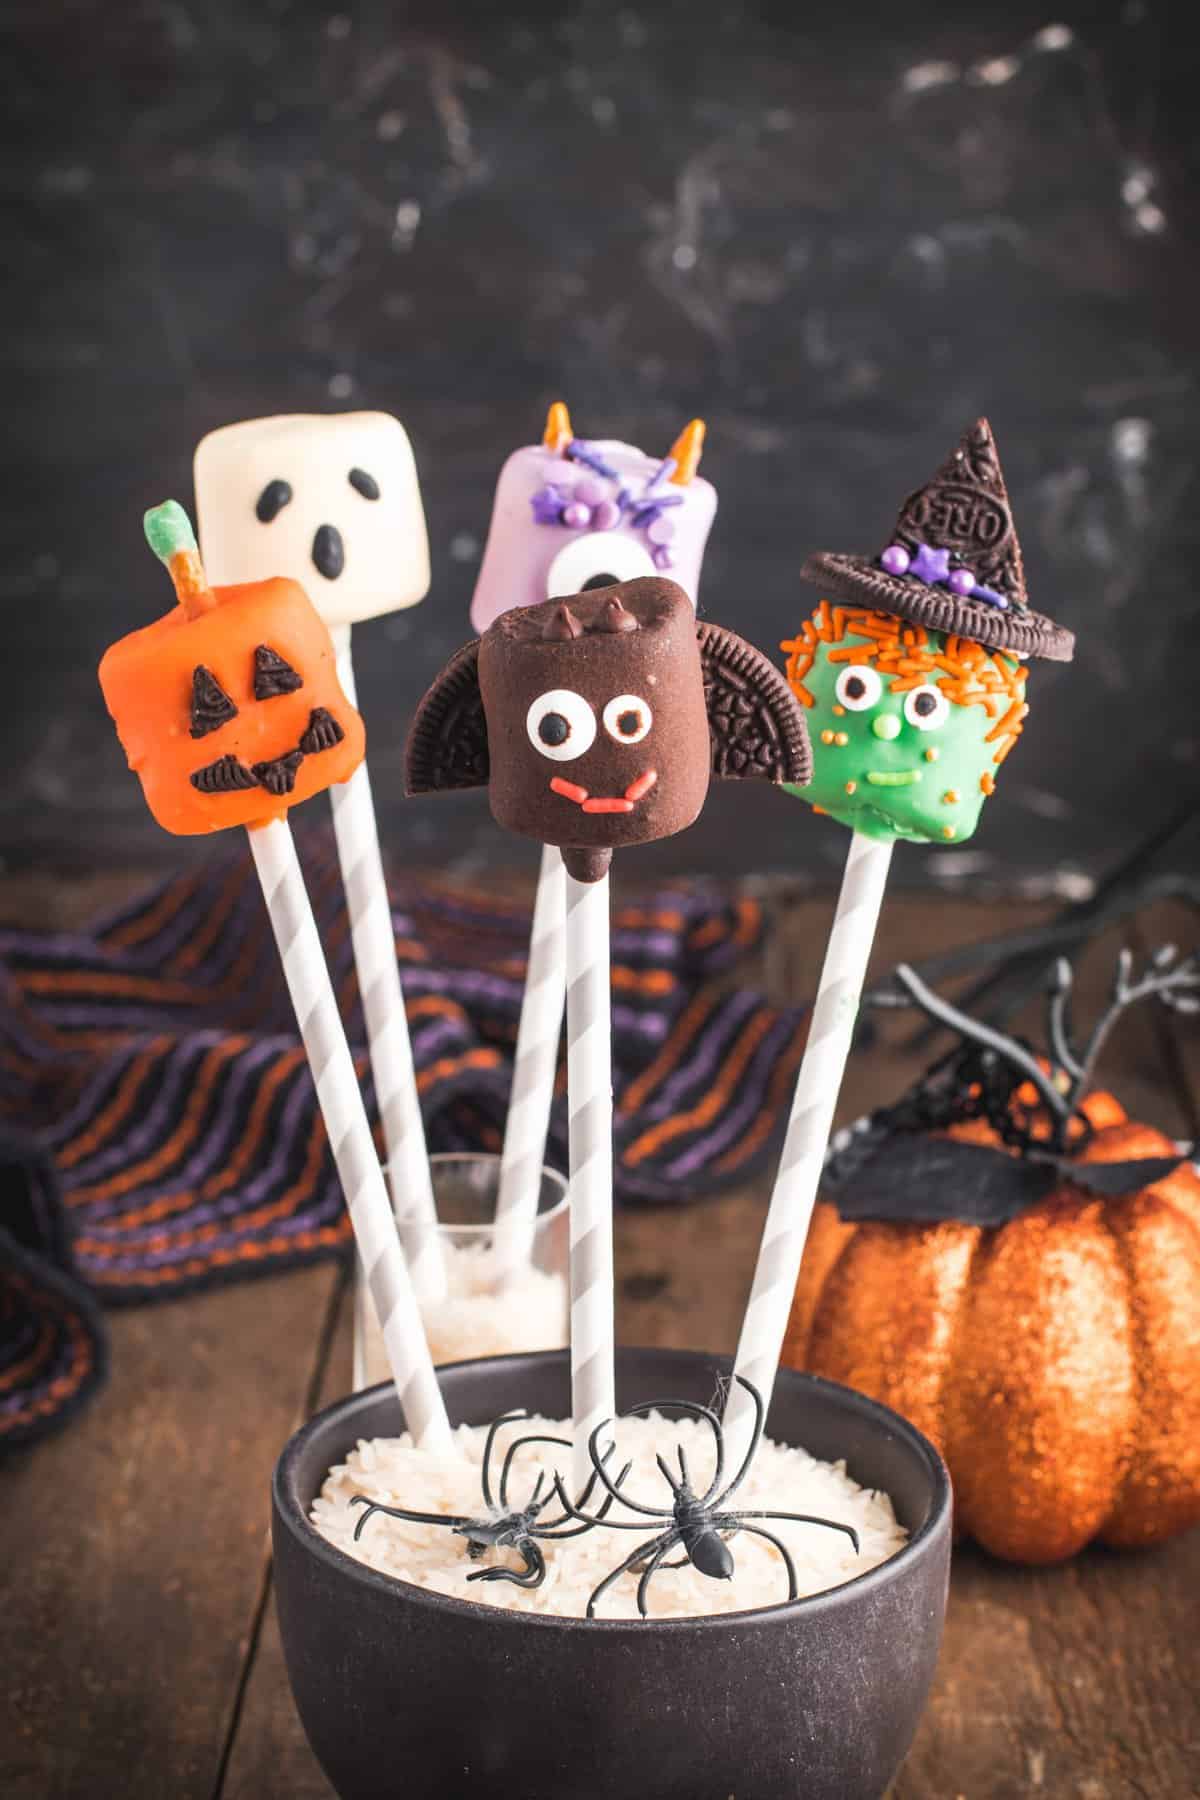
Forget the same old Halloween marshmallow pops or cake pops, this easy halloween treat recipe uses gourmet Belgian chocolate and delicious additions such as Oreos, sprinkles, and pretzels to create spooktacular characters including a Ghost, Witch, Bat, Jack-o-Lantern, and Monster.
Best of all they’re ready in less than an hour saving you time and effort to focus on the more important Halloween tasks, you know, like consuming candy or painting your kid green. They'll be a staple for all of your halloween parties this year!
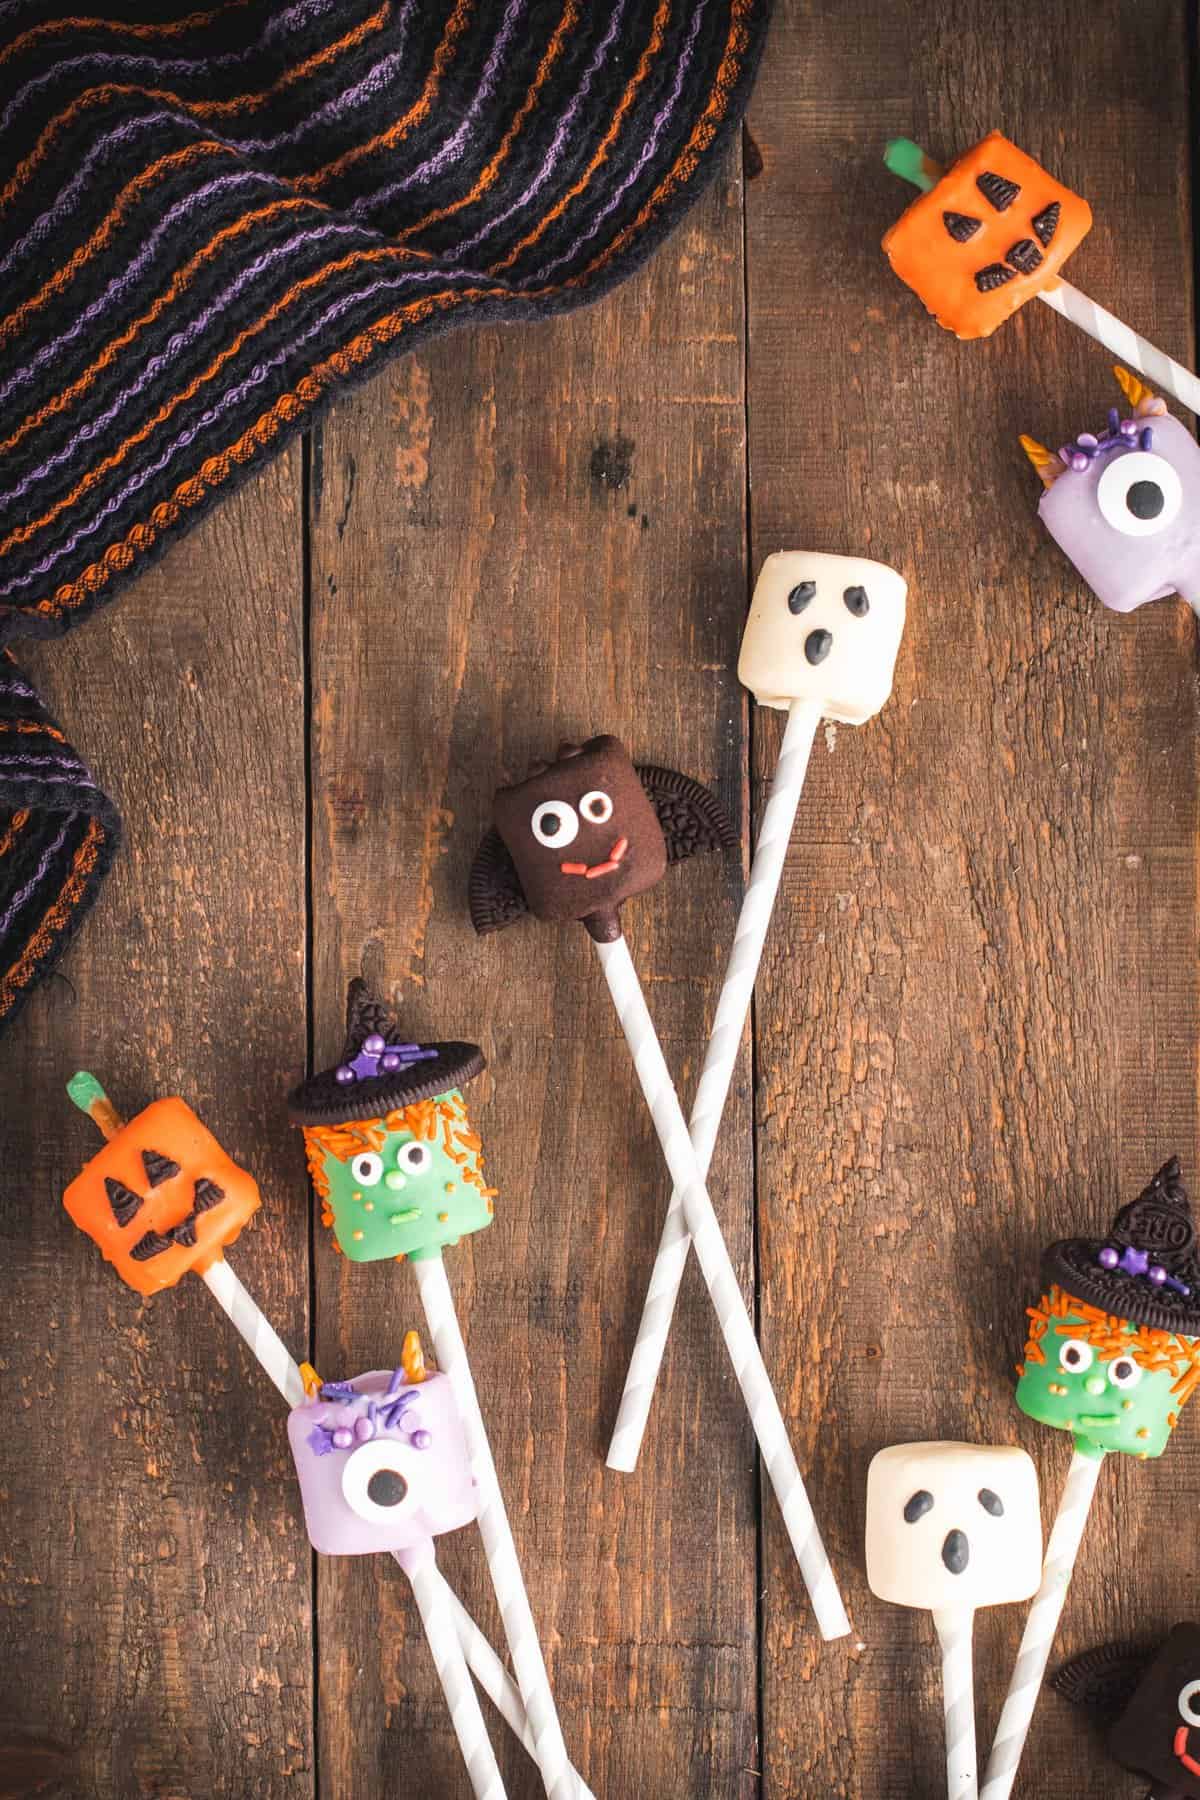
WHY WE LOVE THIS CHOCOLATE HALLOWEEN DIPPED MARSHMALLOWS RECIPE
- It’s easy – Minimal ingredients but maximum impact is the theme with these festive little fellows. Once the chocolate is melted and marshmallows dipped the hard work is done. The decorating is where you can let your kid’s imaginations run wild or follow our instructions to create some crazy characters.
- It’s quick – With 30 minutes of prep and 10 minutes of cool time you and your little helper can be devouring these delicious desserts in under an hour. If you like quick and easy, make sure to try out Graveyard Pudding Cups too!
- They’re portable – Halloween is such a busy time of year but these Halloween marshmallow pops can be whipped up in batches and shipped with ease to school discos, buffet tables, or even kids’ lunch boxes for a terrifying fun treat. They are always a huge hit! Wrap them up in an individual cellophane bag and give them to your halloween party guests.
- No Bake – Apart from “free candy”, these are my two favorite words at this time of year not only because they mean I’ll save time but it means the kids can get involved too without the risk of hot ovens or boiling pans. It's an easy recipe that everyone can enjoy making! Make sure to check out our other Halloween No-Bake Treats!
- Customizable – Although I’ve provided instructions for each character it’s super easy to make these chocolate Halloween dipped marshmallows your own with a few color and candy tweaks. You can also adapt them for different holidays such as Easter and Christmas.
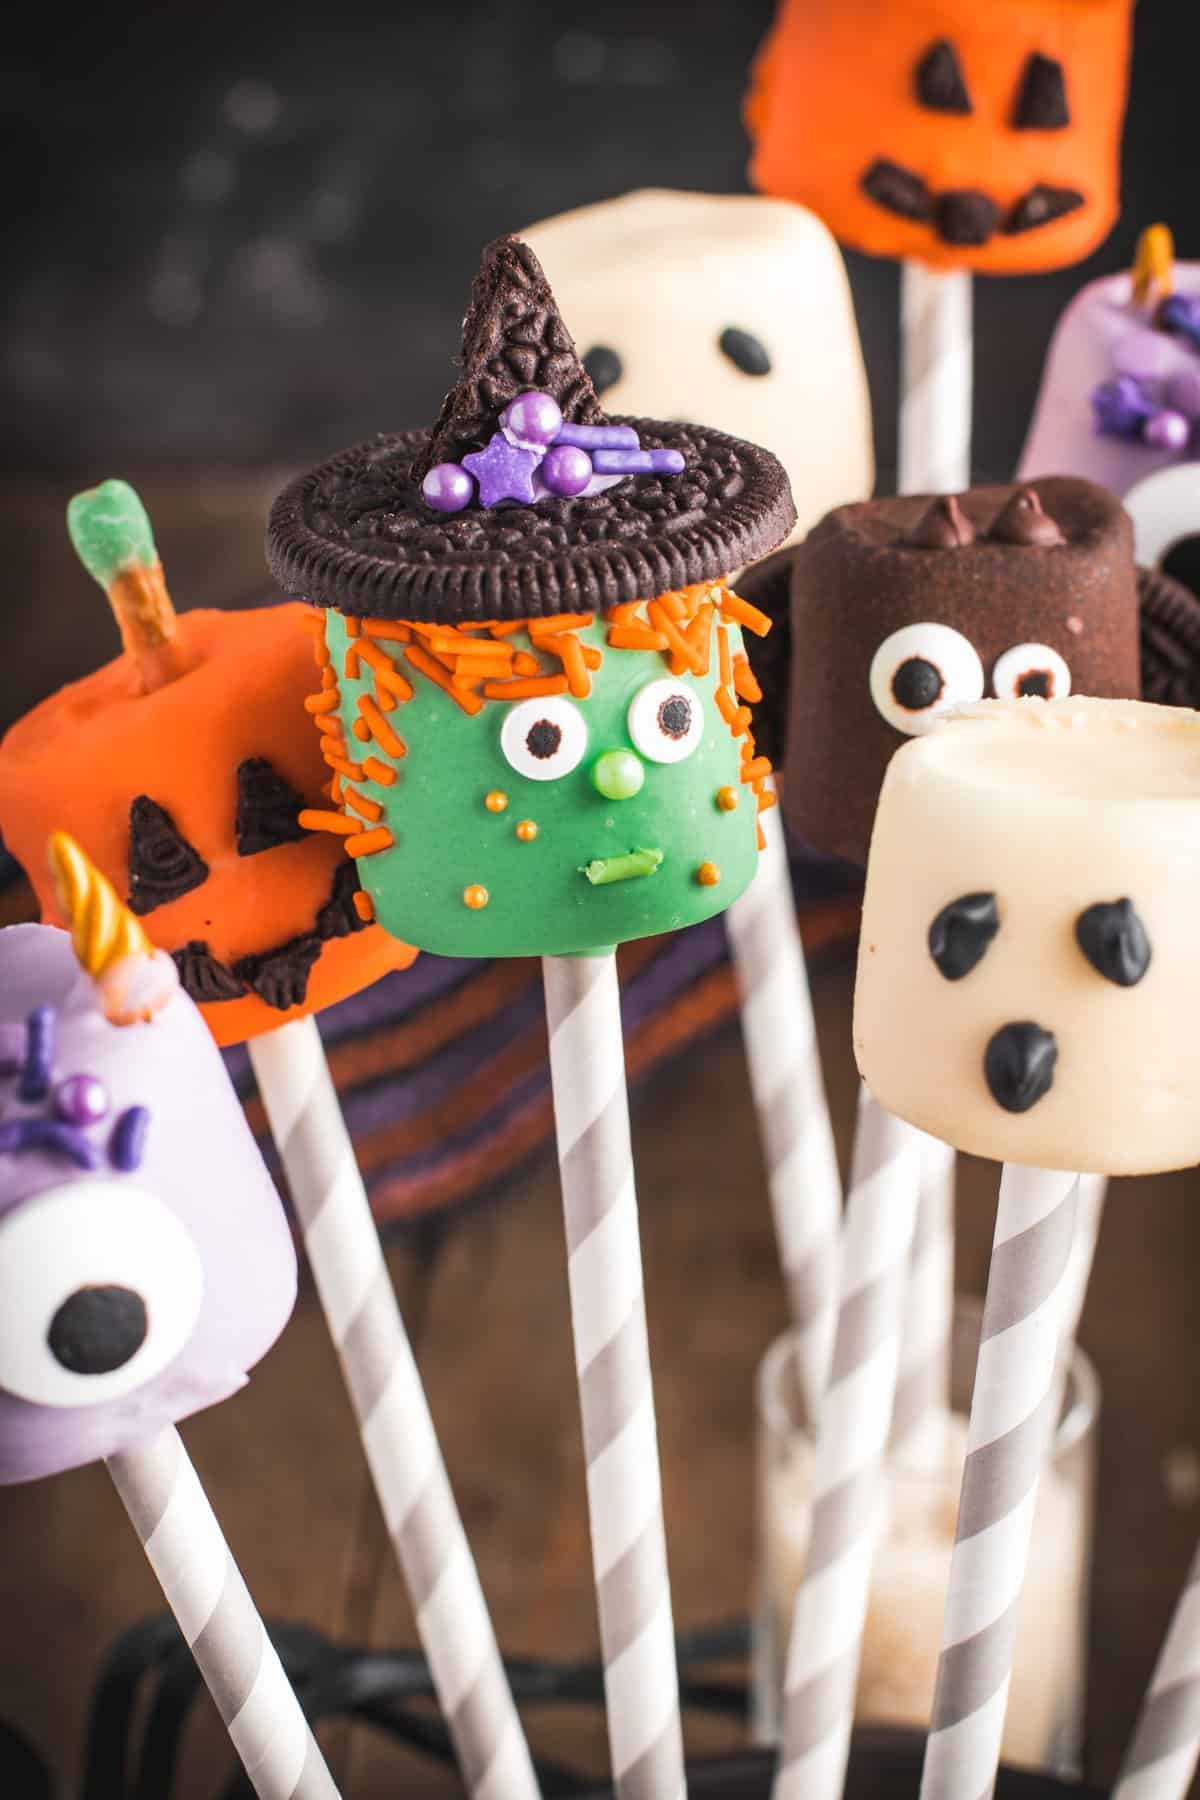
EASY HALLOWEEN MARSHMALLOW POPS INGREDIENTS/SHOPPING LIST
- Large Marshmallows (regular size)
- paper straws, lollipop sticks, or cake pop sticks
- Belgian extra dark chocolate
- Belgian white chocolate
- oil-based candy color
- pretzel stick cut in half
- Oreo cookies
- assorted sprinkles
- unicorn horn sprinkles
- mini chocolate chips
- candy eyes in various sizes
SUBSTITUTIONS AND ADDITIONS
- Chocolate: You can substitute Belgian chocolate for candy melts in green, purple, orange, black, and white, or any candy coating. My only recommendation would be that if you are coloring your chocolate coating, use an oil-based dye (not water based) after the chocolate is melted.
- Marshmallows: I used regular marshmallows but you can also swap for jumbo marshmallows (the kind you use for camping) if you think regular is a little tricky to work with or you simply want a jumbo sized snack. You can also thread on 2 mallows if you want a body and face per character.
- Candy eyes: If you’re struggling to find candy eyes, you can use edible pens instead which are essentially pens that have food coloring instead of ink. That way you can scribble on the details such as eyes and spooky faces instead. If you prefer candy eyes you will need to do this while the chocolate is still warm but the pens will only work once it’s cool.
- Decorating – Halloween is all about creativity, so feel free to deviate with the décor and use whatever you have in the pantry. Experiment with different candies, edible glitter, crushed nuts or biscuit pieces to make your monstrous mallows.
RECOMMENDED TOOLS TO MAKE THIS RECIPE
- microwave-safe bowl or mason jar
- spoon
- wax paper
- plate
- piping bag or sandwich bag
- scissors
- paring knife
- cutting board
HOW TO MAKE THIS CHOCOLATE HALLOWEEN DIPPED MARSHMALLOWS RECIPE
The base of this recipe is simply two steps – dip then decorate. However, I’ve provided detailed instructions for each character to ensure your Halloween marshmallows are the perfect combo of cute yet creepy to impress your friends and family this fall.
Ghost Pops:
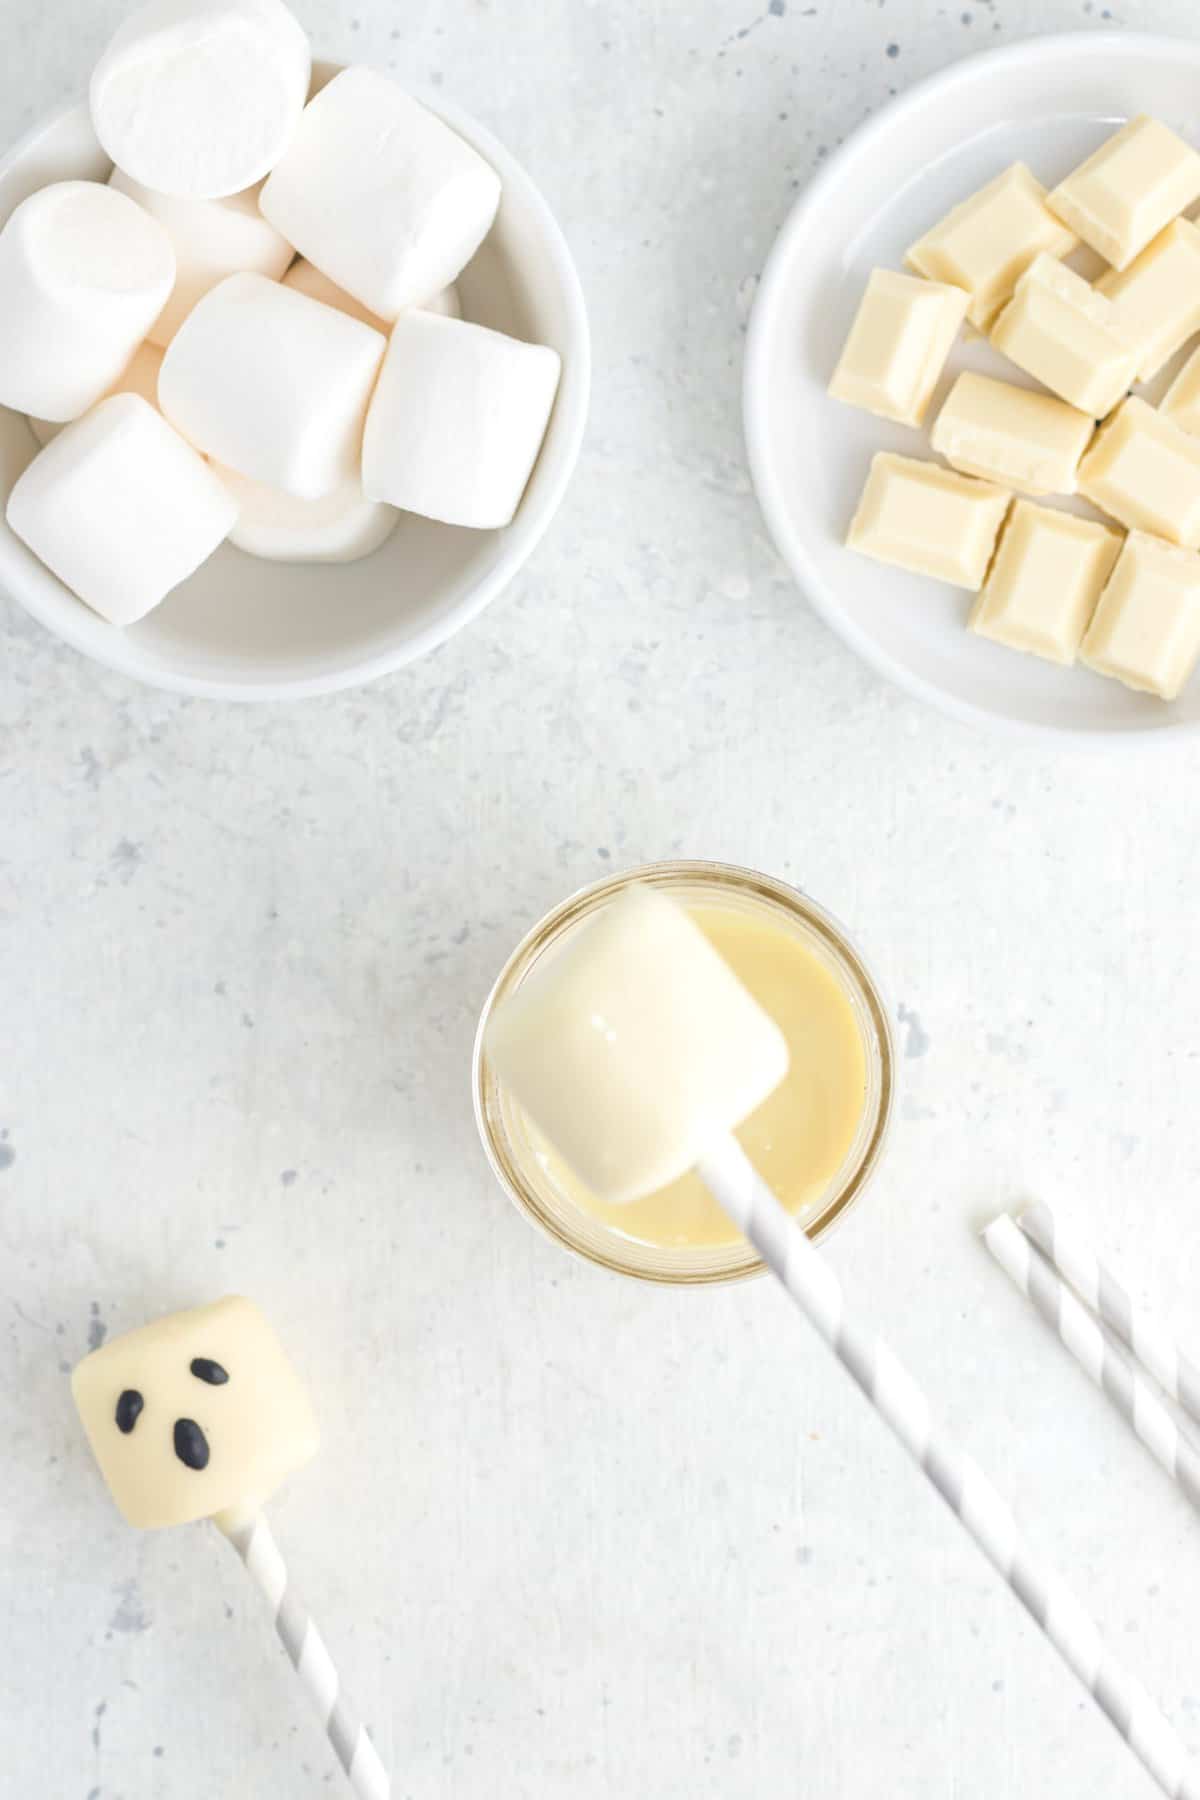
1. To make the Ghost Halloween marshmallow, melt ½ cup of white chocolate, or white candy melts, in a deep microwave-safe bowl or mason jar. Melt the chocolate in 20-second increments, stirring well in between.
2. In a separate bowl melt a 1⁄4 cup of white chocolate and add a few drops of black candy coloring for the eyes.
3. Prepare a plate or baking sheet lined with waxed paper. Set aside.
4. Dip a paper straw or lollipop stick in the melted white chocolate then pierce it into the base of a marshmallow. You can allow it to set if it seems like it’s not secure.
5. Next dip your marshmallow in the white chocolate, fully coating all sides and the base. Allow any excess chocolate to drip back into the bowl or jar. Place it on the wax paper-lined plate and refrigerate to set.
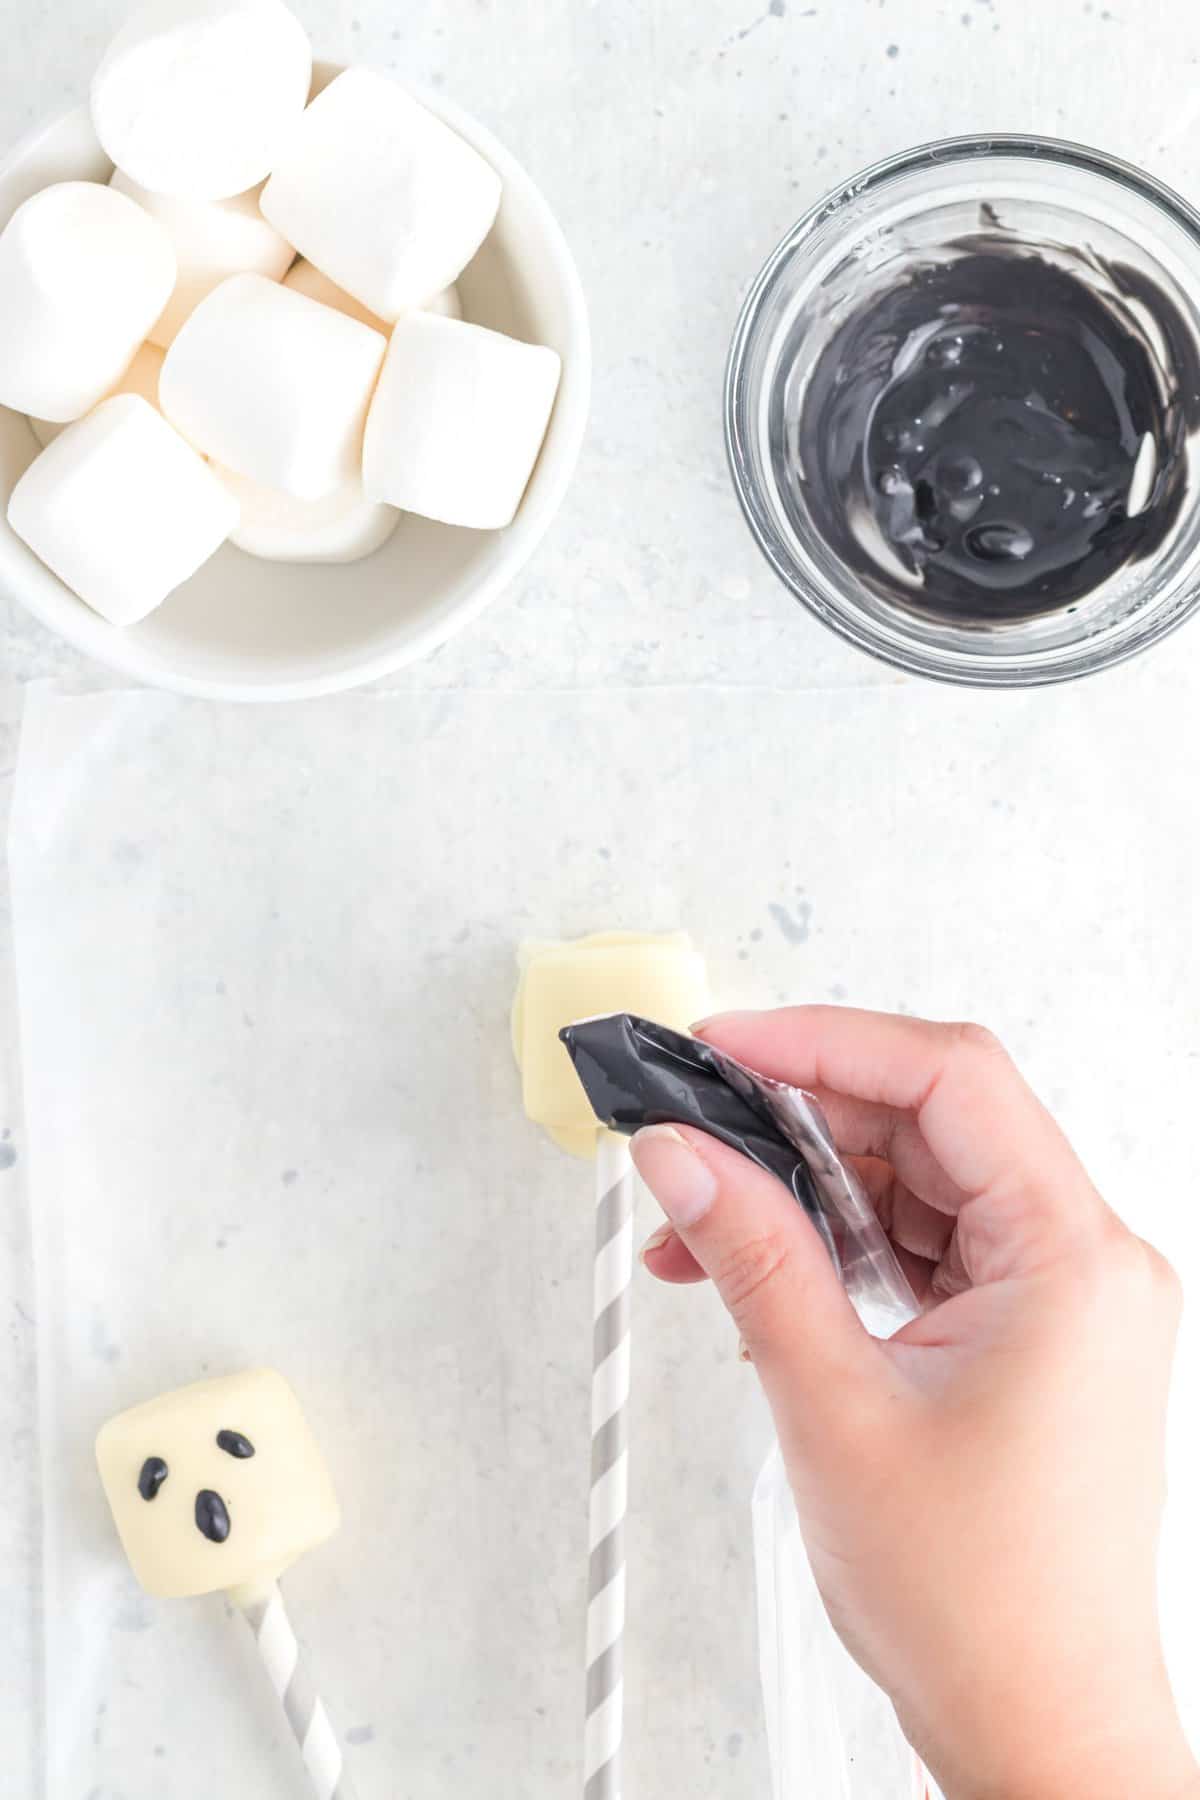
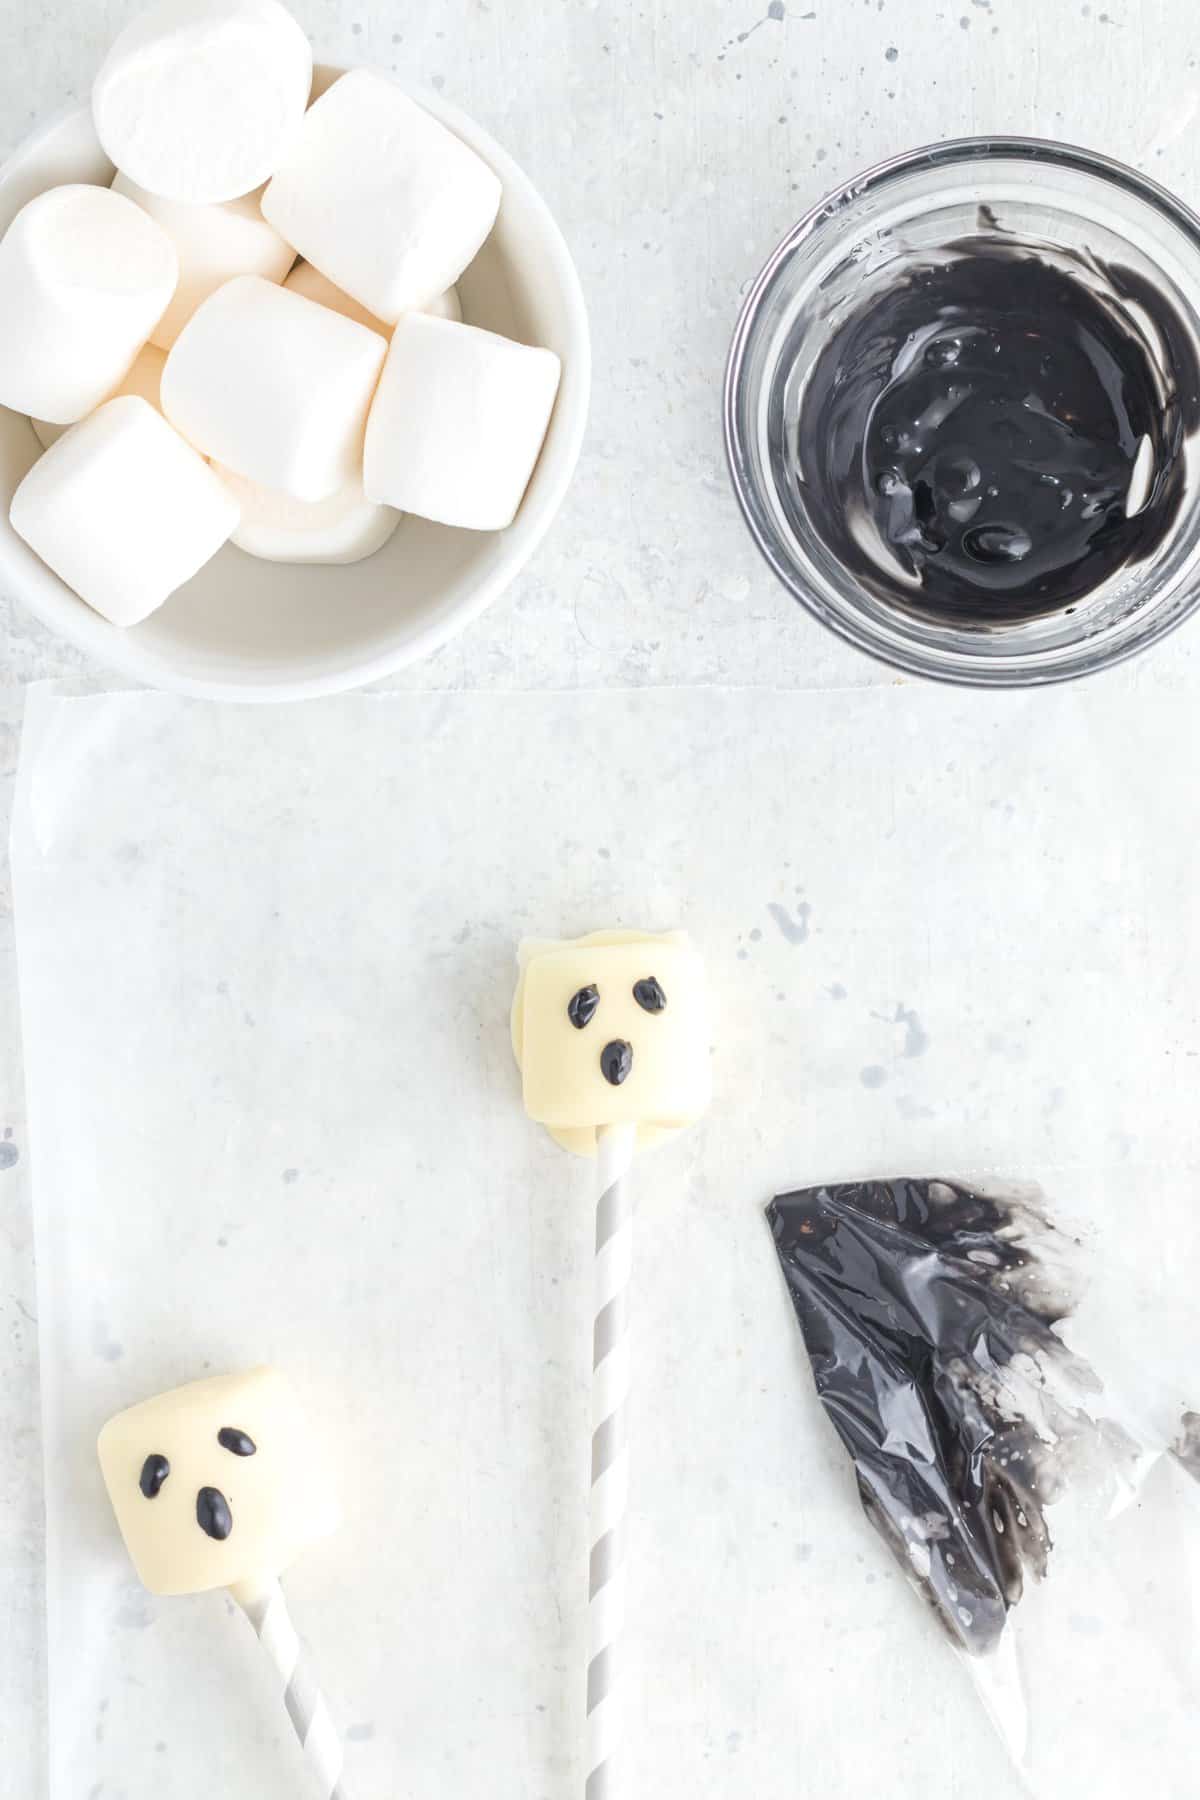
6. Meanwhile, put a bit of the melted black chocolate in either a piping bag or sandwich bag then snip a tiny hole for piping. Reserve the leftover black chocolate for the Bat pop.
7. When the white chocolate has set on the marshmallow remove it from the refrigerator and pipe on two oval-shaped eyes and a mouth to form your Ghost. PRO TIP: Feel free to experiment with expressions. I went for shocked as it was easiest but add eyebrows for a grumpy ghost or add your own terrifying twist. If you wish to skip this step, you can use an edible marker to make the expressions.
8. Allow the Ghost to set completely before transferring to a serving display.
Jack-o-lantern Pops:
1. For the Jack-o-lantern, in a deep microwave-safe bowl or mason jar melt 1⁄2 cup white chocolate, or an orange candy melt color, in 20-second increments, stirring in between.
2. Once melted, mix in some orange candy coloring.
3. In a separate bowl melt 1⁄2 cup of white chocolate and add a few drops of green candy coloring, or use green candy melts.
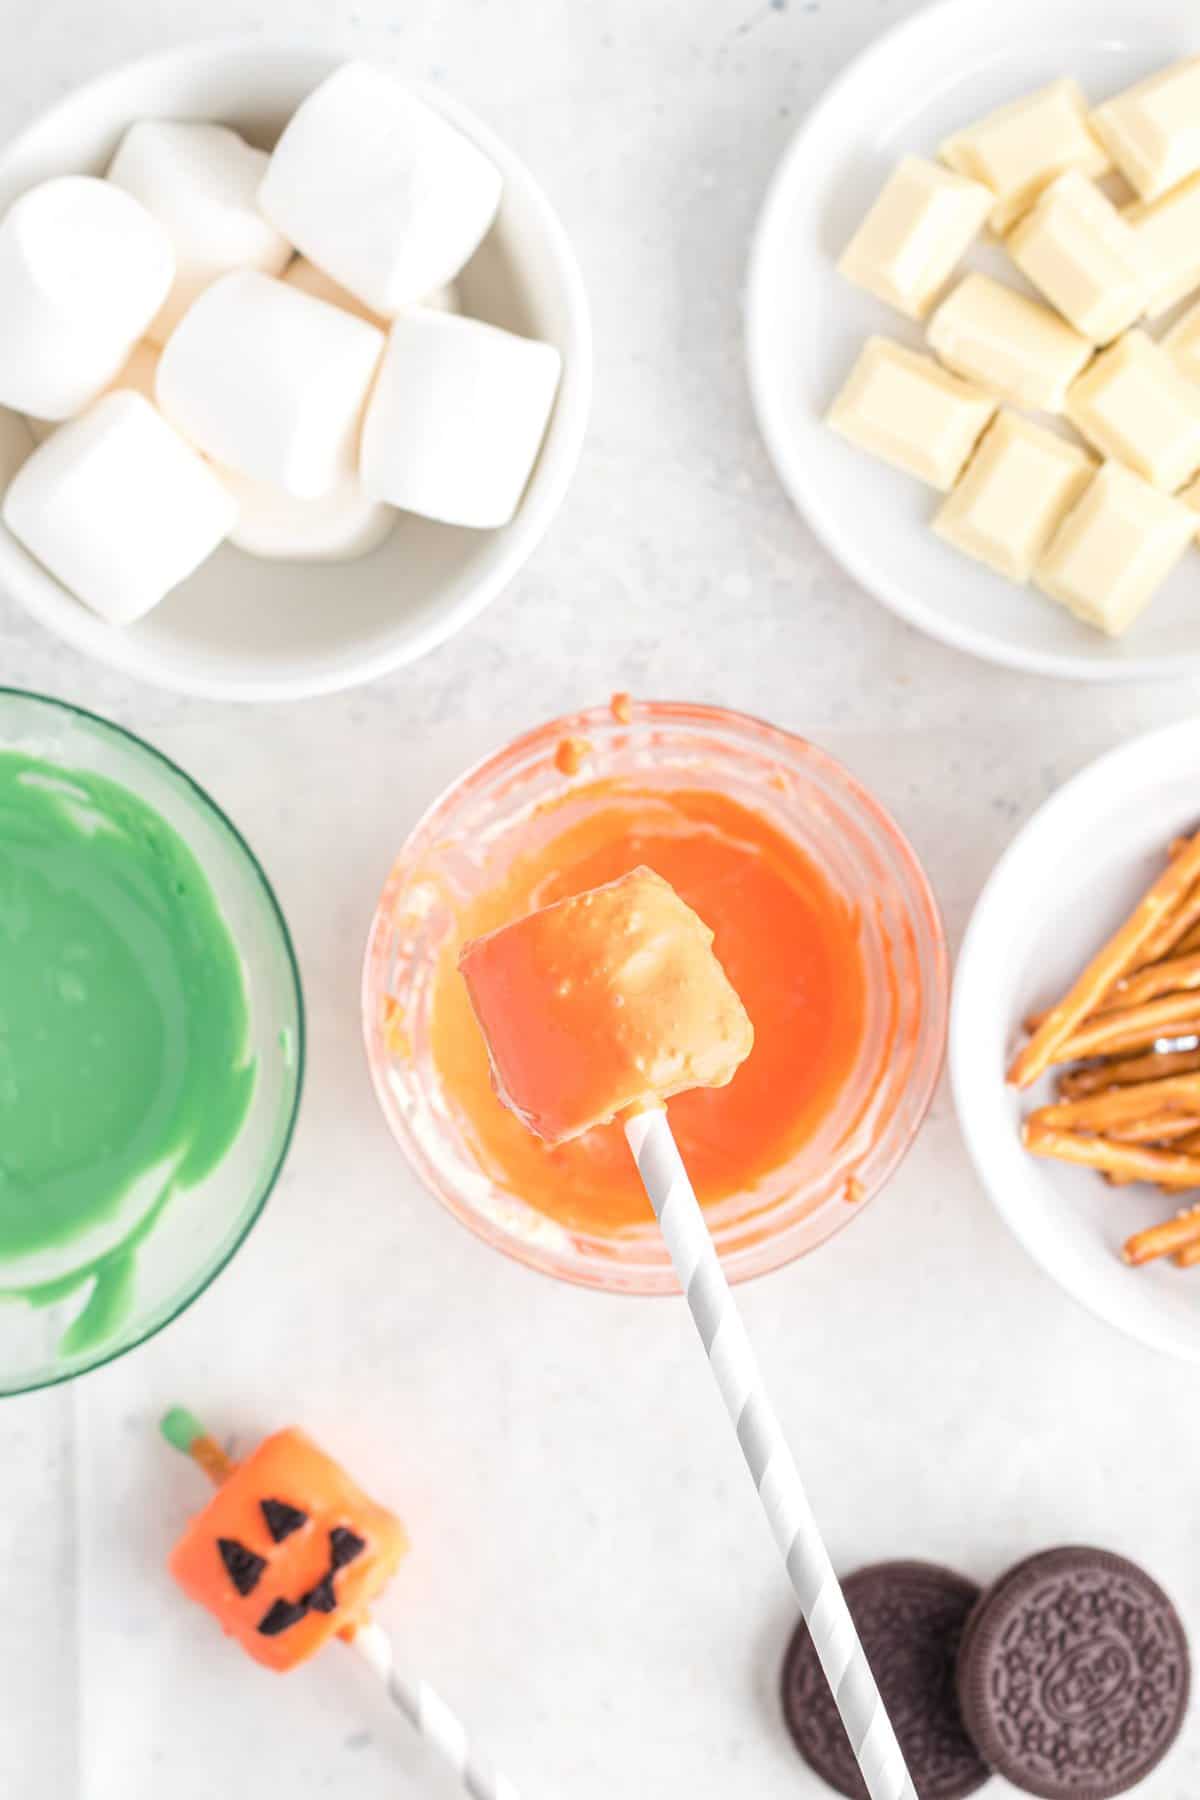
4. Dip the paper straw or lollipop stick in the orange chocolate and then into a marshmallow.
5. Fully submerge the marshmallow in the orange chocolate. Evenly coat on all sides and base then allow the excess chocolate to drip back into the jar or bowl. Place the pop on the wax paper-lined plate.
6. Carefully separate an Oreo cookie. Scrape the cream off of one of the sides of the cookie.
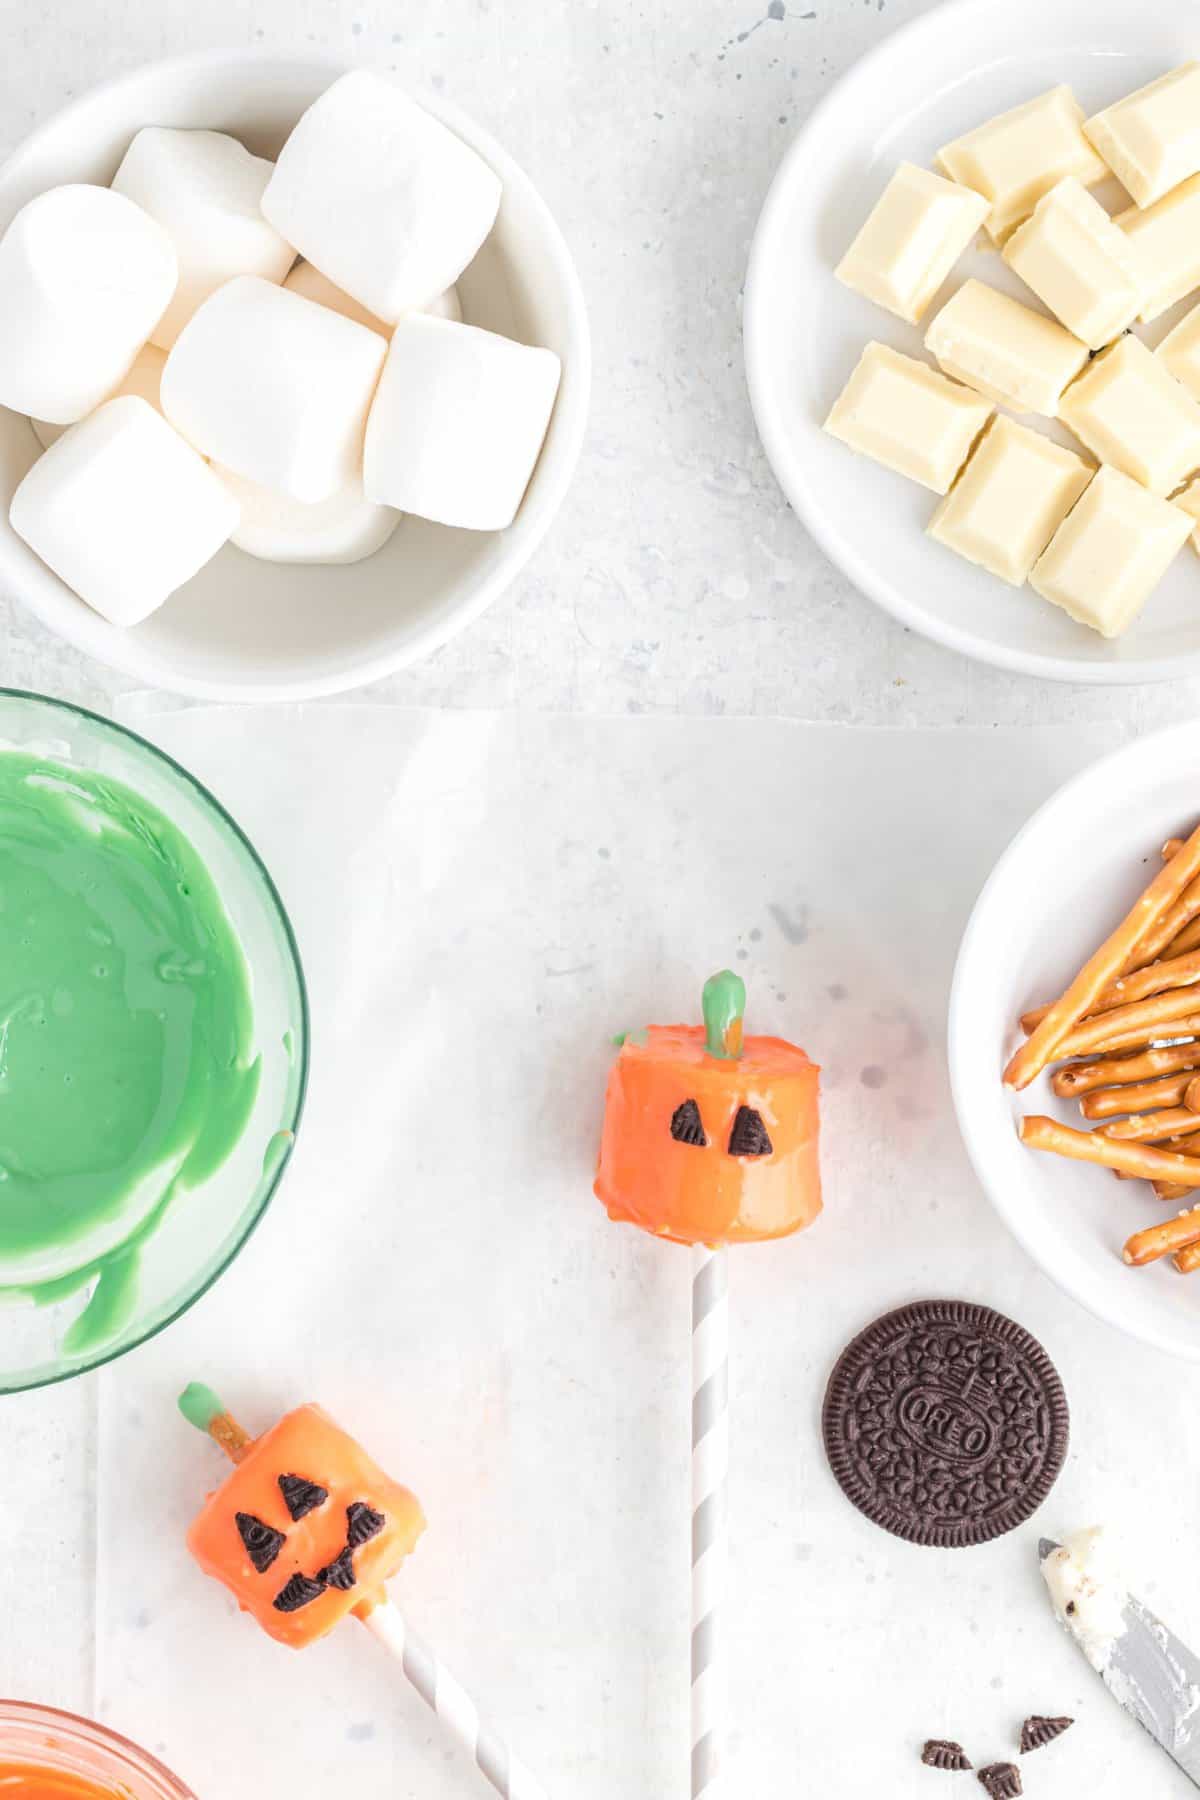
7. Using a paring knife and a cutting board carefully cut 2 small triangles for the eyes and 3 small jagged shapes for the mouth. It doesn't have to be perfect just have fun!
8. Place the Oreo shapes on the marshmallow to form the eyes and mouth. PRO TIP: You will need to act quickly to ensure your chocolate hasn’t set and the Oreo pieces will stick. If it’s too late, melt a little extra chocolate to use as “glue” to stick the pieces on.
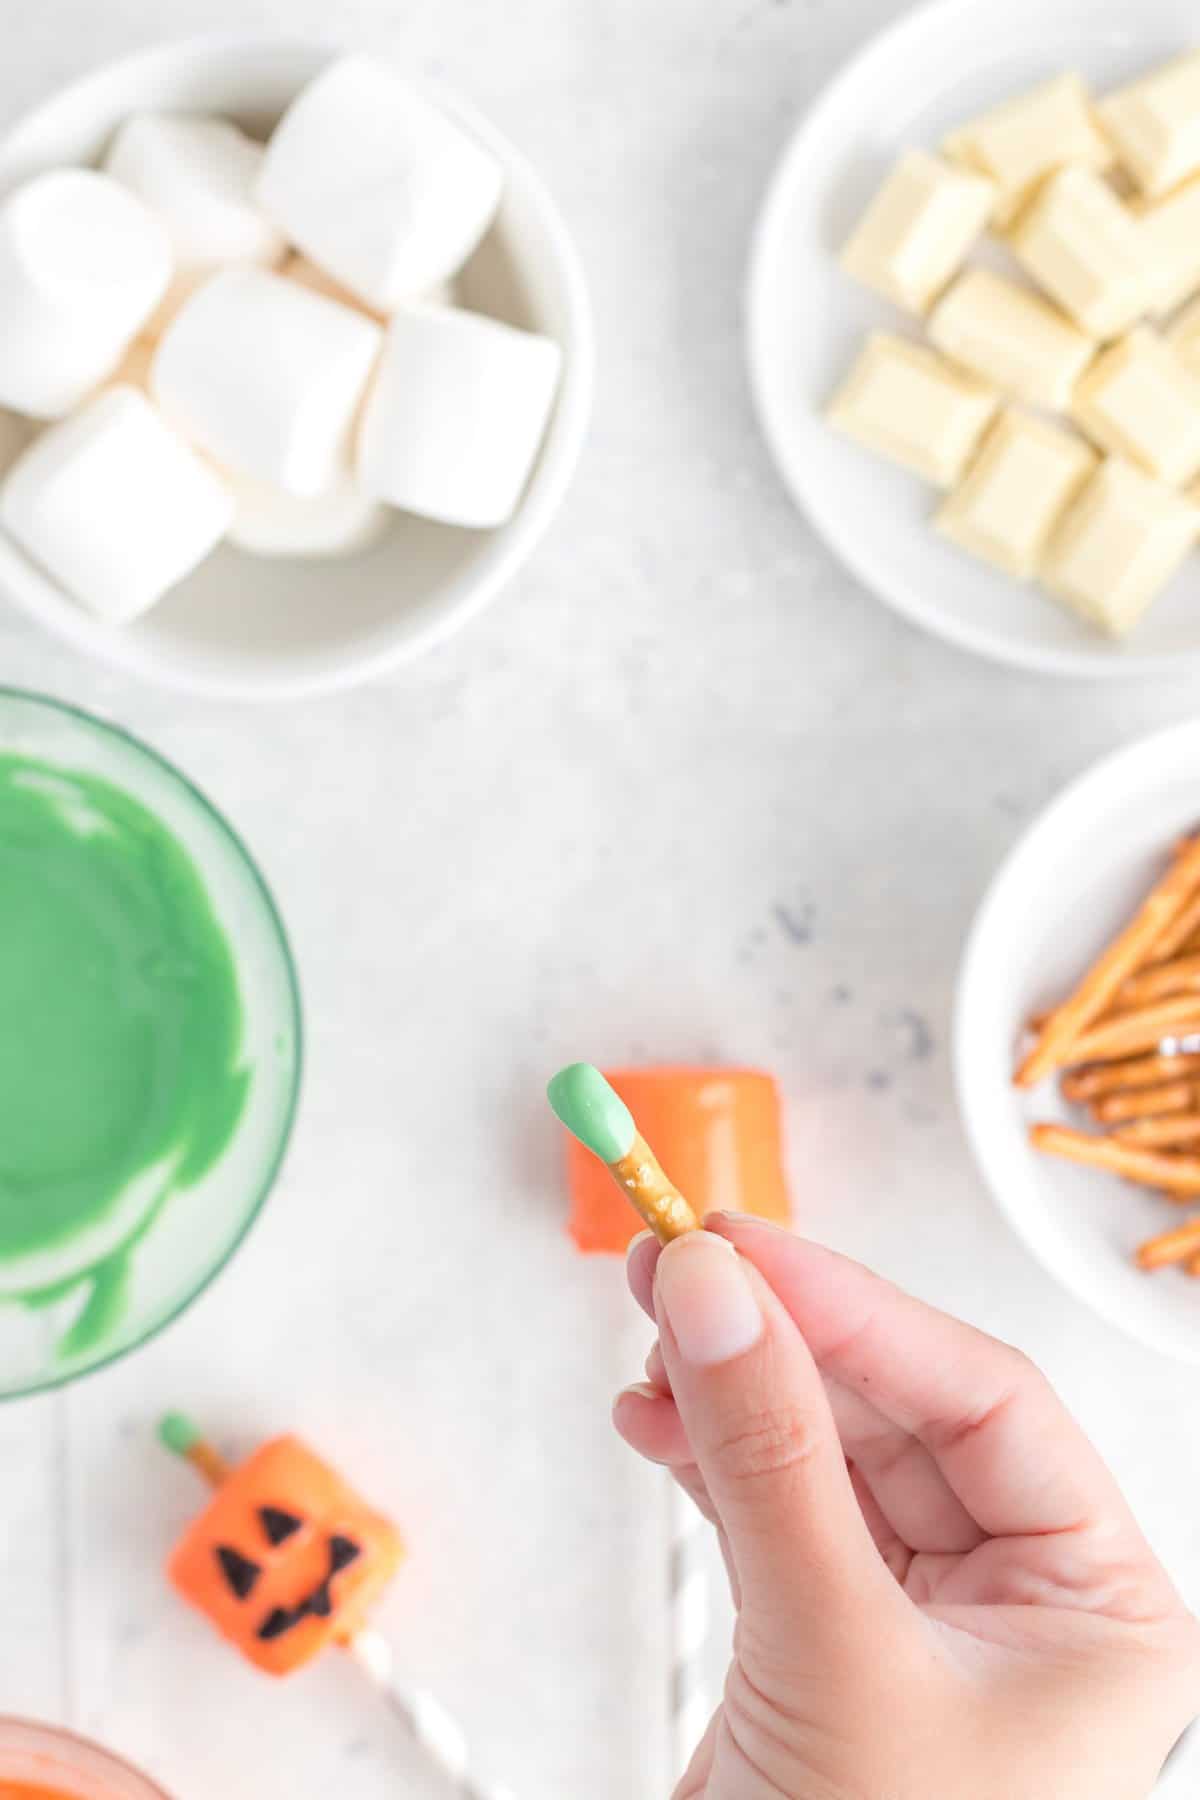
9. For the finishing touch, break a pretzel stick in half and insert it into the green melted chocolate, then into the top of the marshmallow to create the stalk. Reserve the extra green chocolate for the Witch pop.
10. Allow the Jack-o-lantern to fully set.
Witch Pops:
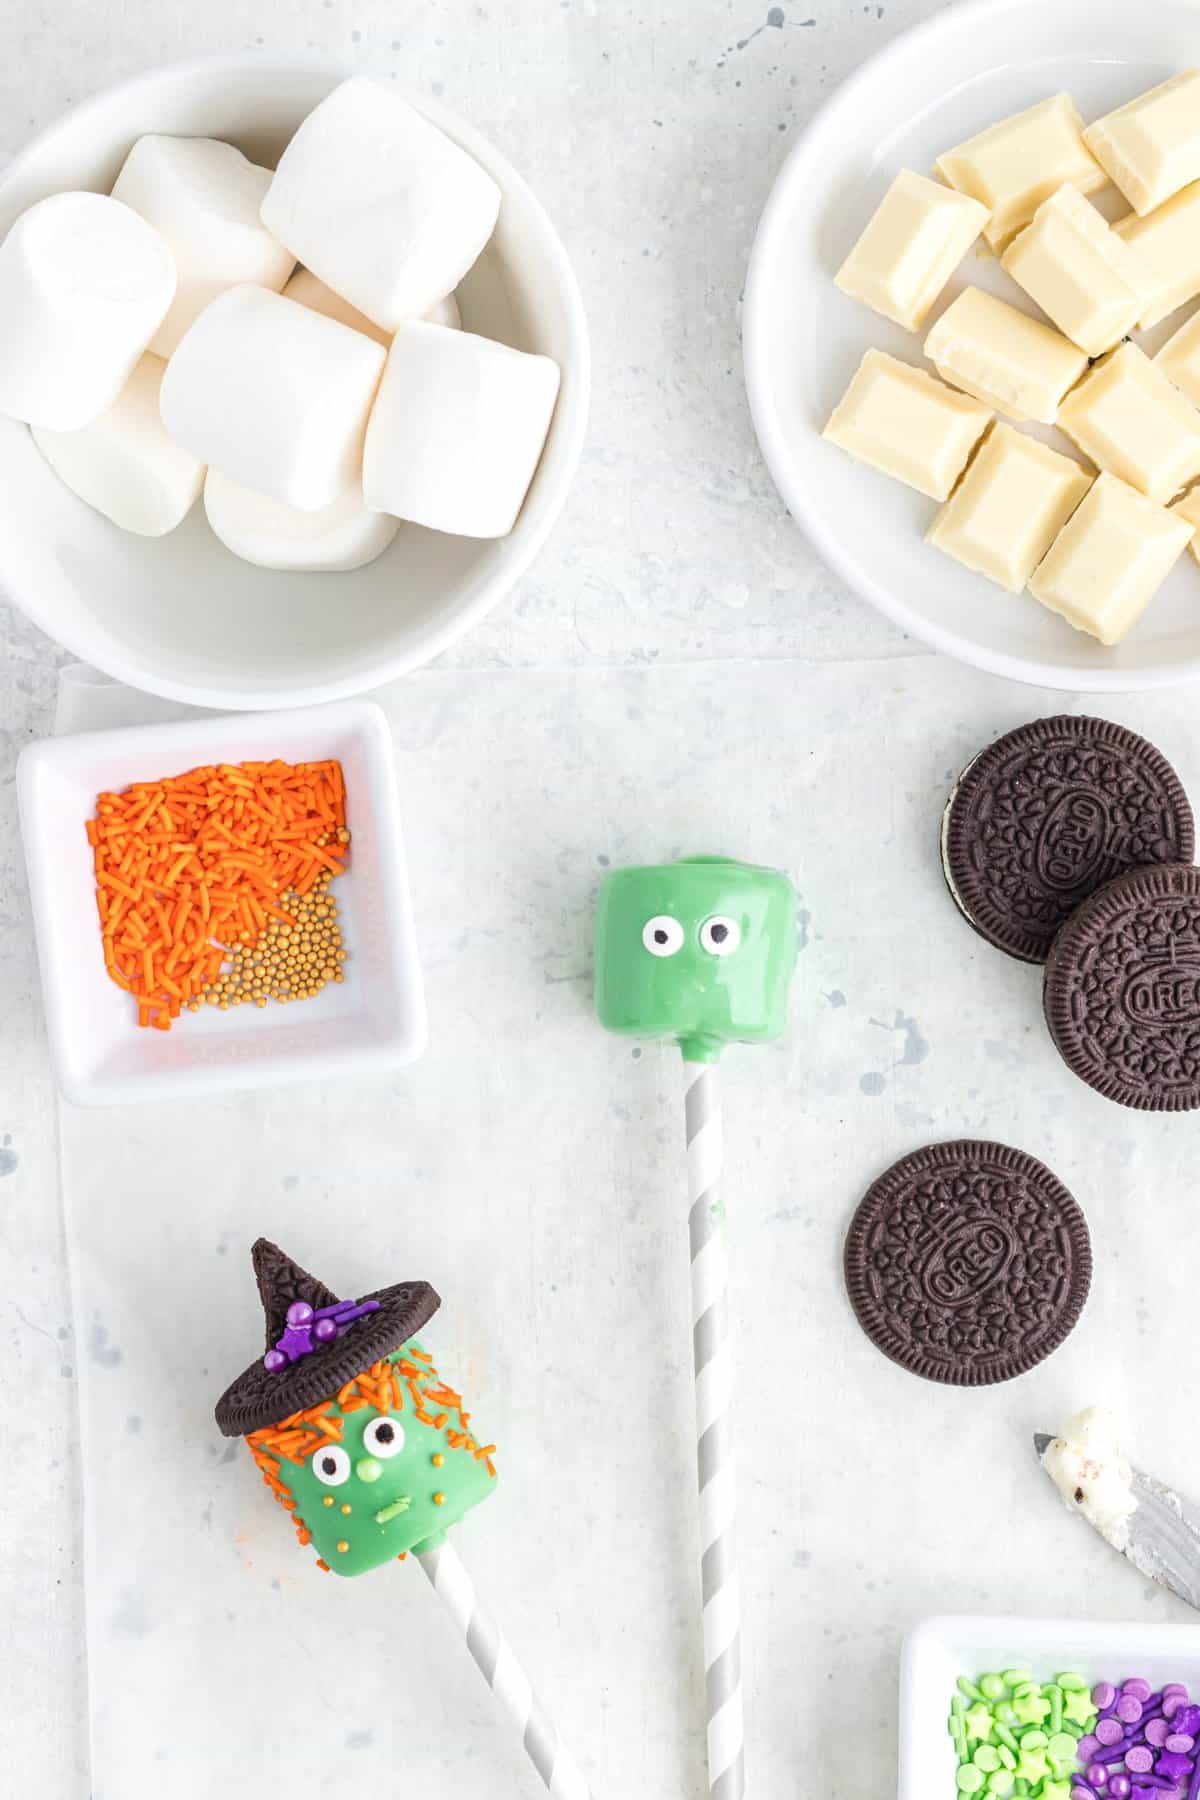
1. To make the Witch, dip a paper straw in the melted green chocolate reserved from the Jack-o-lantern above. PRO TIP: You may need to re-warm the chocolate in the microwave in 10 to 15-second increments, stirring to avoid scorching.
2. Dip the straw into a marshmallow and then fully dip and coat the marshmallow with the green chocolate until evenly coated. Allow excess chocolate to drip off and then place on the wax paper-lined plate.
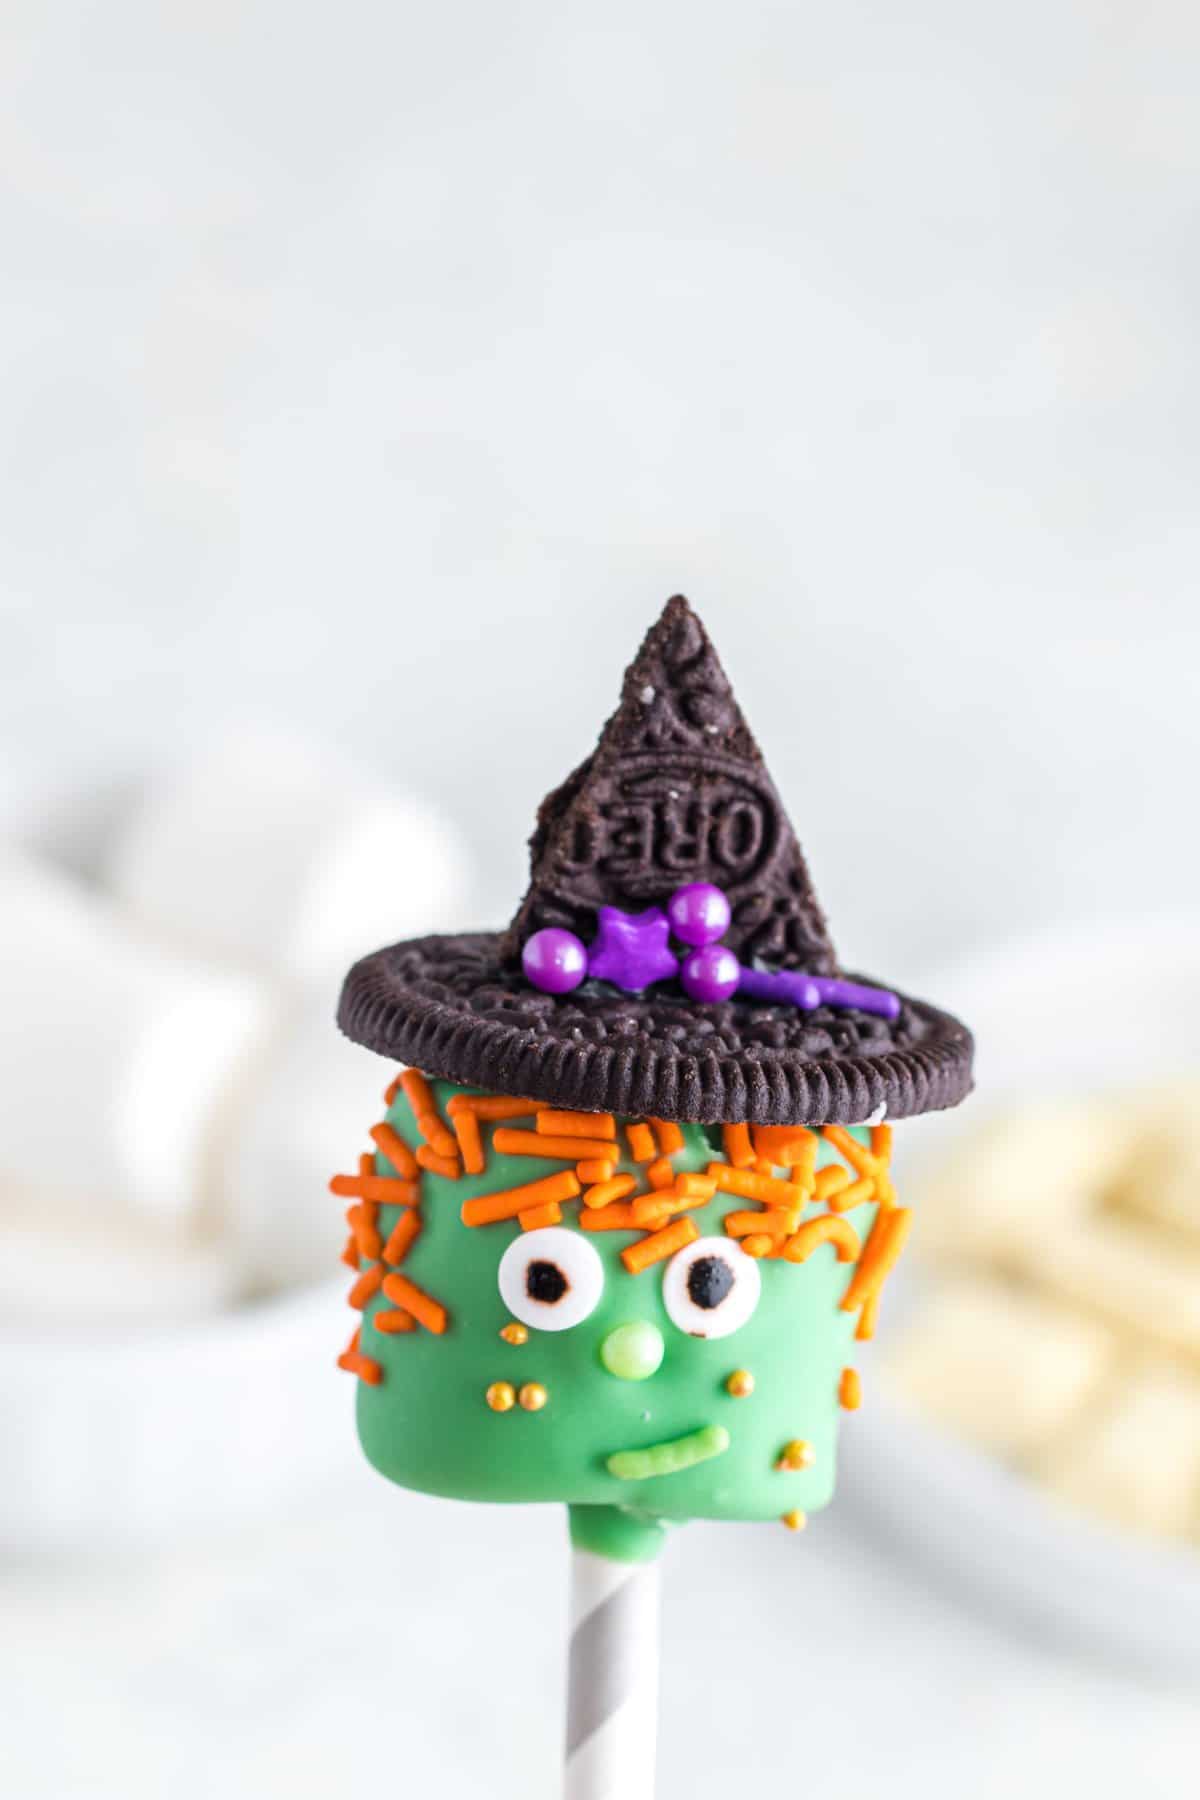
3. Add candy eyes to the marshmallow followed by a round green sprinkle for the nose. Next add a green Jimmie sprinkle for the mouth, followed by orange jimmies for the hair. Finish the face with some gold nonpareils for warts.
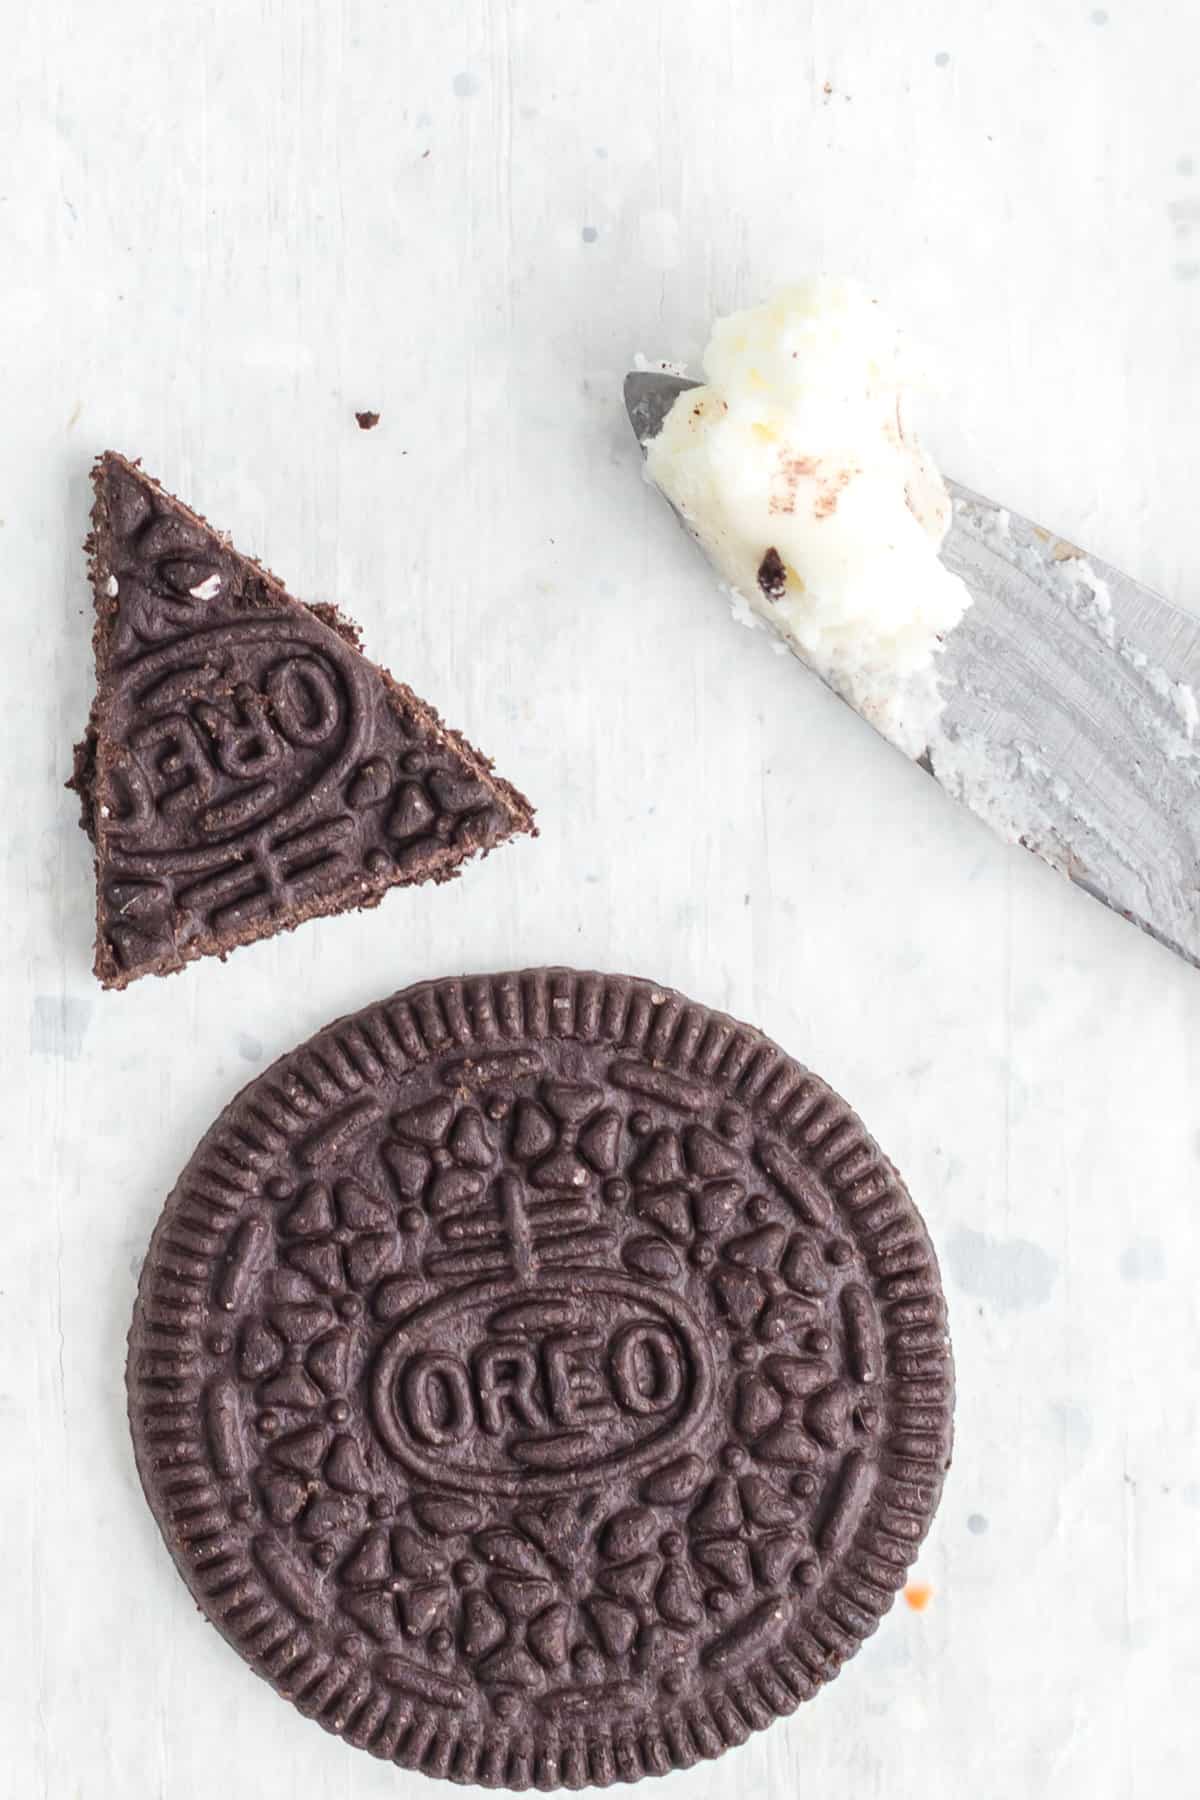
4. To make the witch hat, scrape the cream from an oreo cookie. Use one side of the cookie as the base for the hat and cut a triangle with a paring knife for the top of the hat.
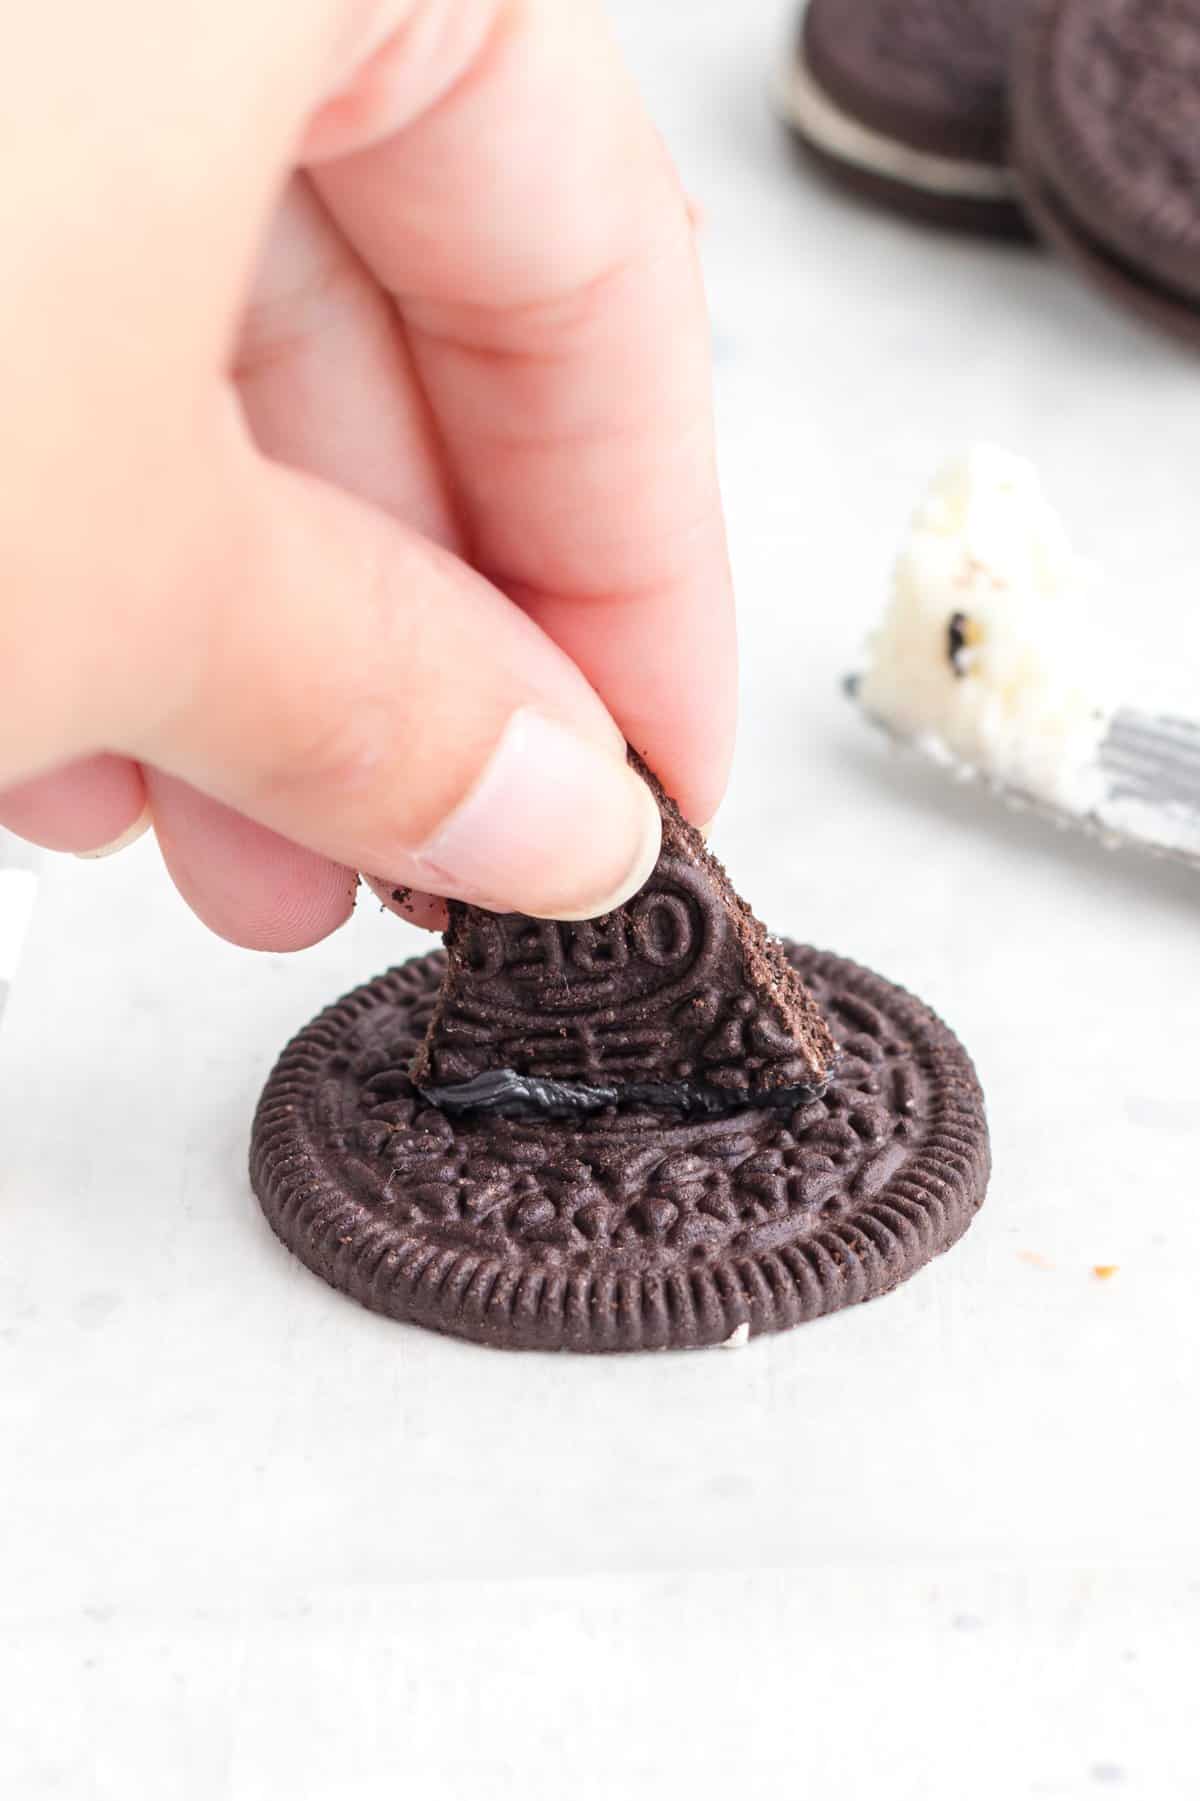
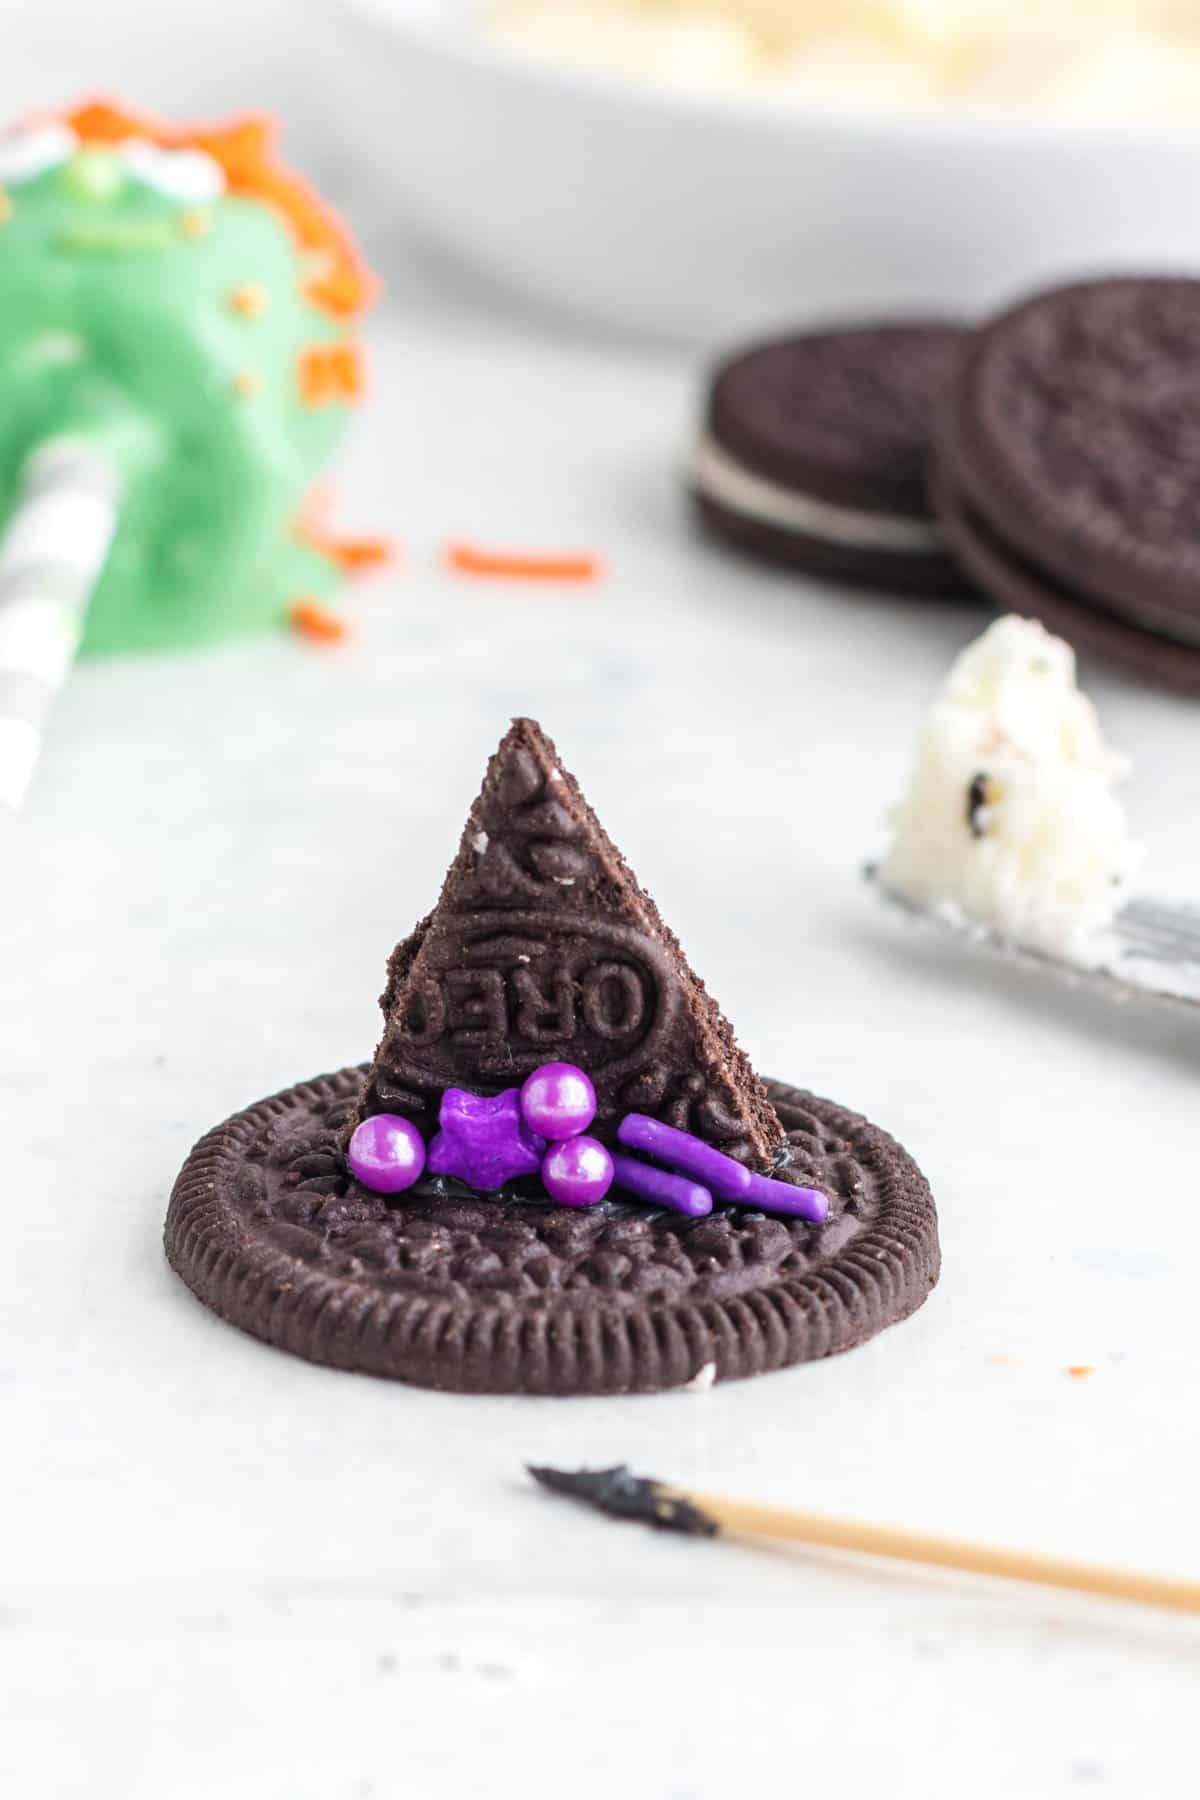
5. Use some of the reserved black chocolate from the Ghost above to act as your glue and attach the triangle to the hat base. Add a little more chocolate to the seam of the hat and base to adhere some purple sprinkles for decoration. PRO TIP: Again, you may need to rewarm the black chocolate since making the ghost. Microwave in 10-15 second increments.
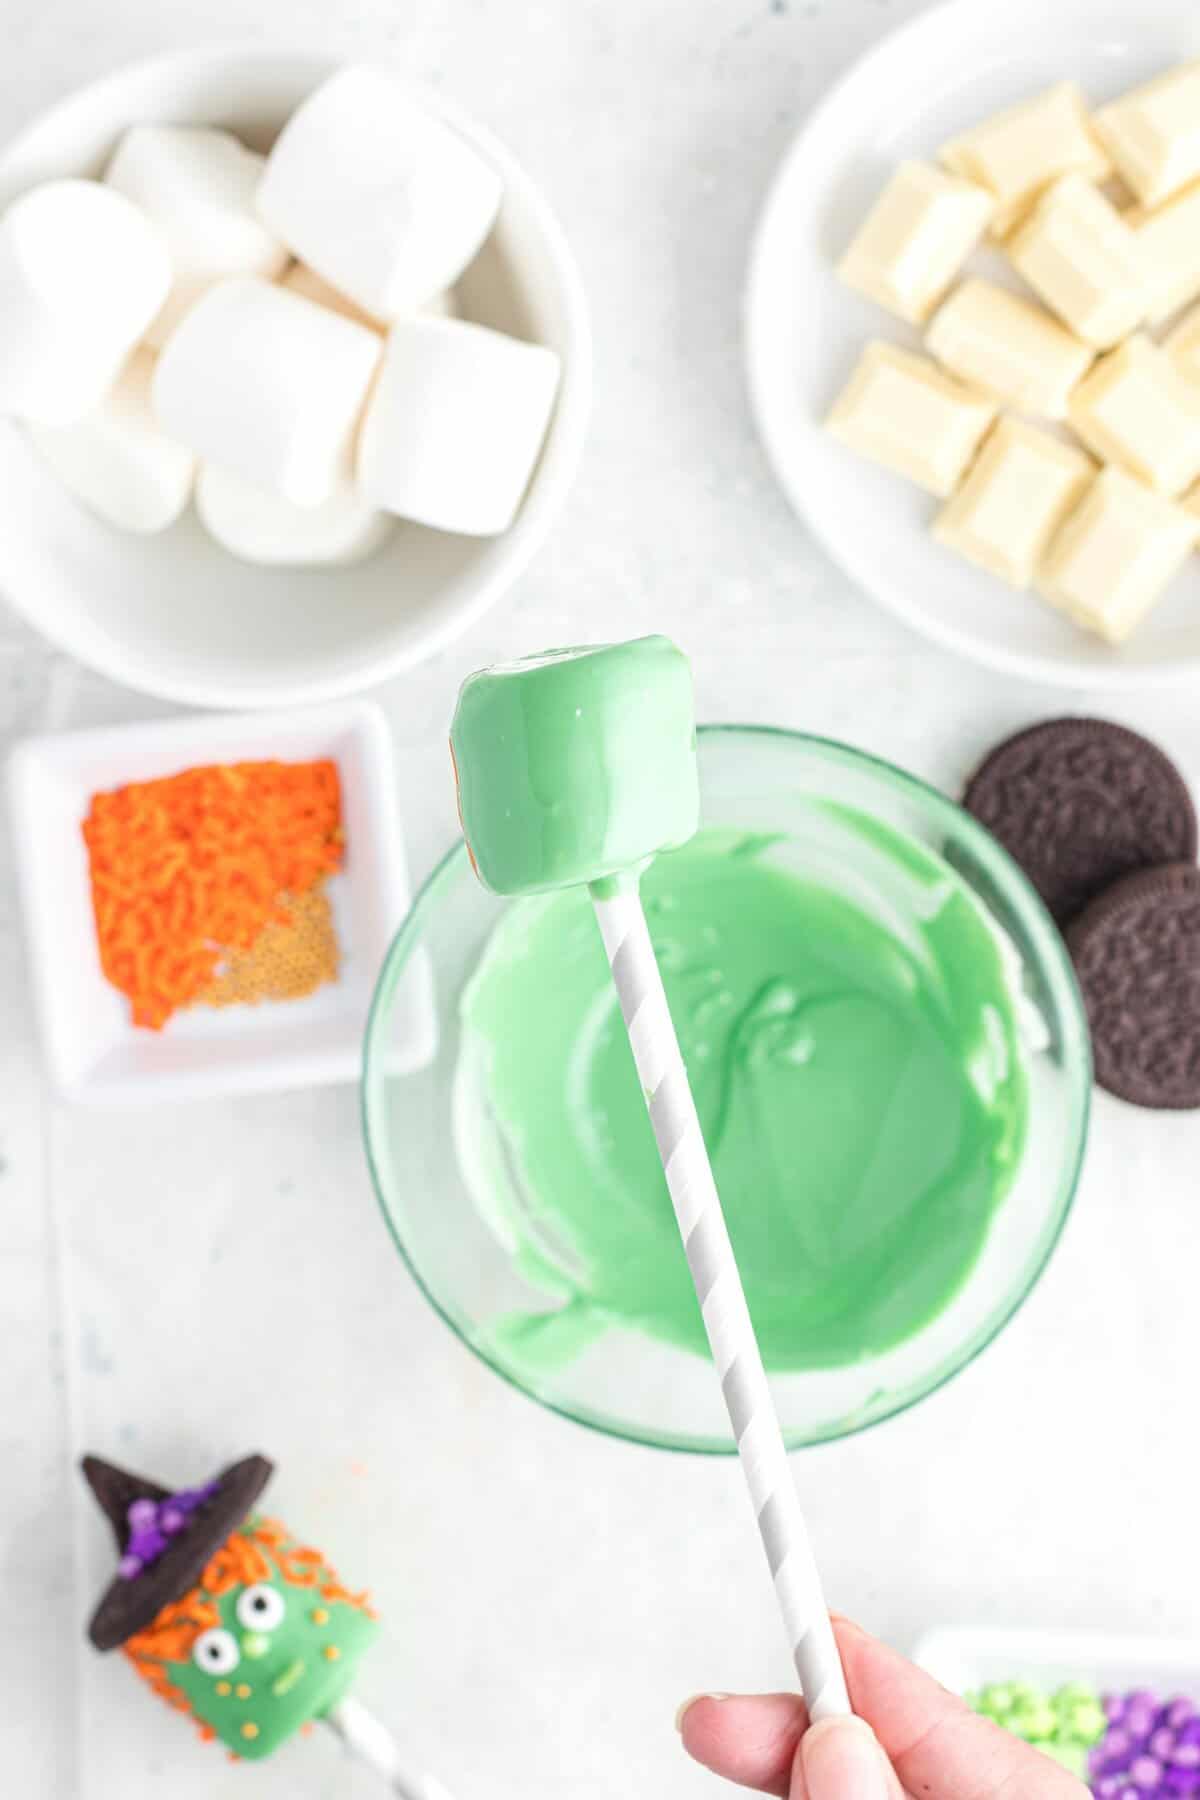
6. When the Witch has fully set attach the hat using some more melted black chocolate on the top. You can place it in a cup in the refrigerator to allow it to set upright! Once dry your witch is party-ready!
Monster Pops:
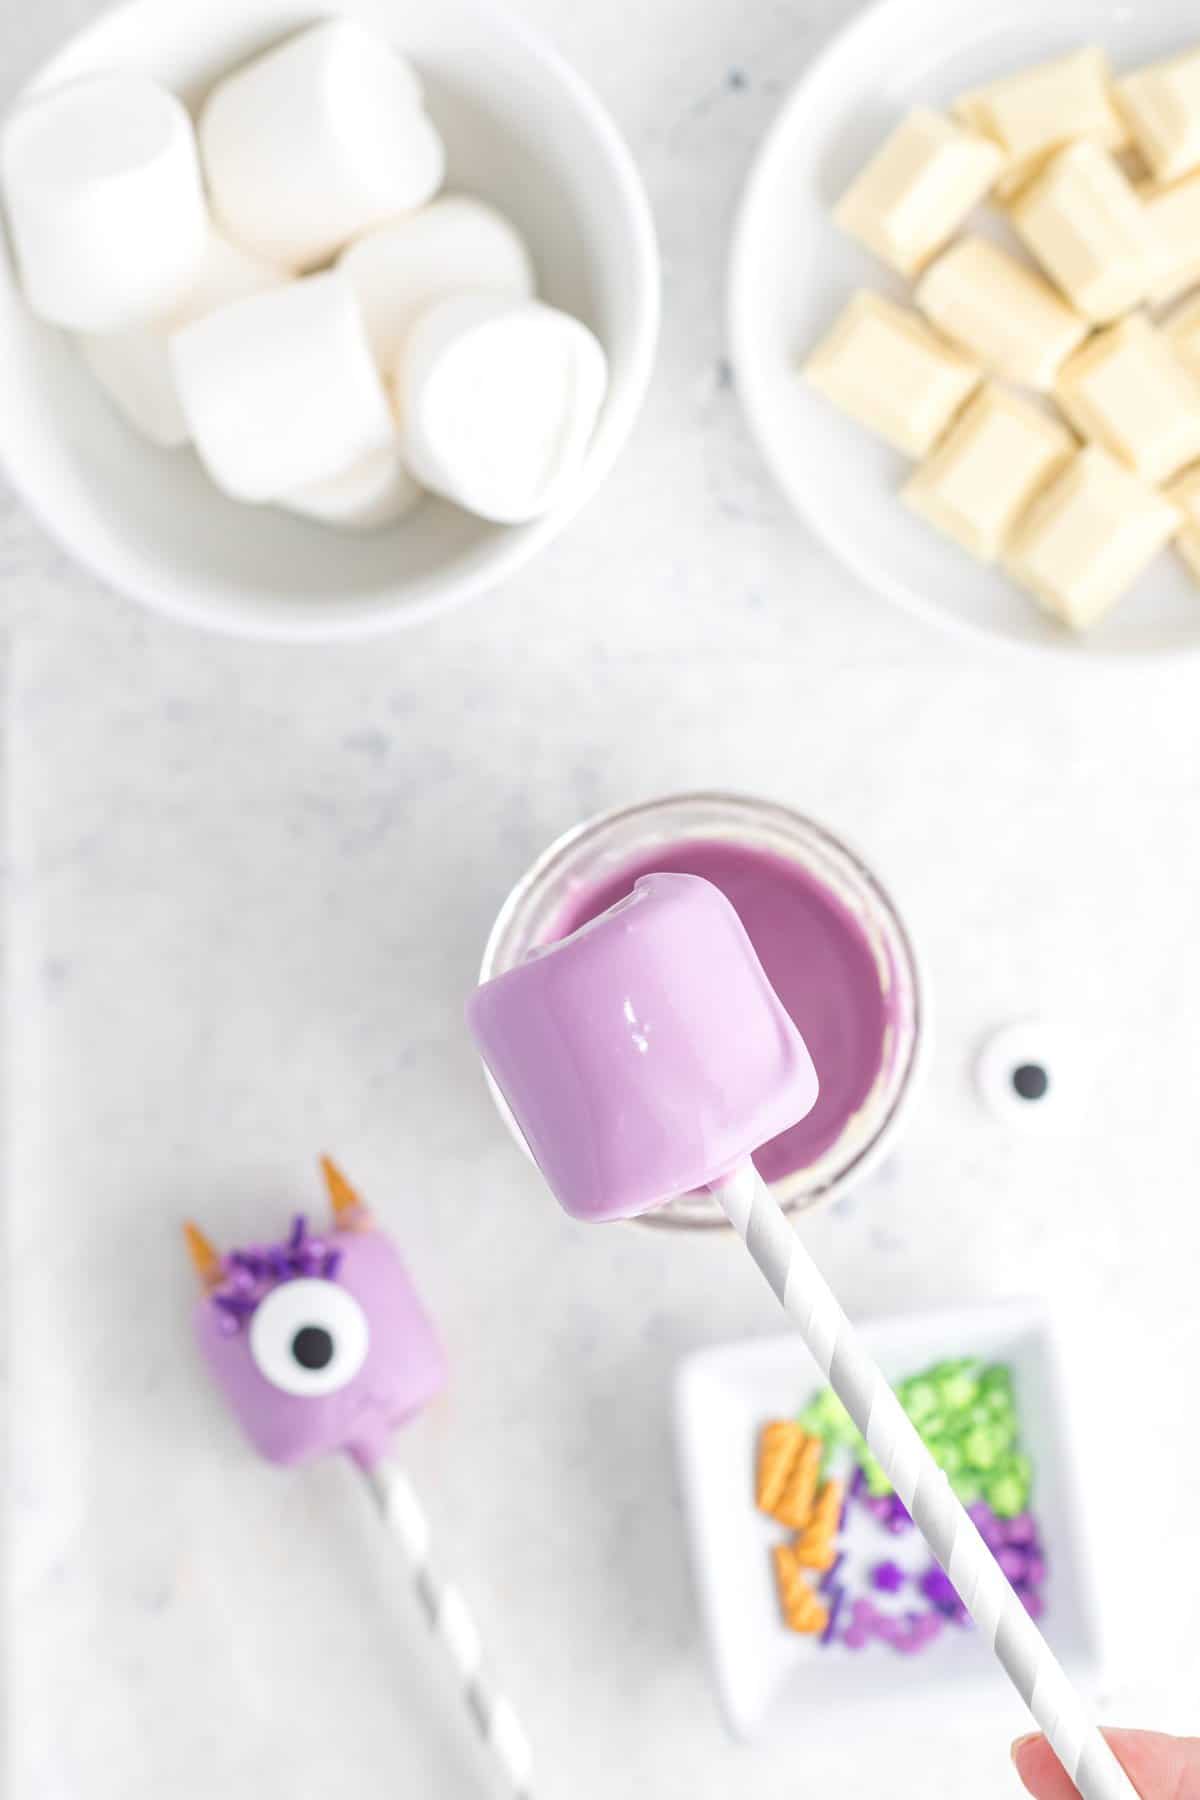
1. For the Monster, in a deep microwave-safe bowl or mason jar melt 1⁄2 cup white chocolate or enough to immerse a marshmallow and coat it fully. Mix a few drops of purple candy coloring in with the chocolate and melt In 20-second increments, stirring well in between. Again, you can use purple candy melts in lieu of the chocolate as well.
2. Dip a paper straw into the purple chocolate and then into a marshmallow.
3. Dip the marshmallow in the purple chocolate making sure it is coated fully. Allow the excess to drip back into the jar.
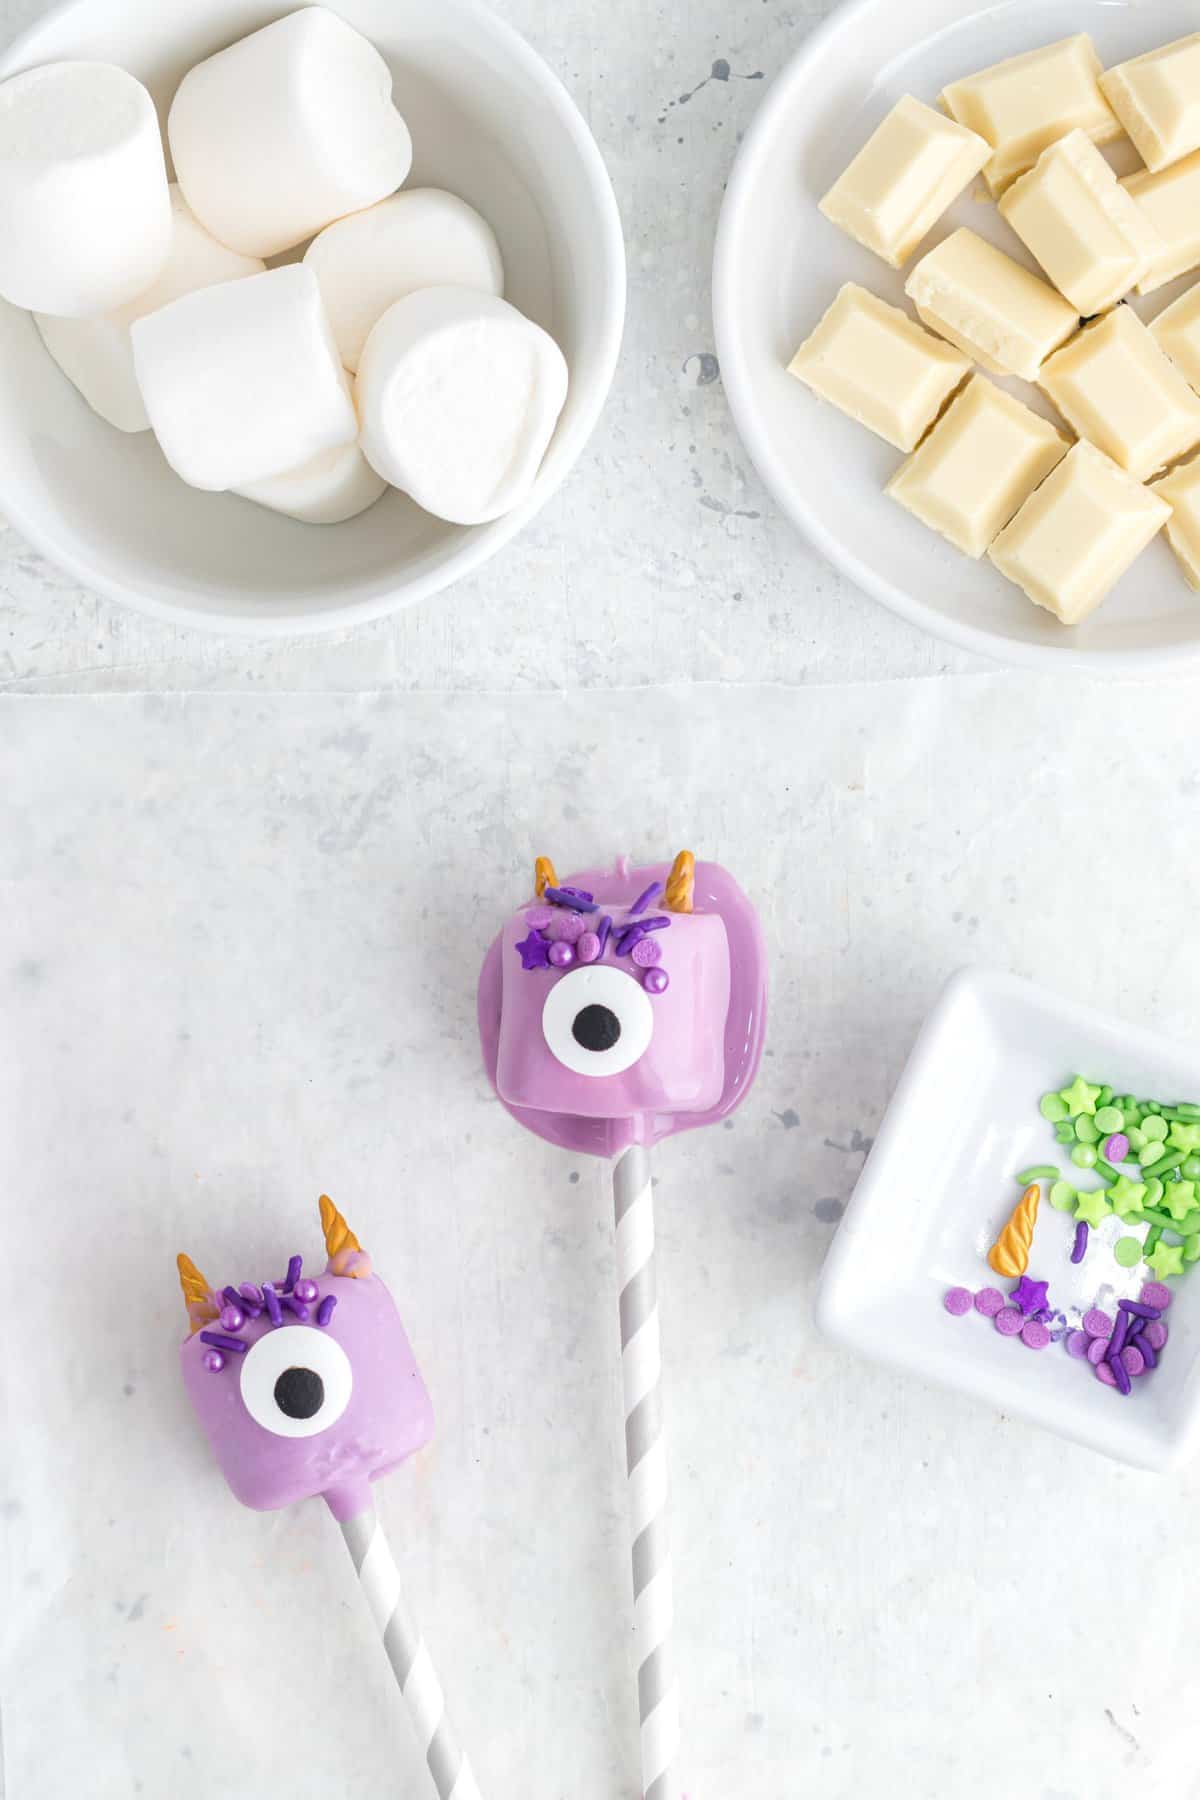
4. Place the marshmallow on the wax paper-lined plate and add a large candy eye to the center.
5. Next, add two unicorn horn sprinkles to the sides and some purple sprinkles for fur.
PRO TIP: There is no rules to how a monster should look so feel free to get creative and add any style of sprinkles you please.
6. Allow your monster to fully set before adding to the party display!
Bat Pops:
1. To make the Bat Halloween marshmalow, melt ½ cup extra dark Belgian chocolate in a deep microwave-safe bowl or mason jar. Melt in 20-second increments, stirring well in between to avoid scorching.
2. Then prep the bat wings. Separate an Oreo cookie and scrape off the cream. Take one half, cut it in half, then half again. This will form the wings. Place the Oreo wings on the wax paper-lined plate. Set aside.
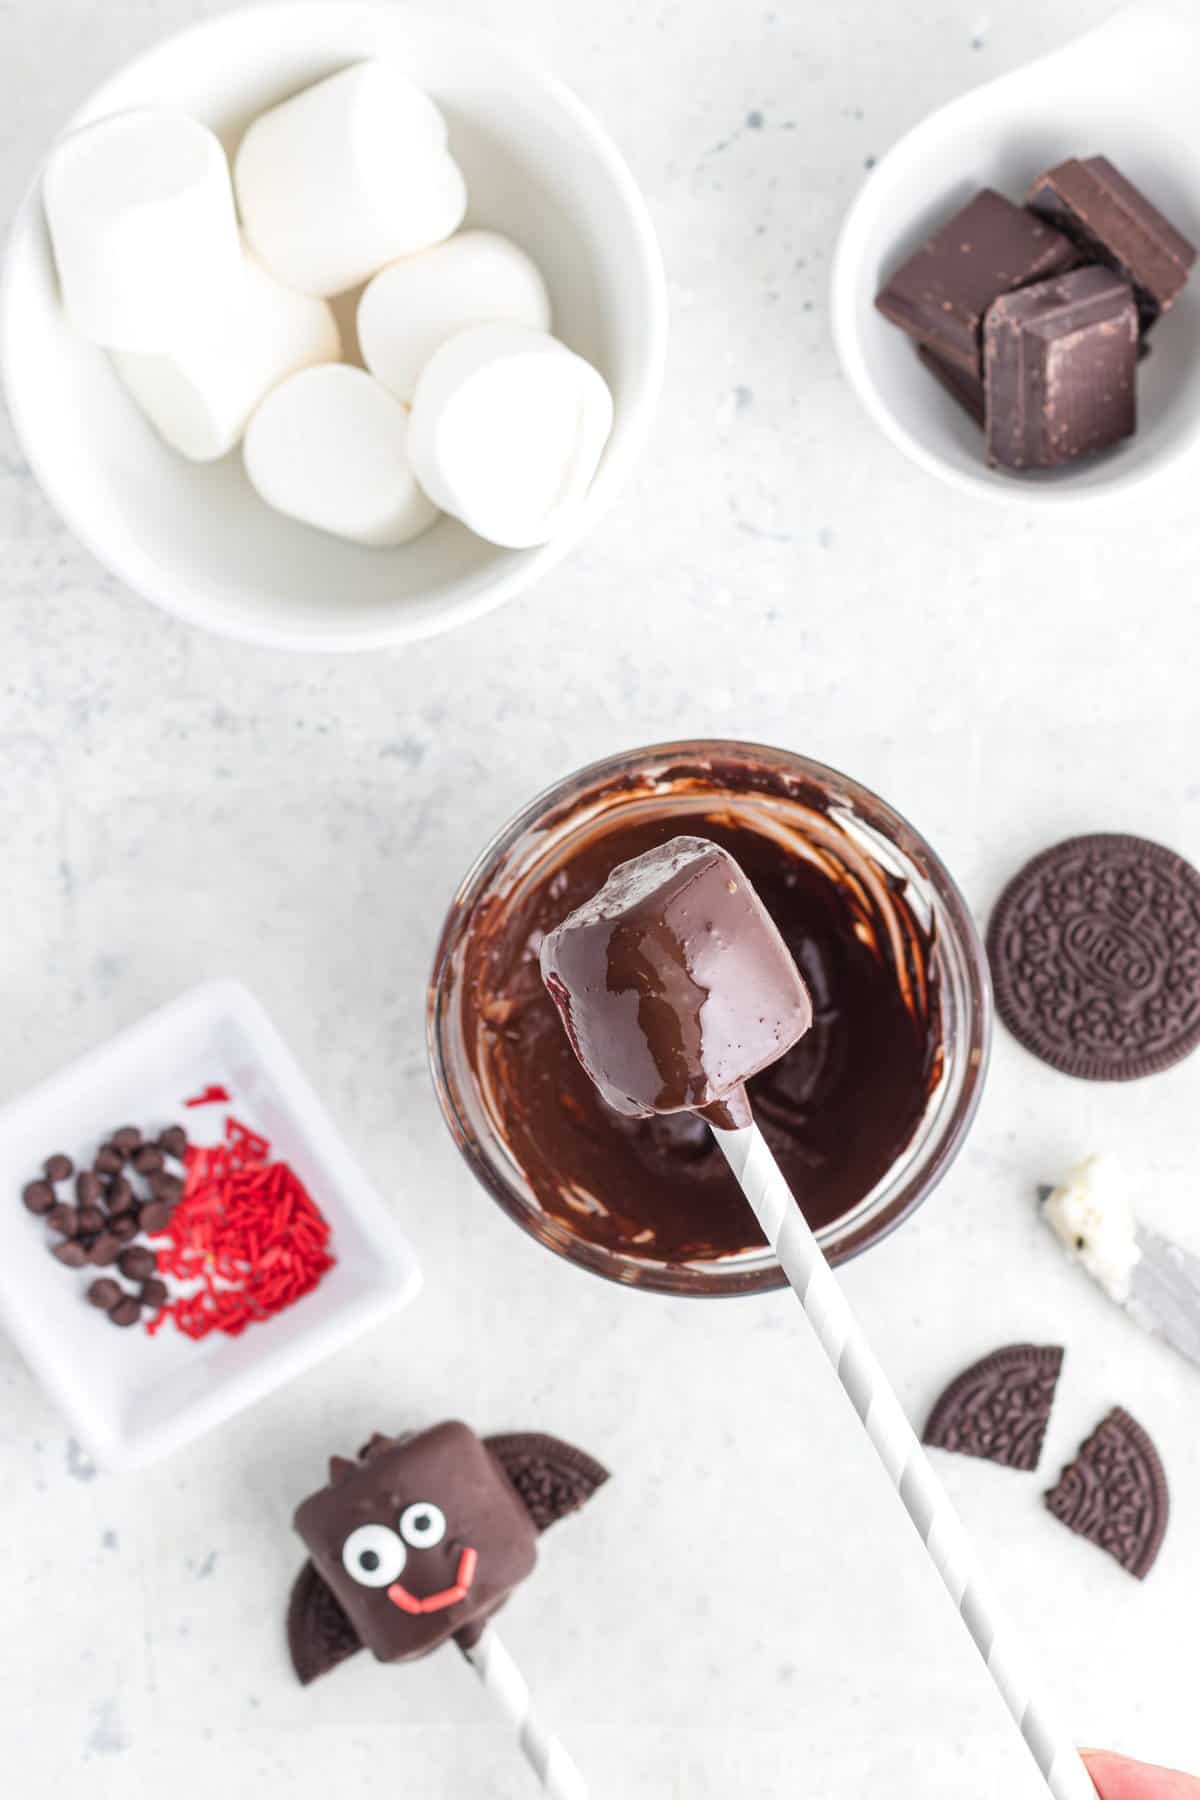
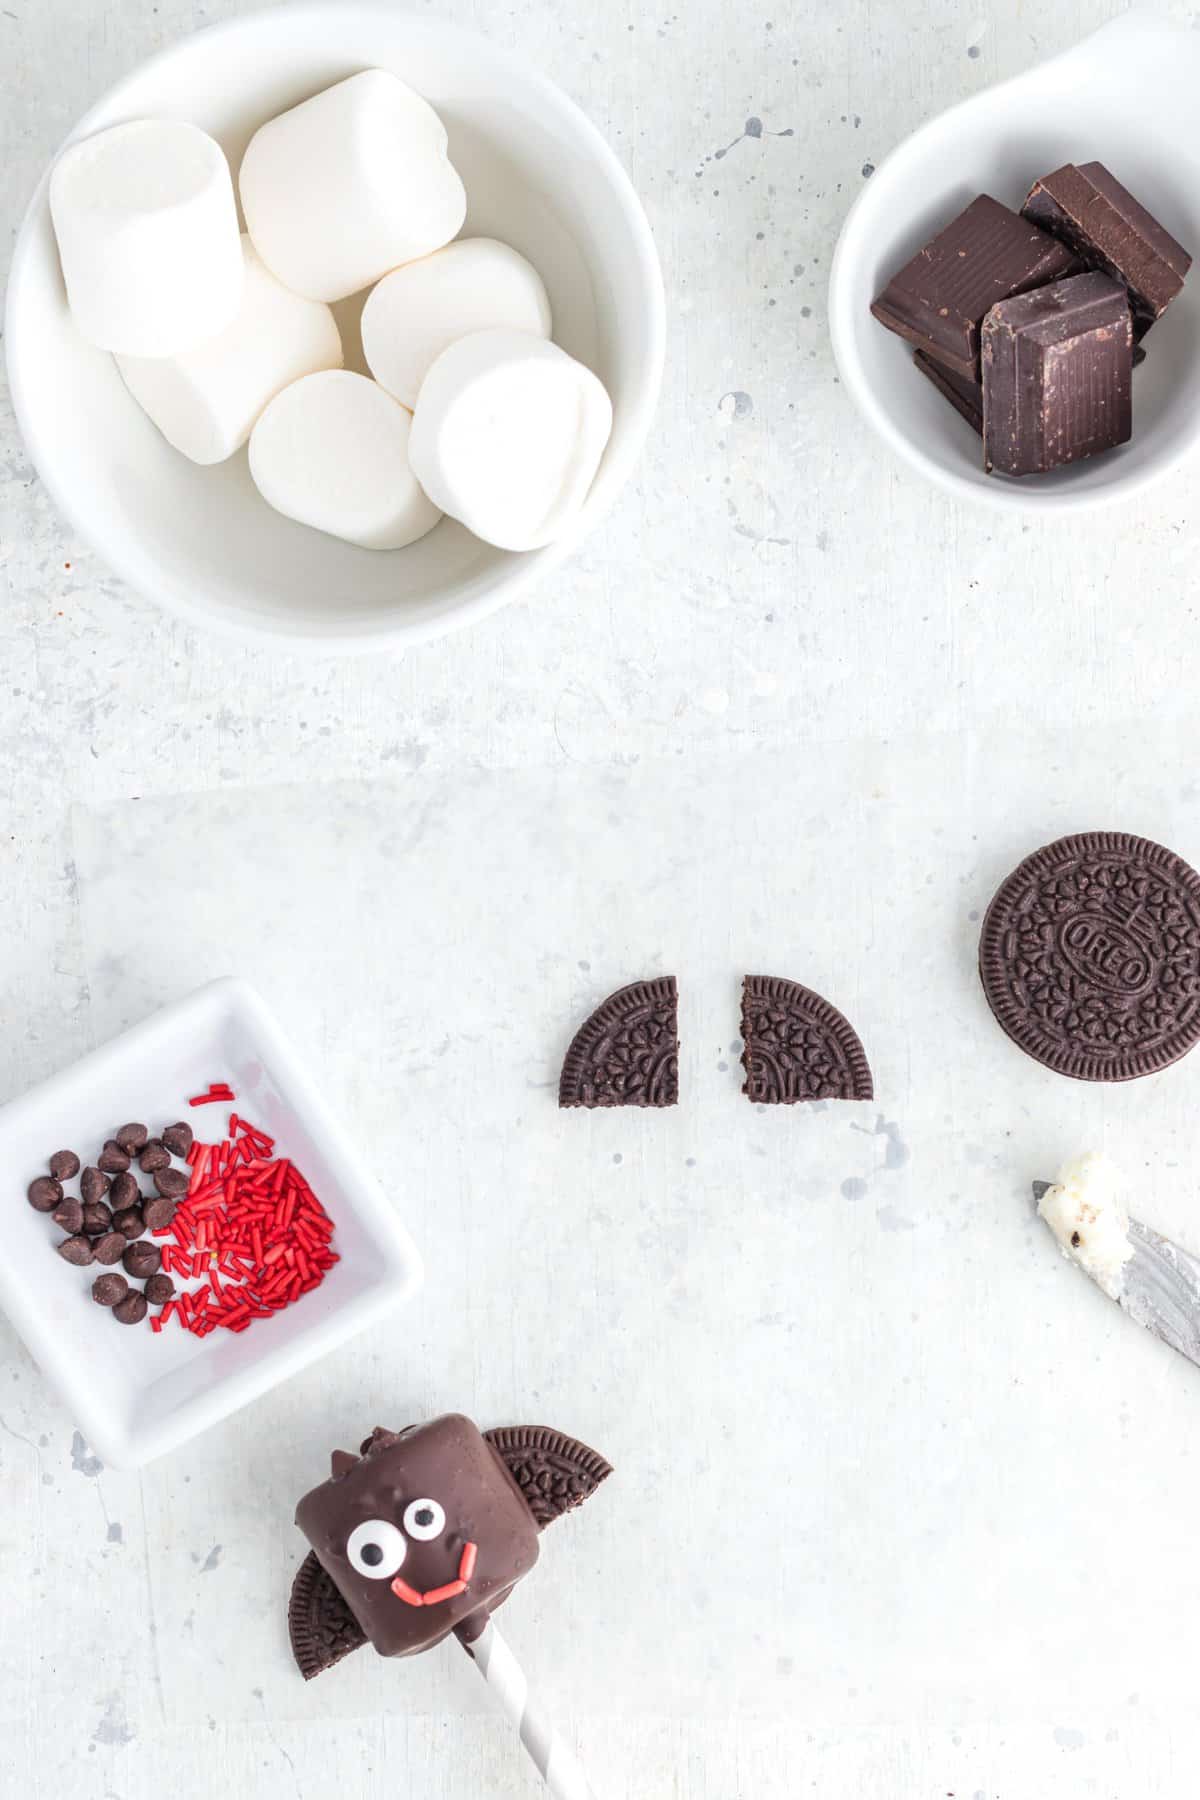
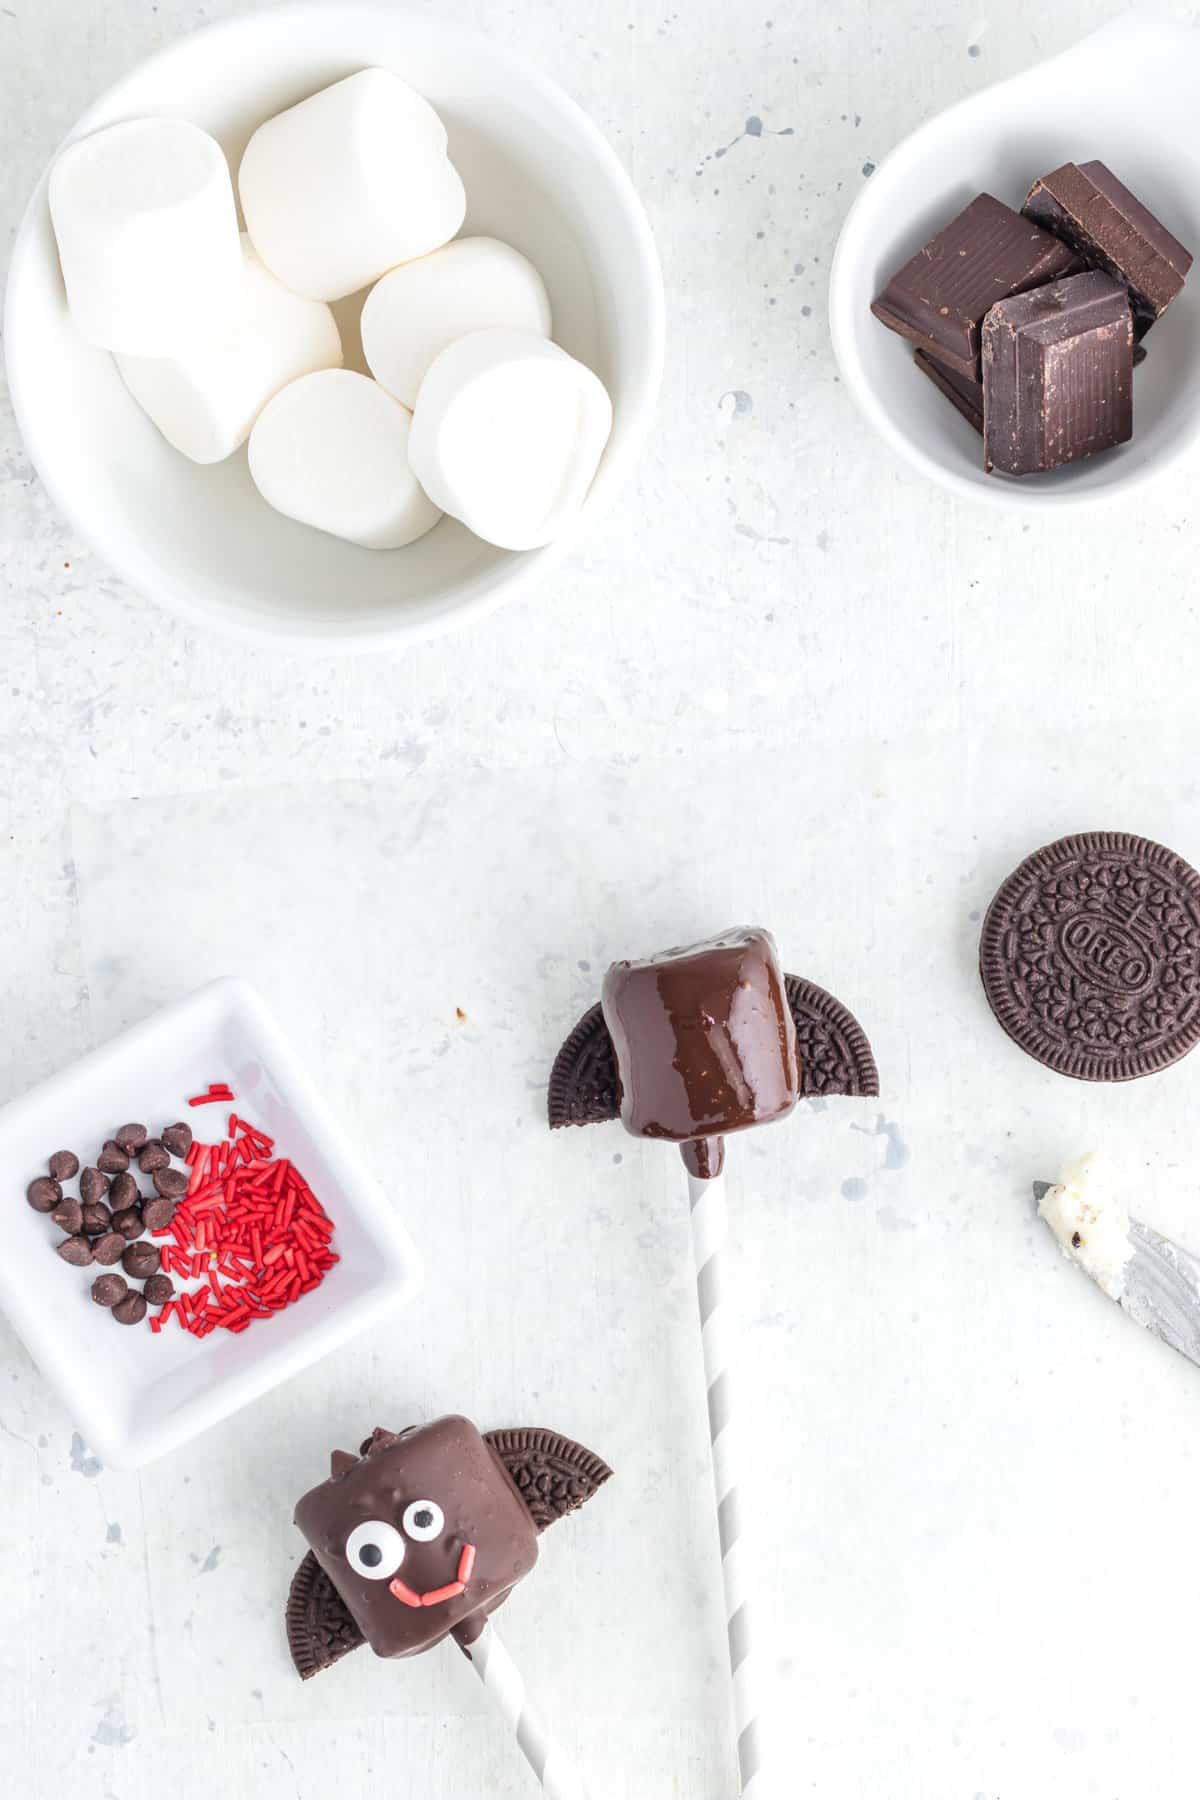
3. Next, dip a paper straw in some dark chocolate. Insert the straw into a marshmallow. Dip the marshmallow into the dark chocolate until fully coated on all sides and the base.
4. Place the dipped marshmallow on top of the Oreo wings. PRO TIP: Do this gently to avoid crushing the wings.
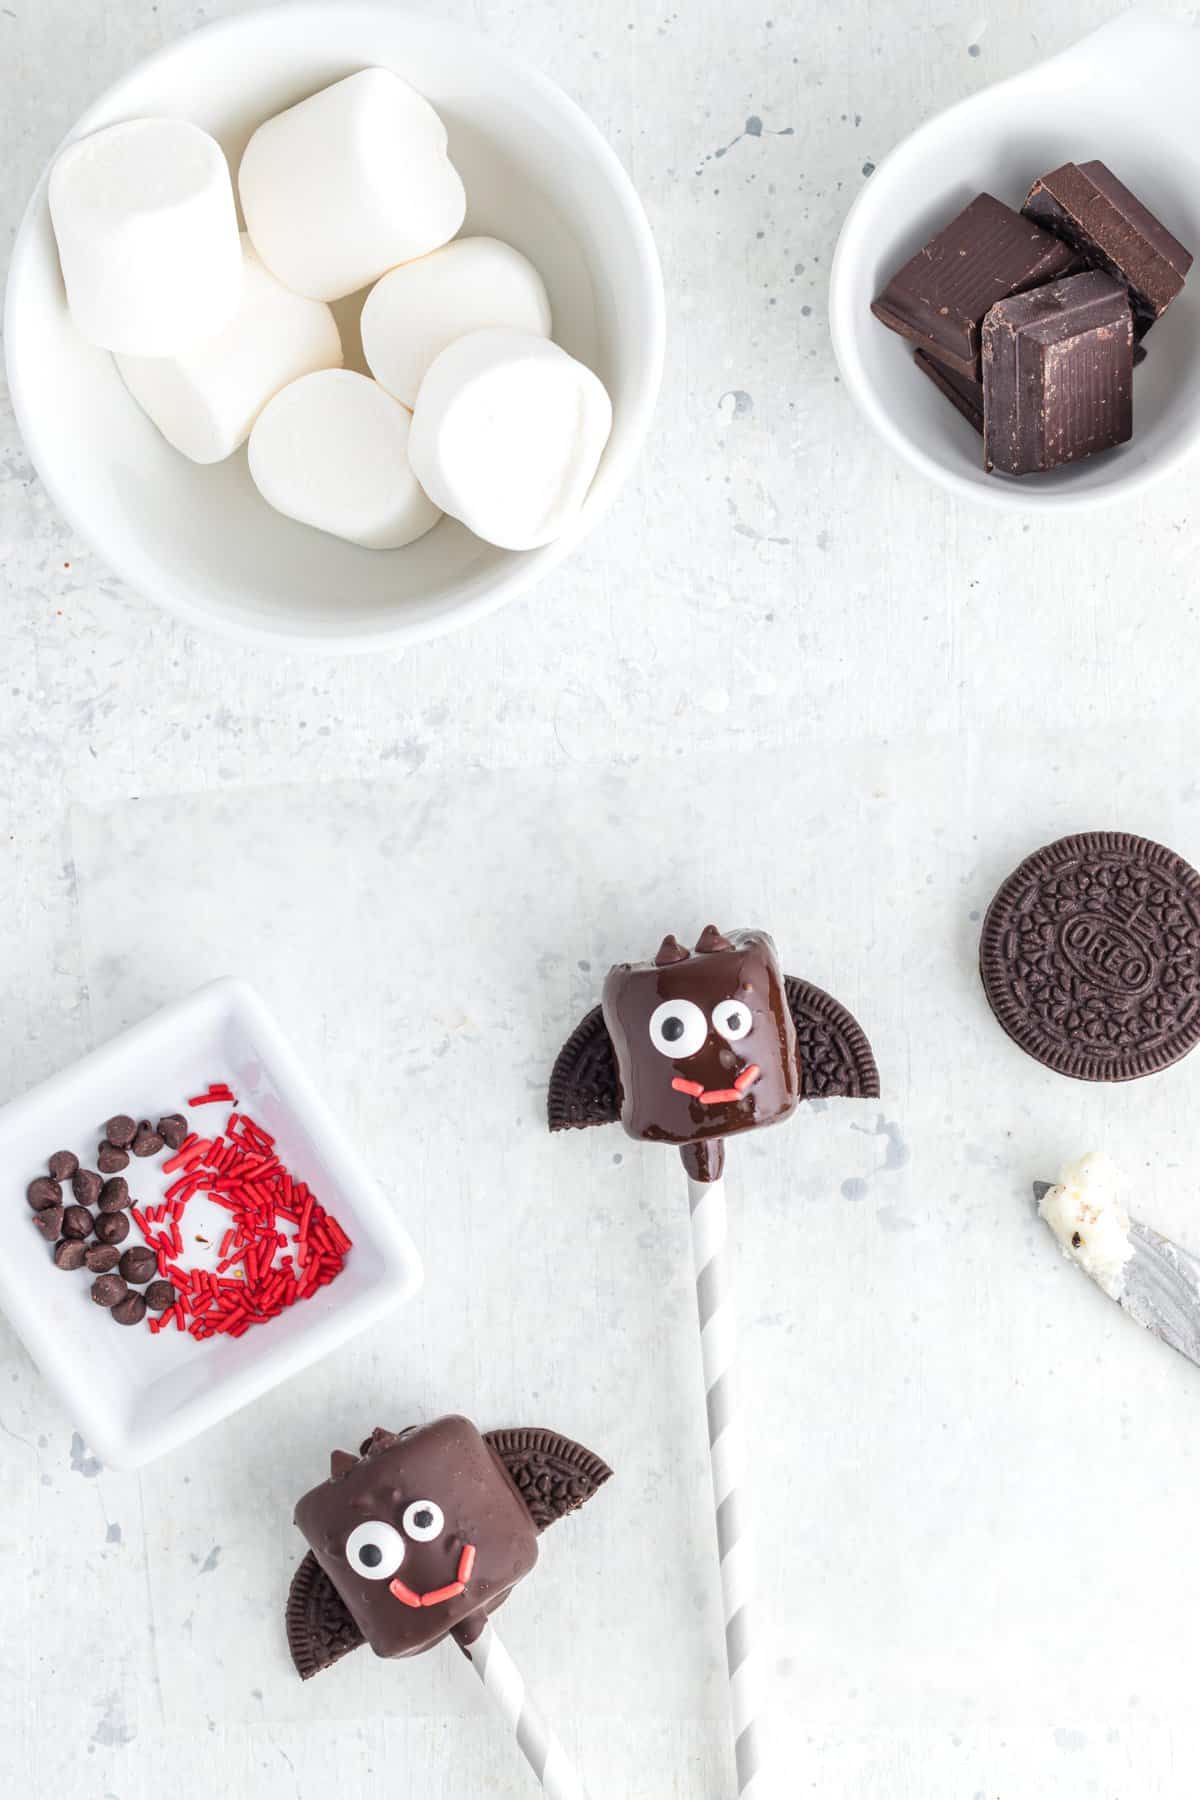
5. Next add 2 candy eyes, followed by 2 mini chocolate chip ears and red Jimmie sprinkles for a mouth. PRO TIP: you will need to add these details quite quickly to these little guys before the chocolate sets.
6. Allow all to set and the cutest bat ever is ready for the party!
HALLOWEEN MARSHMALLOW TREATS TIPS
- Hot Choc: Be careful not to overheat your chocolate as it will burn and ruin the color of your pops. By microwaving in 20-second bursts and stirring in between, you will avoid scorching it.
- The best bowls: Use deep bowls or small mason jars for the melted chocolate as this will make it easier to fully submerge your marshmallows so that they are coated fully.
- The amount of chocolate: The amounts for the chocolate are an estimate, measured before melting. In testing of this recipe, 1⁄2 cup of Belgian chocolate melted, coated 2 pops with a bit left over. This is a guide and can change depending on how many pops you would like to make, or how big your marshmallows are.
- The correct coloring: Use only oil-based candy coloring for this project for the best results. Water-based food color will not mix as well.
- Get the kids involved: This is such a fun recipe for a kid's party. Little ones will love creating the creatures and adding on their features! For less mess, I recommend adults stick to the dipping and kids can add the decorations.
- One at a time: It’s best to focus on one marshmallow at a time and work quite quickly as the chocolate sets fast. It is far easier to add the details and decorations when the chocolate is still warm. Dip marshmallows on a stick then stick into a piece of styrofoam to harden. This will hold them in place.
STORAGE TIPS
- I recommend eating these Halloween marshmallows the same day they are made. If you store them in the refrigerator, the moisture may cause the decorations to run, which will create mallows that are more scary than sweet.
- If you need to store them, add them to an airtight container and keep at room temperature for up to seven days.
- Alternatively, hand these Halloween marshmallow pops out as favors for party guests or trick or treaters, by wrapping them individually using treat bags.
FREQUENTLY ASKED QUESTIONS
Can You Melt Chocolate in The Instant Pot?
If you don’t have a microwave or you need to make a BIG batch of these Halloween chocolate dipped marshmallows, it may be easier to melt the chocolate in your instant pot. It’s ideal if you need to make many marshmallows as the chocolate sets again quickly, so the instant pot will help keep it warm and melted until you need it.
- Add 2 cups of water into the Instant Pot
- Place a glass bowl on top and press saute mode
- As the instant pot heats up, the steam created from the boiling water will melt your chocolate/candy melts
- Stir using a spatula until fully melted then press cancel
- Set your instant pot to “Keep Warm” if you want the chocolate kept warm enough for you to dip the whole batch.
What can I use instead of paper straws?
I prefer using paper straws as they are cheap, sustainable and you get them in a fabulous choice of colors and patterns around Halloween. However, you could also use lollipop stocks, pretzel sticks, or popsicle sticks if you’d prefer.
How to help these Halloween Marshmallows fully set
A few tips to help your monsters set fully with minimal mess, is to keep the marshmallow pops upright until the chocolate has hardened fully. You can do this by filling a bowl with rice and stabbing the straws into it or using a block of Styrofoam to hold the sticks secure.
OTHER RECIPES YOU MAY ENJOY
- 10 Marshmallows regular size
- 10 paper straws or lollipop sticks
- ½ cup Belgian extra dark chocolate measure before melting
- 2 ¼ cups Belgian white chocolate divided (measure before melting).
- Oil-based candy color for coloring chocolate
- 1 pretzel stick cut in half for 2 Jack-O-Lantern Pops)
- 2-3 Oreo cookies for Bat, Witch and Jack-O-Lantern pops
- Assorted sprinkles
- 4 unicorn horn sprinkles for 2 Monster pops
- 4 mini chocolate chips for 2 Bat pops
- Candy eyes in various sizes 2 large eyes for 2 Monster pops, 4 small eyes for 2 Witch Pops, 2 small and 2 medium eyes for 2 Bat pops.
-
To make the Ghost, in a deep microwave-safe bowl or mason jar melt ½ cup white chocolate or enough to immerse a marshmallow and coat it fully. In 20-second increments, stirring well in between. In a separate bowl melt a 1⁄4 cup of white chocolate with a few drops of black candy coloring for the eyes.
-
Prepare a plate or baking sheet lined with waxed paper. Set aside. (reserve for other pops to set).
-
Start by dipping a paper straw or lollipop stick in the melted white chocolate then pierce it into the base of a marshmallow. You can allow it to set if it seems like it’s not secure. Next dip your marshmallow in the white chocolate, fully coating all sides and the base. Allow any excess chocolate to drip back into the bowl or jar. Place it on the wax paper-lined plate and refrigerate to set. Meanwhile, put a bit of the melted black chocolate in either a piping bag or sandwich bag with a tiny hole cut out for piping. (reserve leftovers for the Bat pop.)
-
When the white chocolate has set on the marshmallow remove it from the refrigerator and add two oval-shaped eyes and a mouth to form your Ghost. Allow the Ghost to set completely before transferring to a serving display.
-
To make the Jack-o-lantern, in a deep microwave-safe bowl or mason jar melt 1⁄2 cup white chocolate enough to immerse a marshmallow and coat it fully. Mix in some orange candy coloring, melt in 20-second increments, stirring well in between. In a separate bowl melt 1⁄2 cup of white chocolate and add a few drops of green candy coloring.
-
Dip the paper straw or lollipop stick in the orange chocolate and then into a marshmallow.
-
Dip the marshmallow in the orange chocolate. Evenly coat on all sides and base and allow
-
the excess chocolate to drip back into the jar or bowl. Place the pop on the wax paper-lined
-
plate.
-
Carefully separate an Oreo cookie. Scrape the cream off of one of the sides of the cookie.
-
Using a paring knife and a cutting board carefully cut 2 small triangles for the eyes and 3
-
small jagged shapes for the mouth.
-
Place the Oreo shapes on the marshmallow to form the eyes and mouth. To complete your
-
Jack-o-lantern break a pretzel stick in half and insert it into the green melted chocolate if you would like. Then allow the Jack-o-lantern to fully set. Reserve the extra green chocolate for the Witch pop.
-
To make the Witch, dip a paper straw in the melted green chocolate reserved from the Jack-o-lantern above. You may need to re-warm the chocolate in the microwave in 10 to 15-second increments.
-
Dip the straw into a marshmallow and then fully dip and coat the marshmallow with the green chocolate until evenly coated. Allow excess chocolate to drip off and then place on the wax paper-lined plate.
-
Add candy eyes to the marshmallow followed by a round green sprinkle for the nose. Next add a green Jimmie sprinkle for the mouth, followed by orange jimmies for the hair. Finish the face with some gold nonpareils for warts.
-
To make the witch hat, scrape the cream from an oreo cookie. Use one side of the cookie as the base for the hat and cut a triangle with a paring knife for the top of the hat. Use some of the reserved black chocolate from the Ghost above to attach the triangle to the hat base. Add a little more chocolate to the seam of the hat and base to adhere some purple sprinkles to decorate the hat. Again, you may need to rewarm the black chocolate in 10-15 second increments.
-
When the Witch has fully set attach the hat using some more melted black chocolate on the top. You can place it in a cup in the refrigerator to allow it to set upright! Once dry your witch is party-ready!
-
To make the Monster, in a deep microwave-safe bowl or mason jar melt 1⁄2 cup white chocolate or enough to immerse a marshmallow and coat it fully. Mix a few drops of purple candy coloring in with the chocolate and melt In 20-second increments, stirring well in between.
-
Dip a paper straw into the purple chocolate and then into a marshmallow. Dip the marshmallow in the purple chocolate and allow it to fully coat the marshmallow and the excess to drip back into the jar.
-
Place the marshmallow on the wax paper-lined plate and add a large candy eye to the center. Next, add two unicorn horn sprinkles to the sides and some purple sprinkles for fur.
-
Allow your monster to fully set before adding to the party display!
-
To make the Bat, in a deep microwave-safe bowl or mason jar melt 1⁄2 cup extra dark Belgian chocolate or enough to immerse a marshmallow and coat it fully. Melt in 20-second increments, stirring well in between.
-
Start by preparing the bat wings. Take a scraped Oreo cookie half. Cut the round in half and then in half again to form 2 wings. Place the Oreo wings on the wax paper-lined plate. Set aside.
-
Next, dip a paper straw in some dark chocolate. Then insert the straw into a marshmallow. Dip the marshmallow into the dark chocolate until fully coated on all sides and the base. Place the dipped marshmallow on top of the Oreo wings.
-
Next add 2 candy eyes, followed by 2 mini chocolate chip ears and red Jimmie sprinkles for a mouth.
-
Allow all to set and the cutest bat ever is ready for the party!
Recipe Success Tips
* You can substitute Belgian chocolate for candy melts in green, purple, orange, black, and white.
● Be careful not to overheat your chocolate as it will burn and ruin the color of your pops.
● Use deep bowls or small mason jars for melting chocolate for best results.
● Colored candy melts can be used in place of the Belgian chocolate if desired. It will save a bit
of time with coloring the chocolate if that is an issue for you.
● The amounts for the chocolate are an estimate, measured before melting. In testing of this
recipe 1⁄2 cup of Belgian chocolate melted, coated 2 pops with a bit left over. This is a guide
and can change depending on how many pops you would like to make.
● Use only oil-based candy coloring for this project for the best results.
● These are best eaten the day they are made storage in the refrigerator will cause moisture
and running of the decorations causing a disappointing mess.
● This is a fun recipe to make at a kid's party. They will love creating the creatures and adding
on their features! Adults can do the dipping and kids can add decorations(for less mess)!

Leave a Reply