
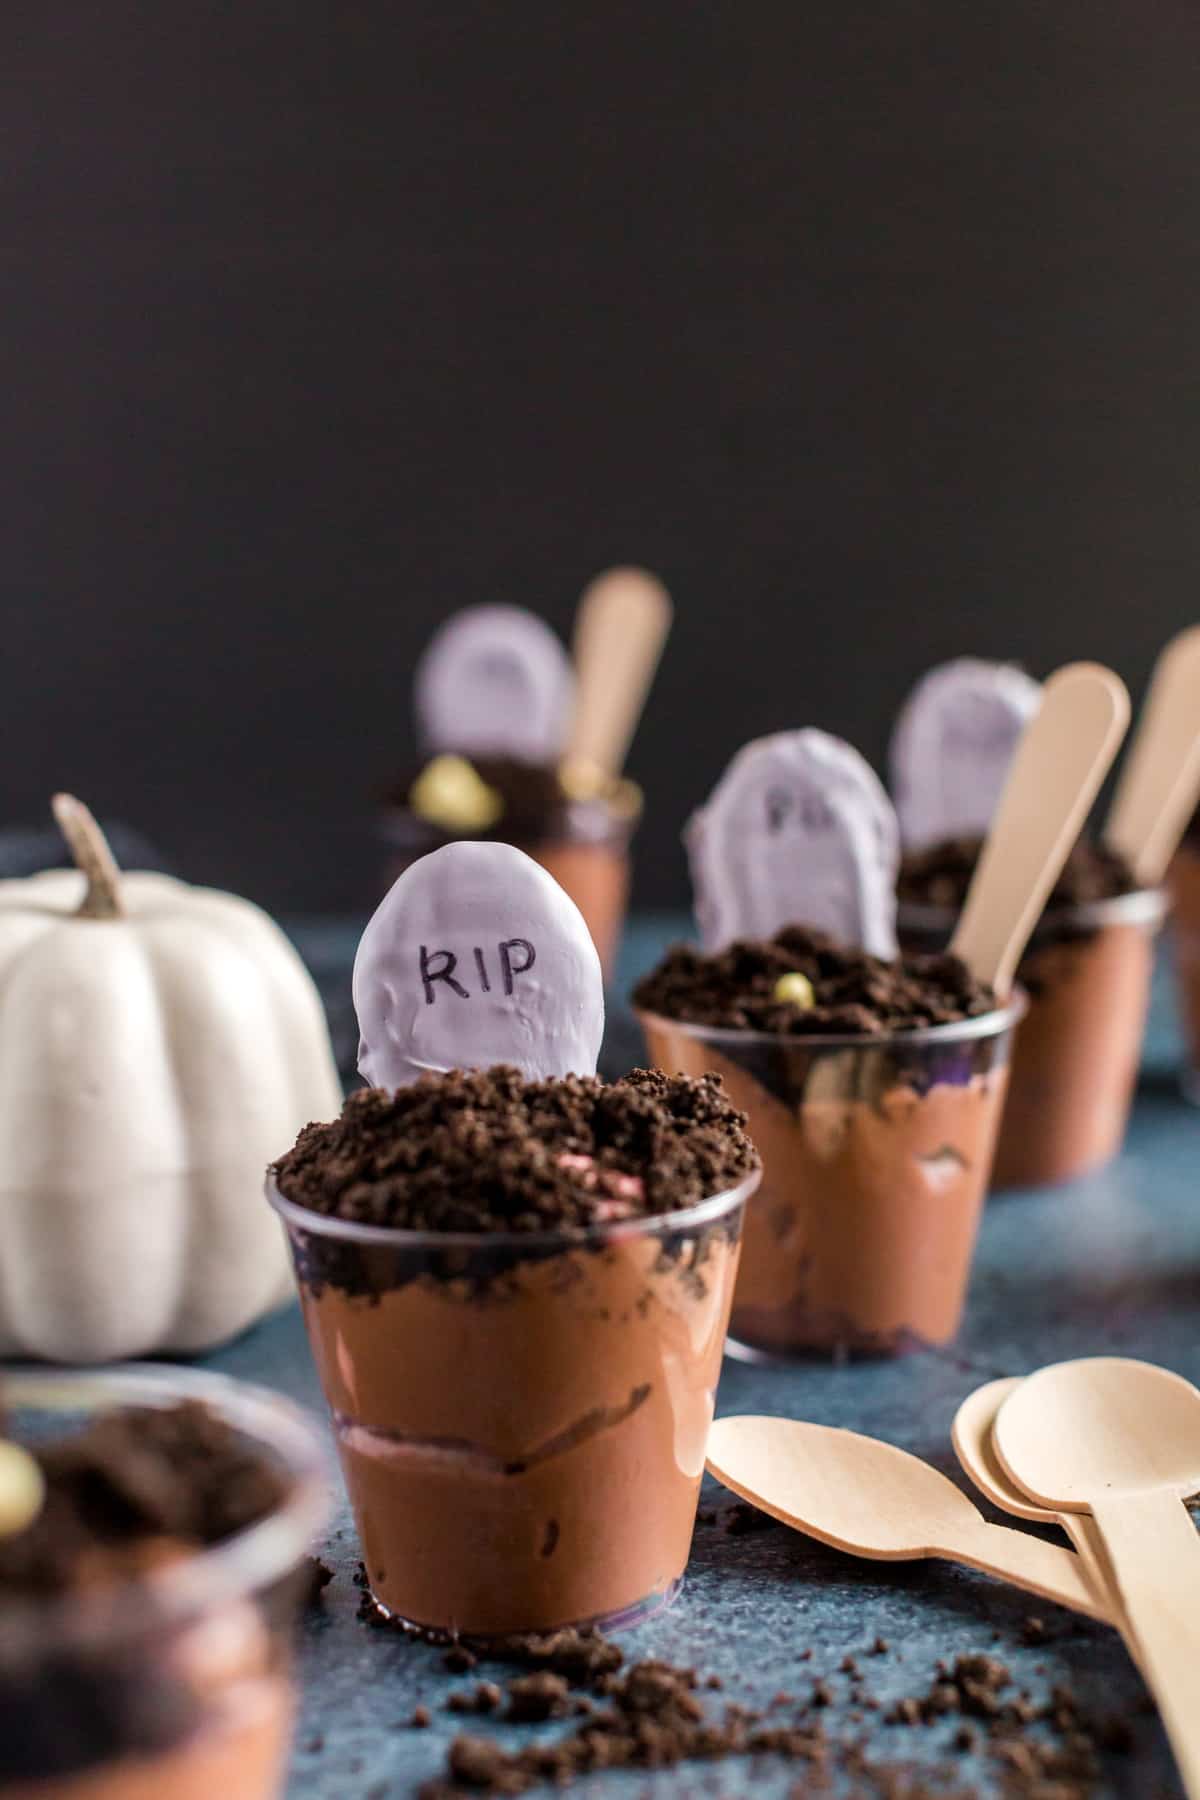
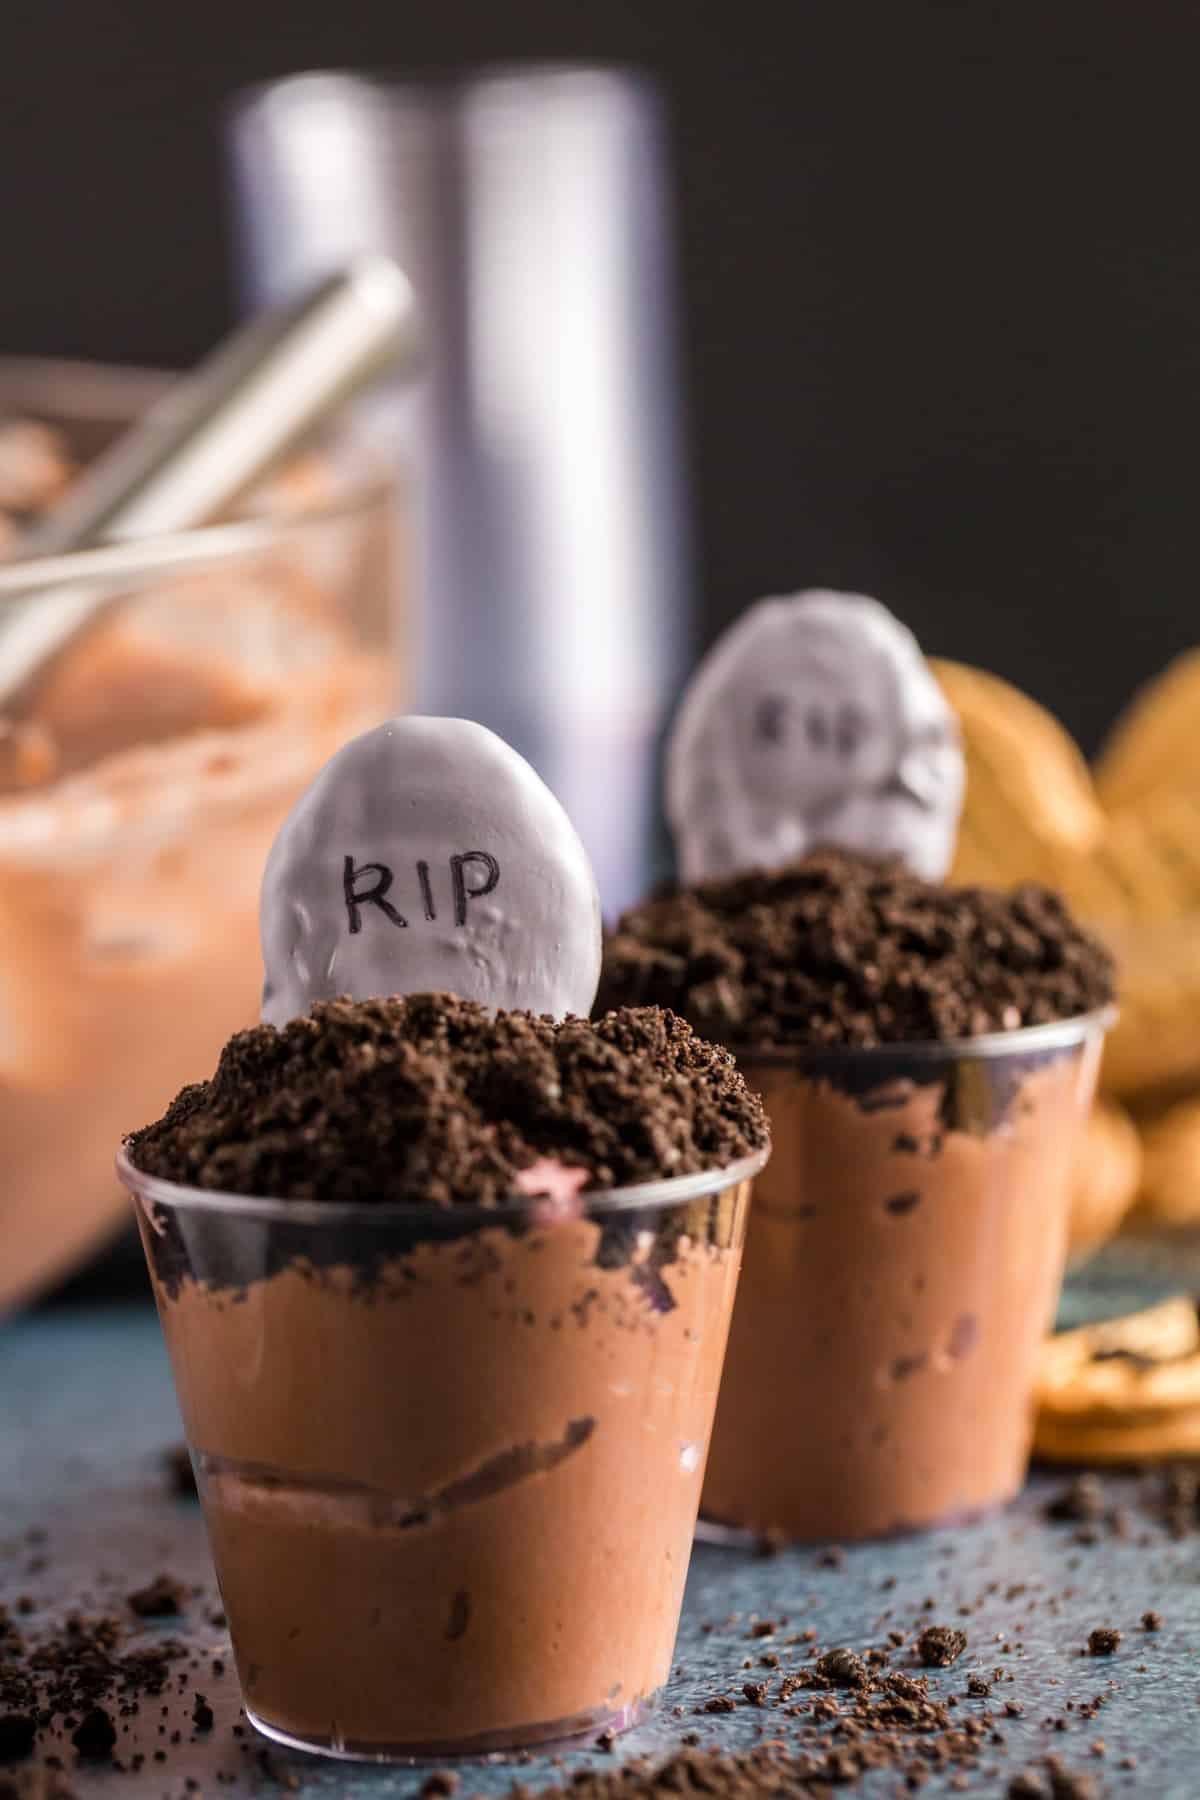
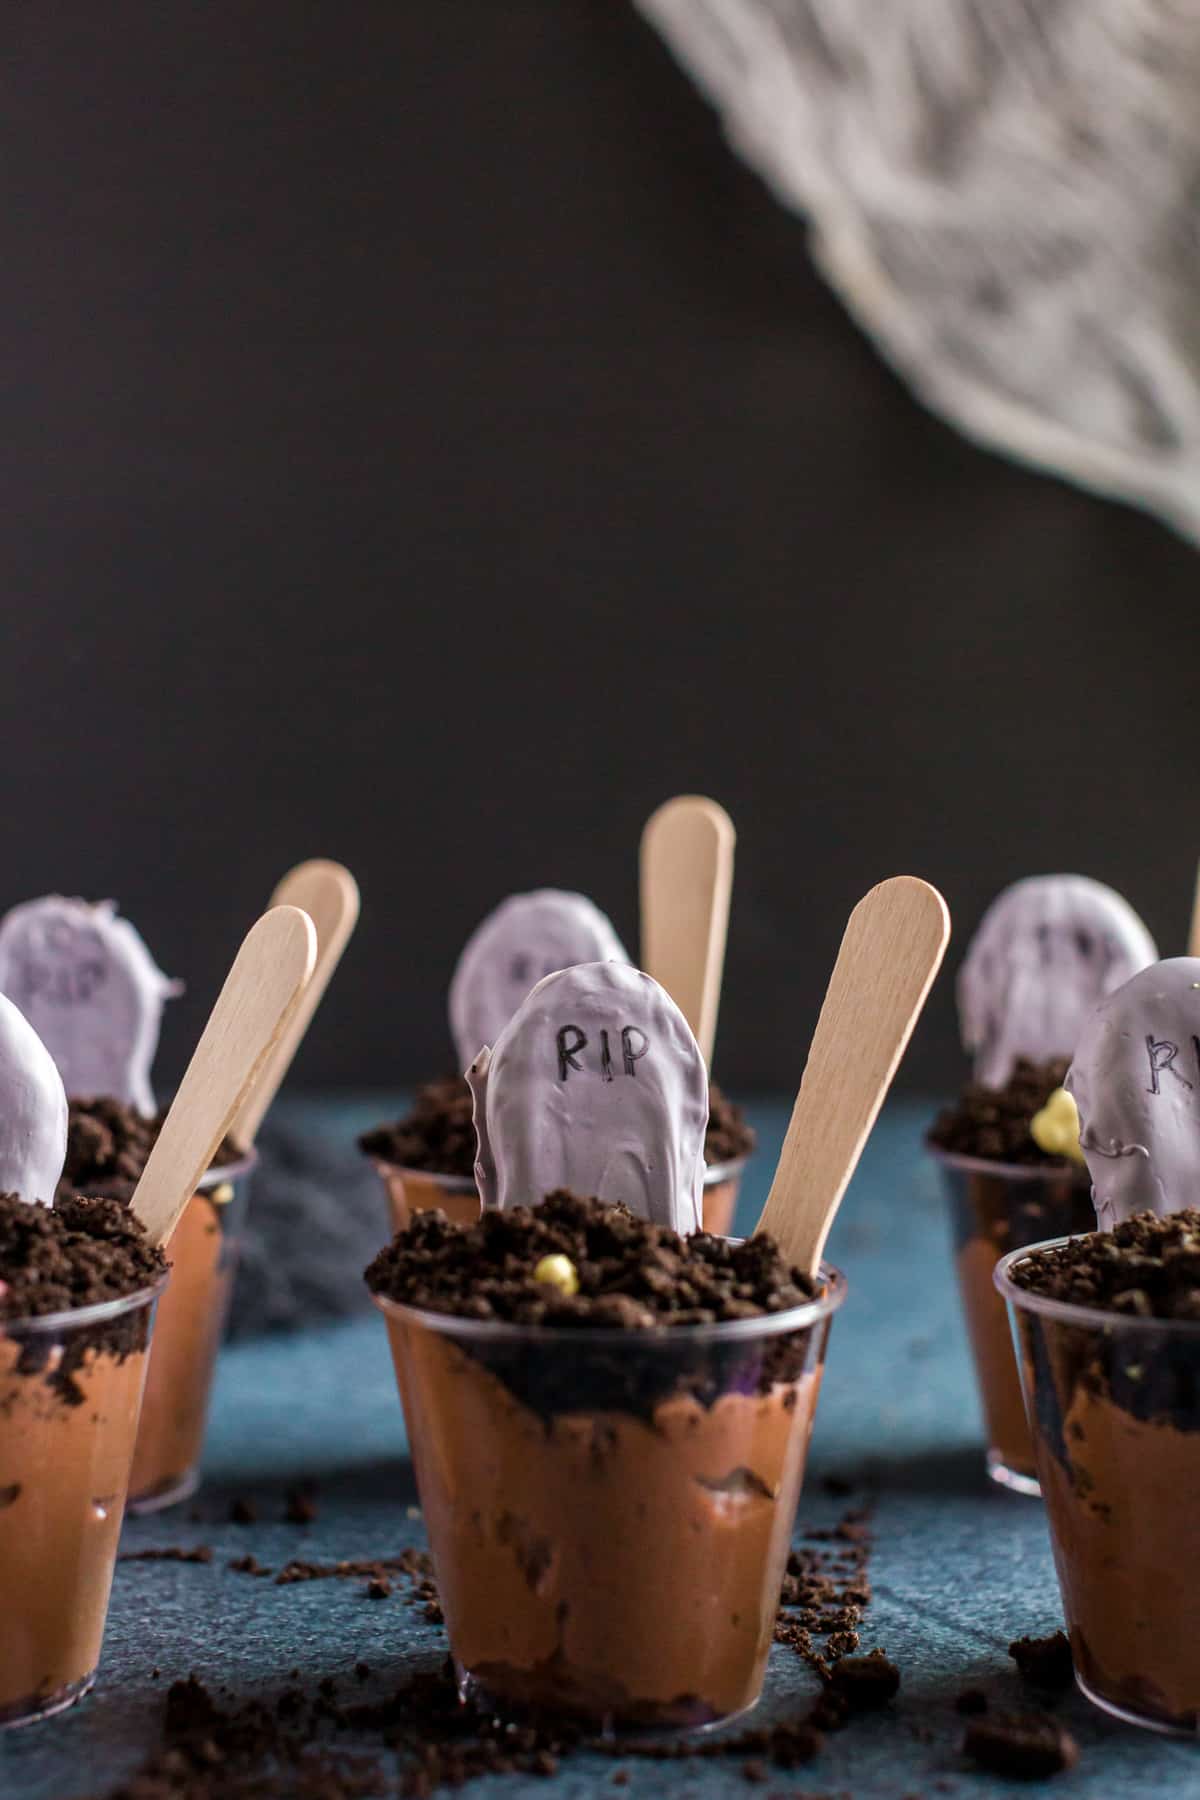
Dive into these Graveyard Pudding Cups for a hauntingly delicious treat! With a mix of chocolate, peanut butter, and creative toppings, these cups will be a hit at your next Halloween gathering.
Halloween is more than just a day - it's a season of fun, frights, and delightful culinary creations. As the chilling October winds blow and the leaves start to fall, every home transforms into a haven of haunted decorations and spooky delights. Among these delightful treats, the Graveyard Pudding Cups stand out, promising a hauntingly good time to everyone who dares to dig in.
October is in full swing, and that means my house is officially Halloween central! Decorations are up, spooky music is playing, and we are busy making all sorts of festive treats. And one of my kid's all-time favorites is this Halloween Dirt Pudding treat.
A symbol of all things fun during the Halloween season, these pudding cups combine the comfort of familiar ingredients with the thrill of festive presentation. The moment they are placed on the table, watch as faces light up with curiosity, followed by the eager anticipation of a delightful treat.
Not just meant for the young, these Graveyard Pudding Cups are versatile enough to be enjoyed by kids and adults alike. Whether it's a casual after-school snack or a star attraction at your Halloween party, they promise to be the talk of the event.
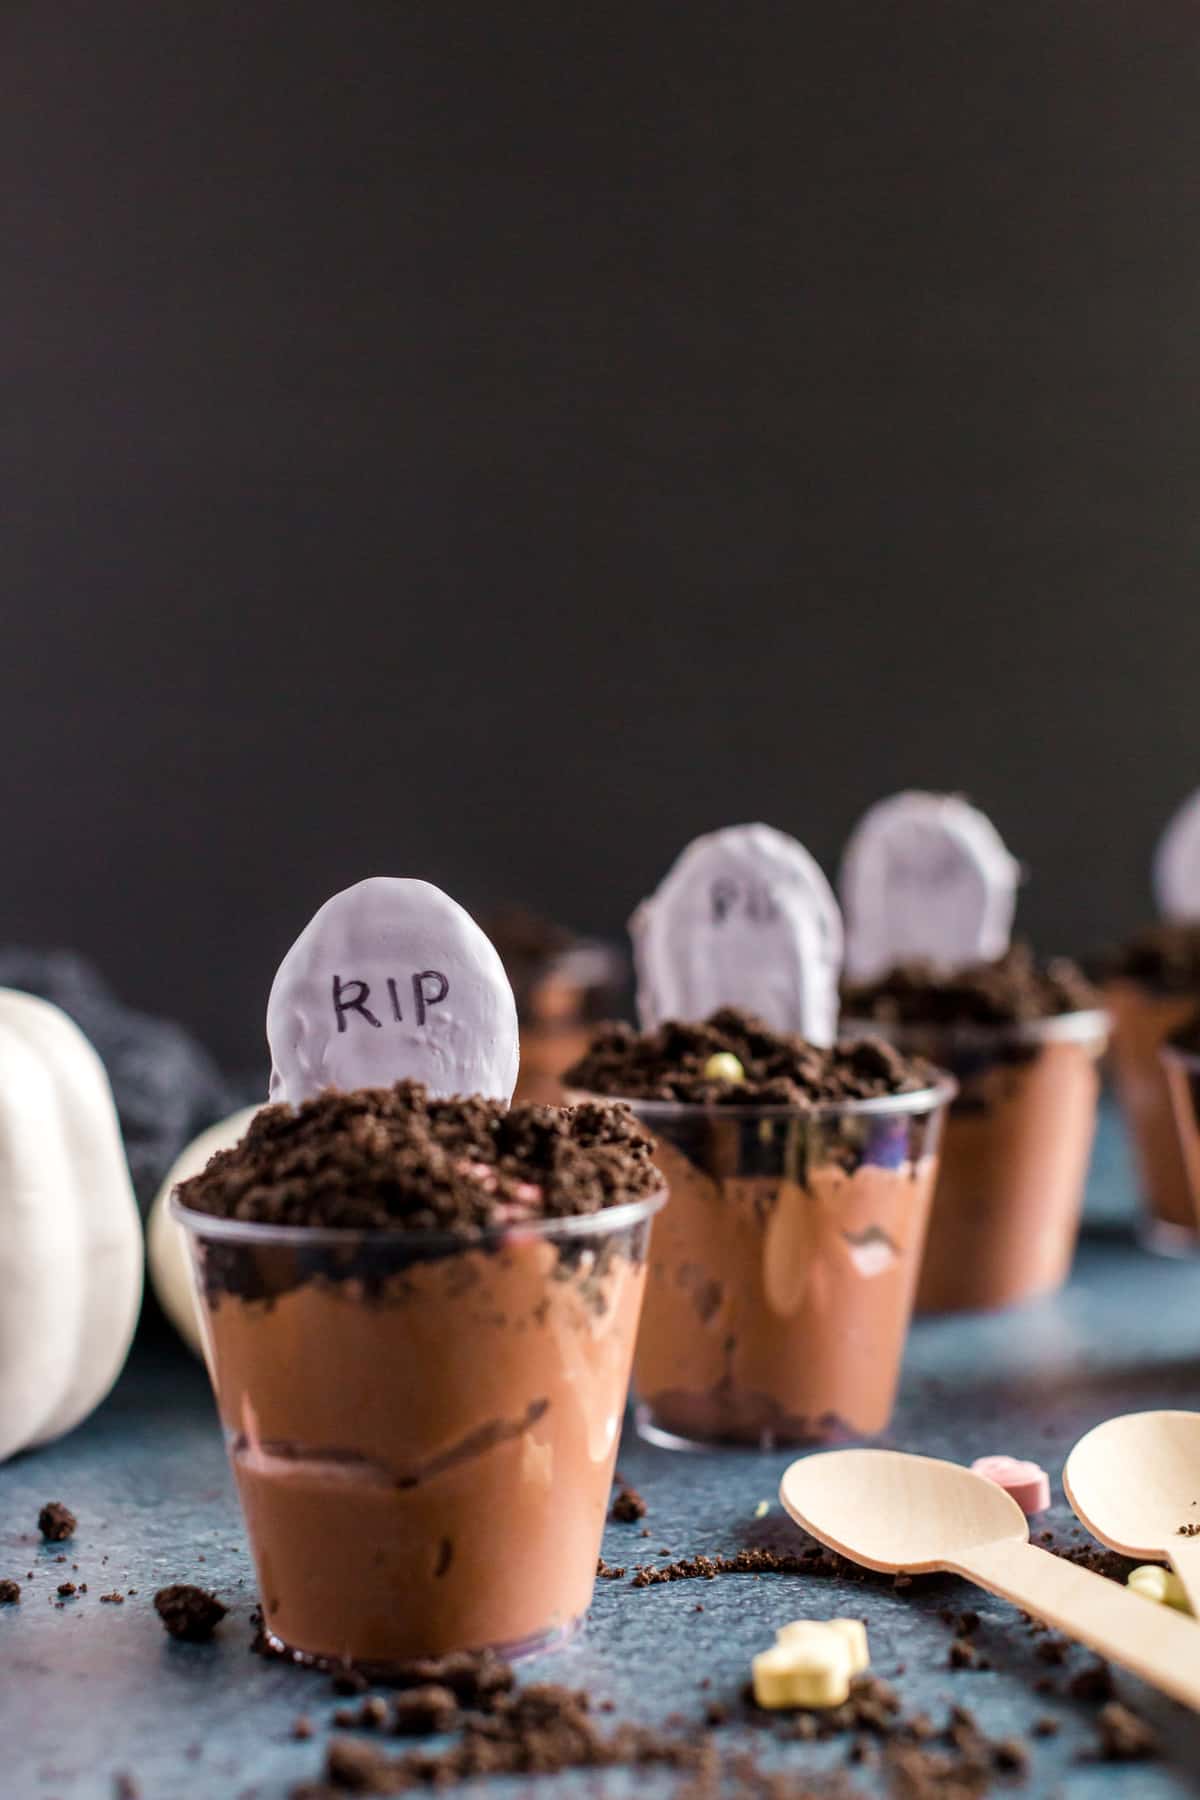
Hosting a Halloween party? Write each guest's name on the tombstones with this edible marker pen and use these Graveyard Pudding Cups place cards. So fun! Serve them with some Halloween Dipped Oreos, a Monster Halloween Cake or this Dirt Cake!
How To Get Kids Involved In Making These Fun Halloween Dirt Cups
Getting kids involved in the kitchen can be both fun and educational. Lay out all the ingredients assembly line style, provide them with clear instructions, and watch as they gleefully create their mini edible graveyards. It's a great way to instill creativity and a love for cooking. For years I've made this easy dessert with the kids during their school's Halloween parties. Just keep in mind you may want to swap out the nutter butter cookies for a graham cracker tombstone instead if there are any nut allergies in the classroom.
Halloween Pudding Cups Ingredients
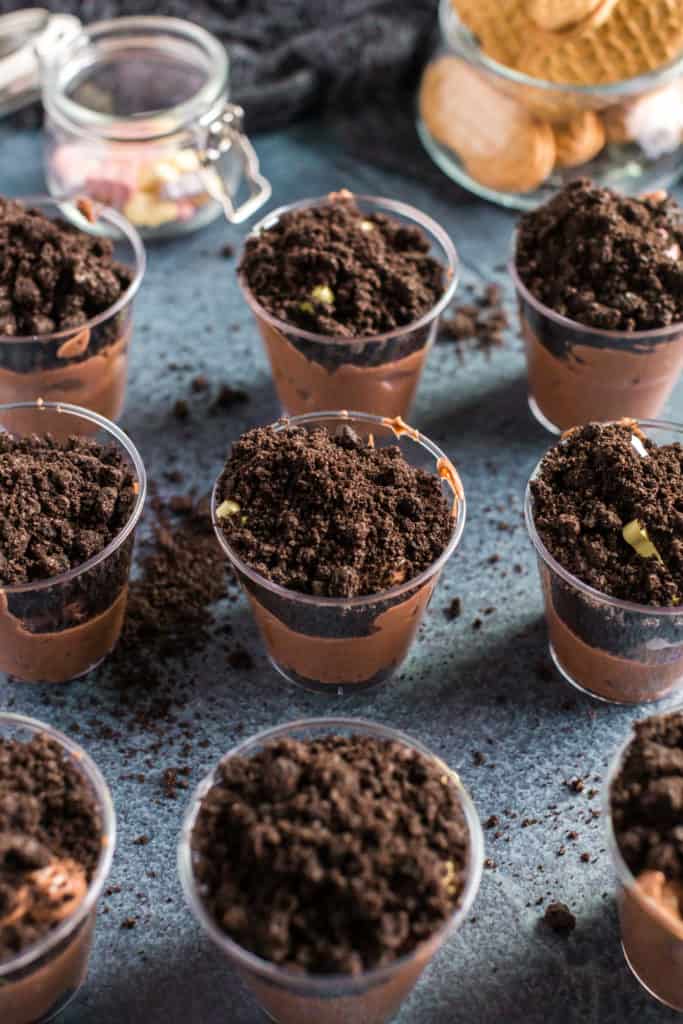
- Oreo Cookies- Crushed Oreos give these Graveyard pudding cups a nice crunch and a dirty feel!
- Instant chocolate pudding- You can also use a homemade pudding, chocolate mousse, or pre-made pudding cups
- Cold milk
- Creamy peanut butter
- Whipped cream topping, thawed
- Nutter Butter Cookies
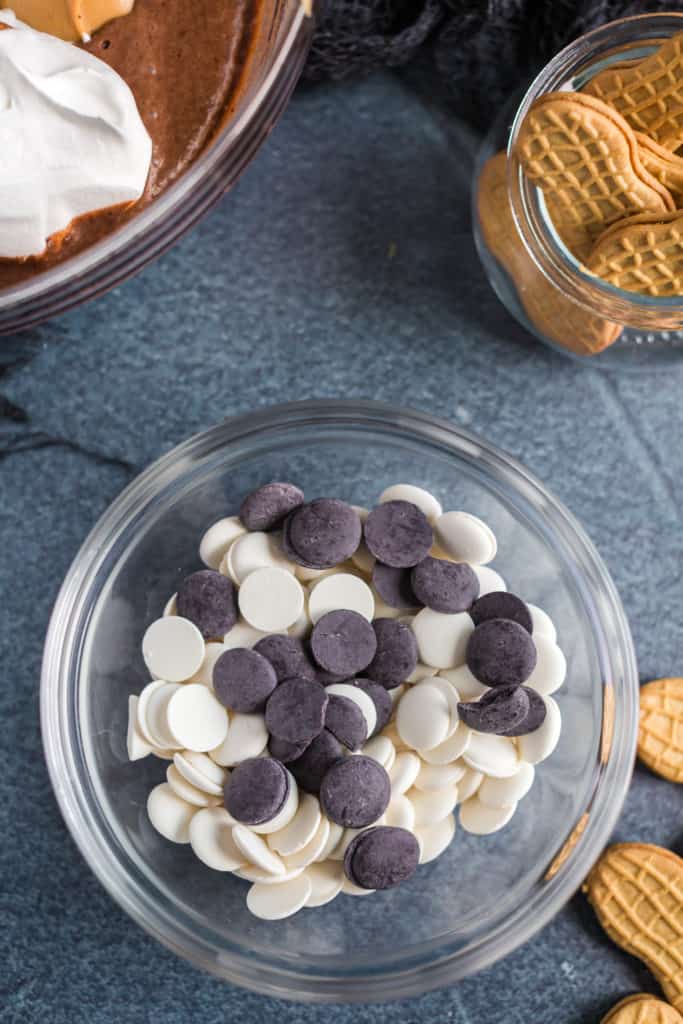
- White candy melts
- Black candy melts
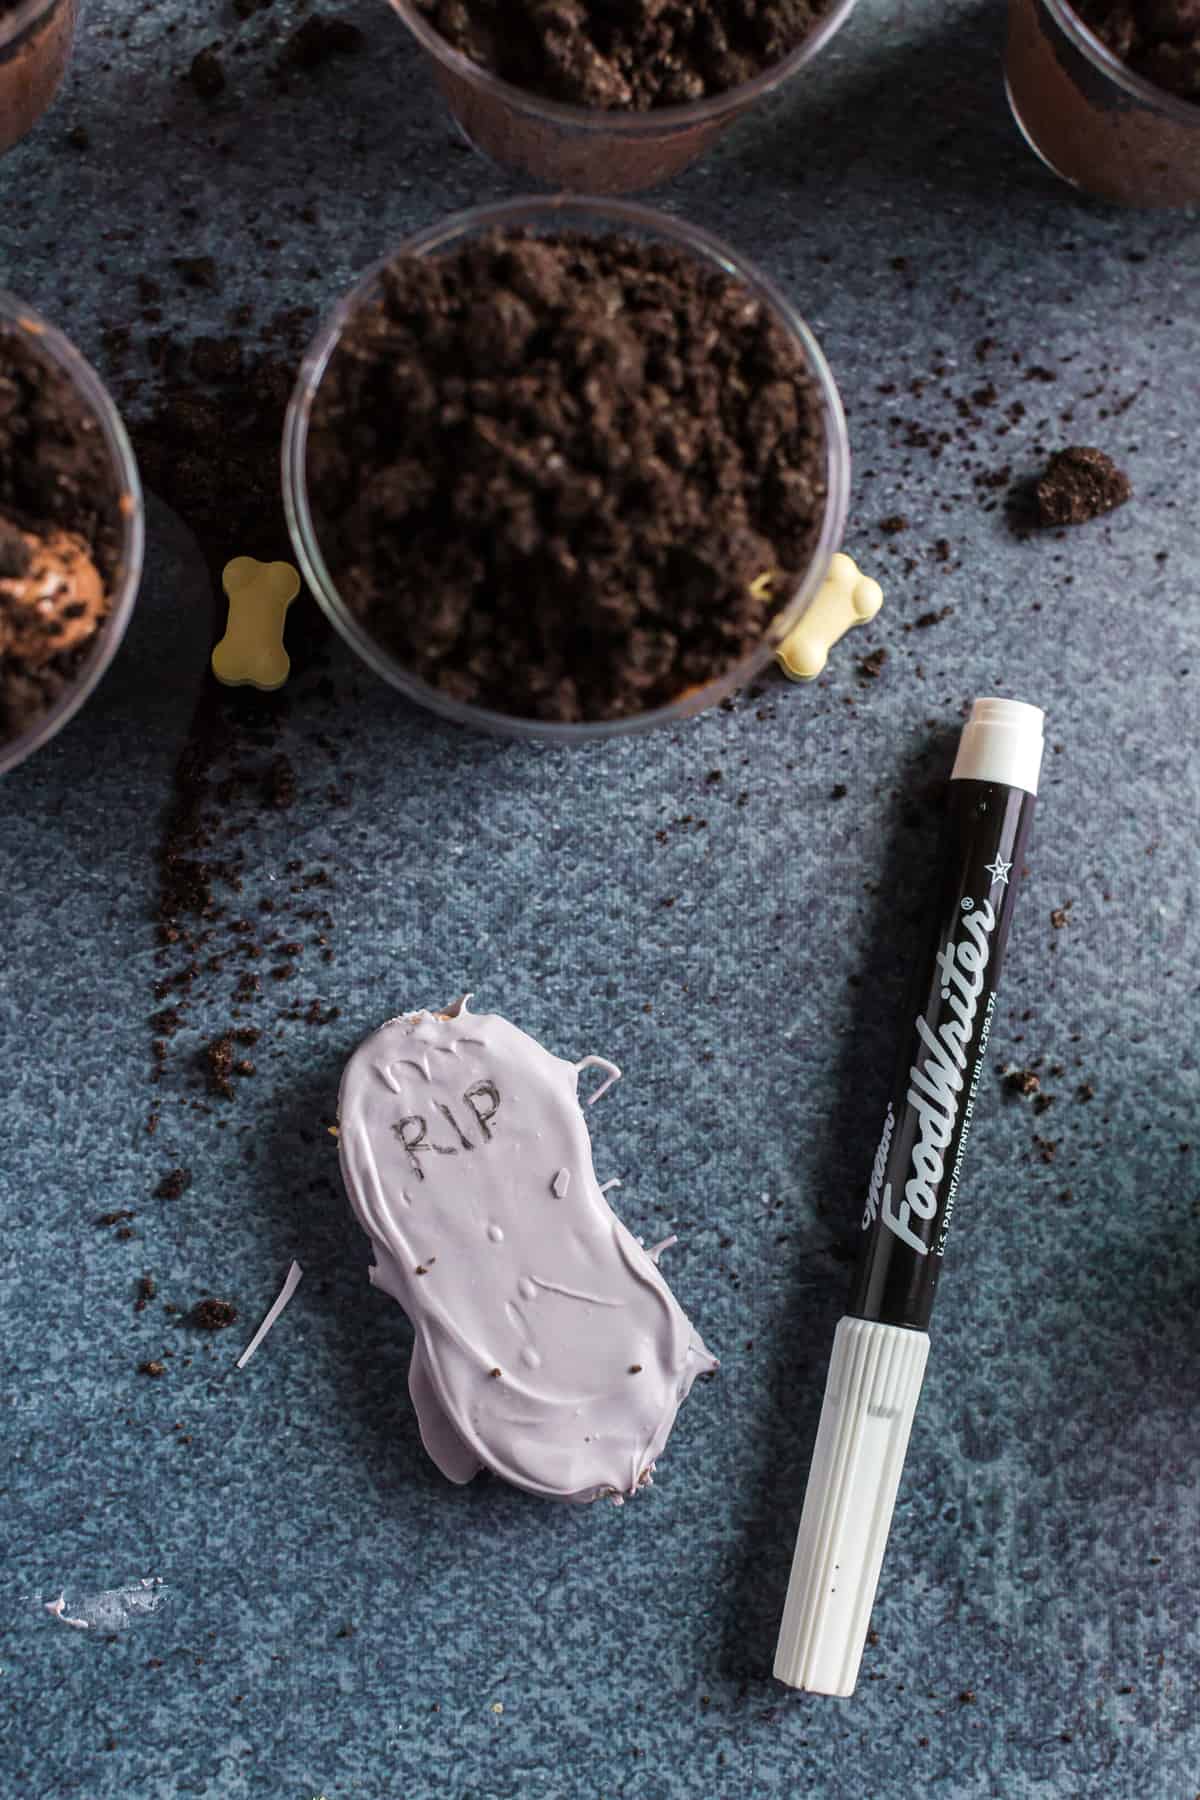
- Wilton edible marker or black gel
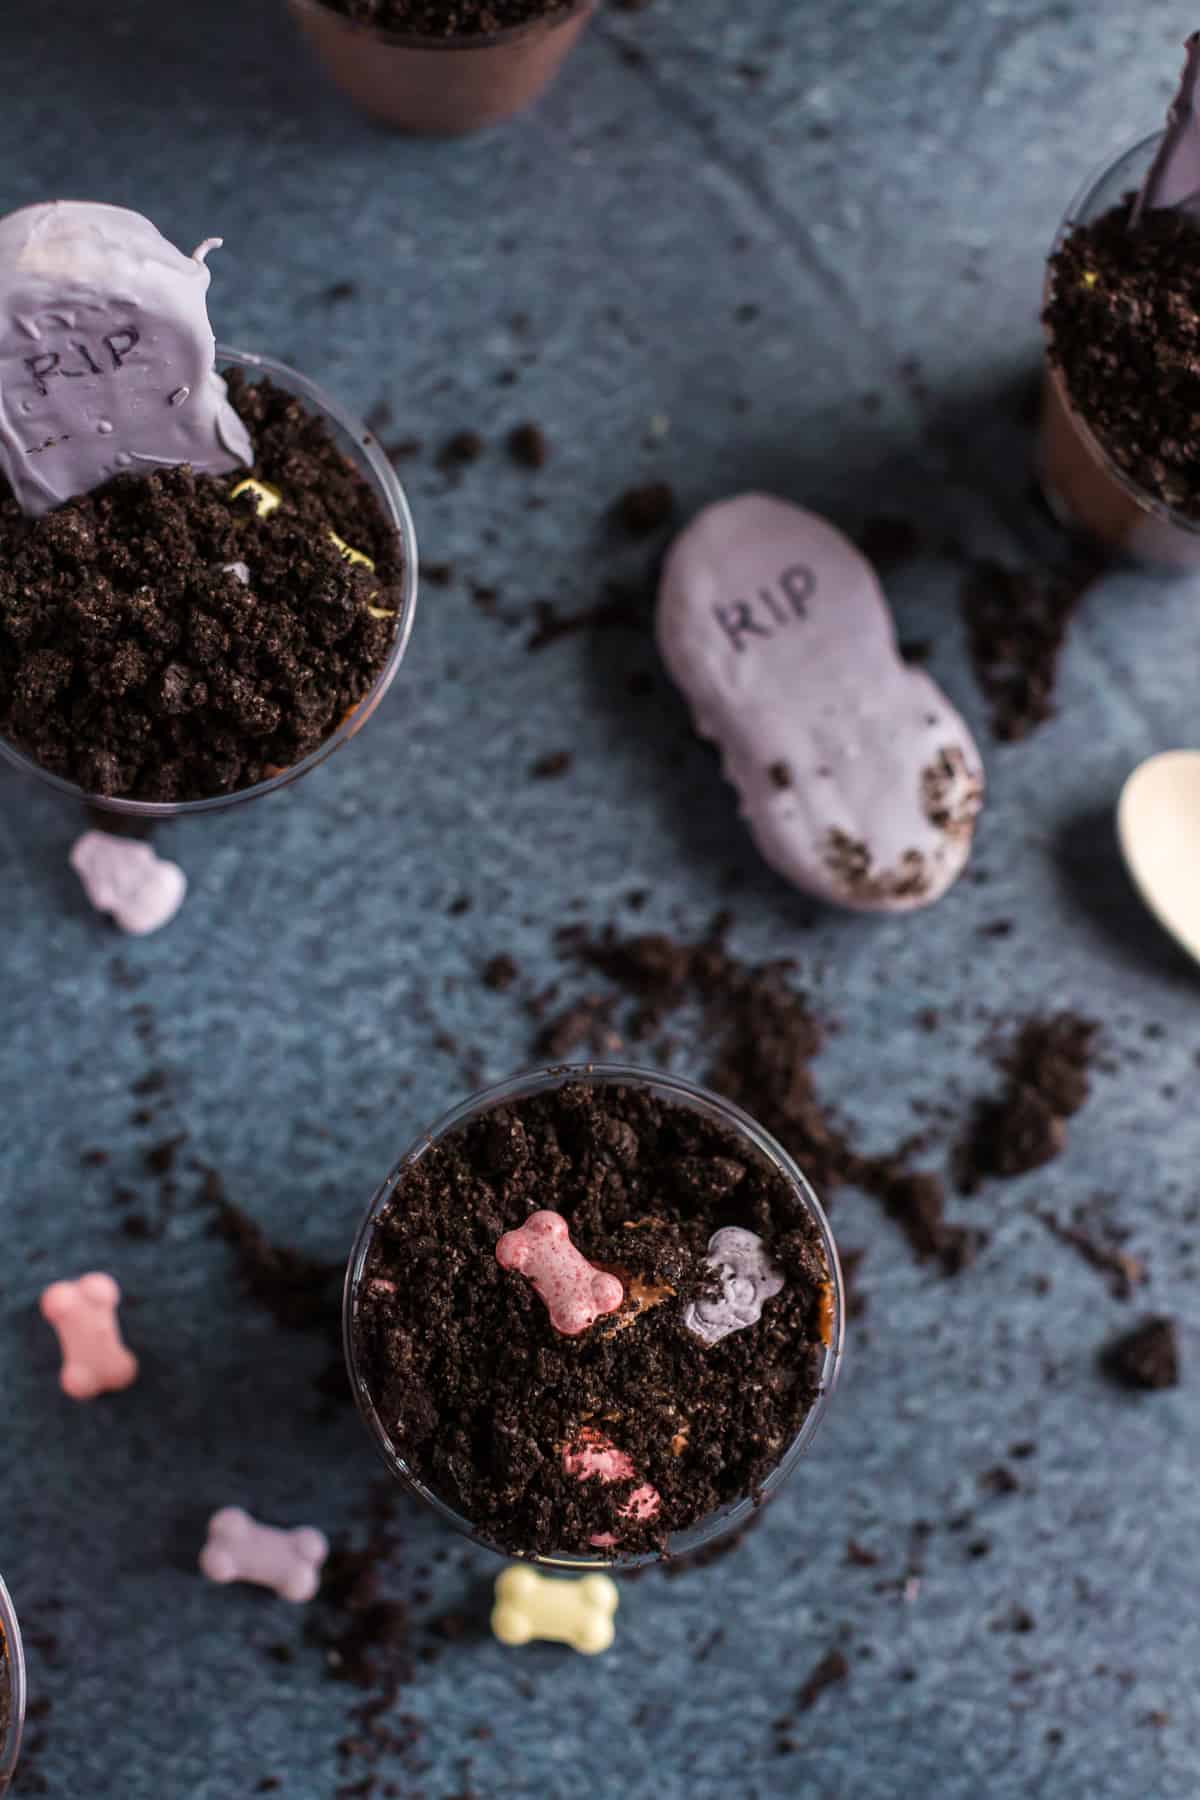
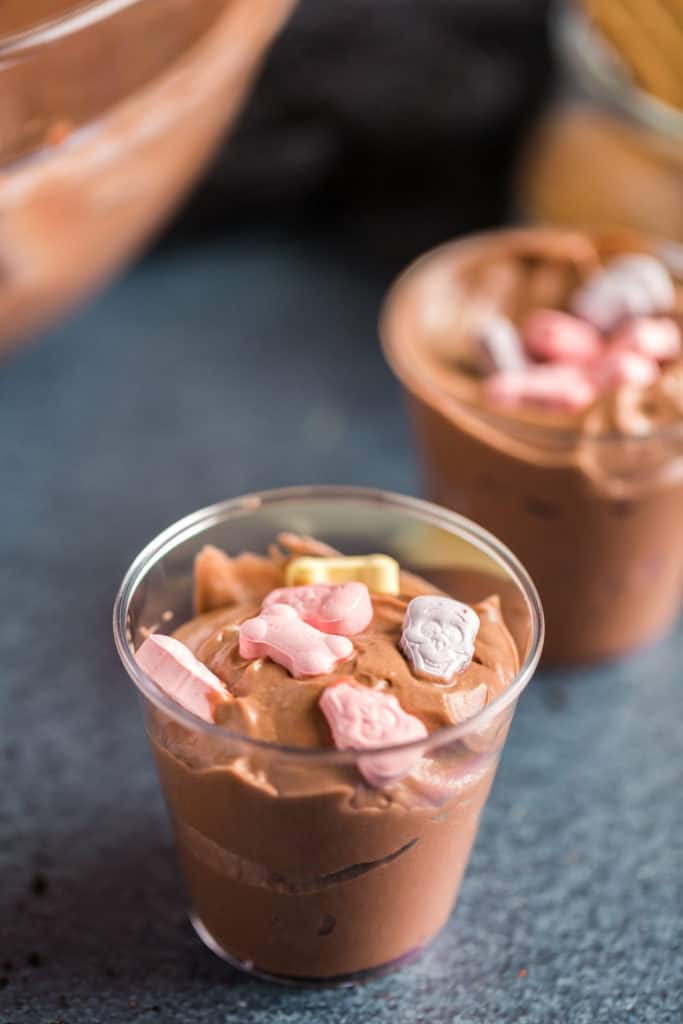
- Skulls and Bones candy, Halloween sprinkles, or sweet tarts
- Wax paper
- Clear plastic cups- I recommend the 6 oz cups
Ingredient Substitutions:
- Oreos: You can use any chocolate sandwich cookies or even graham cracker crumbs for a different texture. Or you can swap in brownie crumbles for the Oreo cookie crumbs.
- Creamy peanut butter: Almond butter, cashew butter, or sunflower seed butter, or Nutella can be great alternatives.
- Nutter Butter Cookies: If these aren’t available, Biscoff cookies, ladyfingers, or Milano cookies can make for a fun twist for the cookie tombstones.
- White and black candy melts: Regular white and dark chocolate chips can be used, though they might have a different melting point.
- Pudding- Want to skip the instant pudding step? Use the snack pack pudding cups instead (like I did in these garden cups)!
- BOOzy Graveyard Pudding Cups- I've been known to serve a boozy version of these graveyard pudding cups with the addition of some butterscotch schnapps or creme de cacao. Delish! I'm always pleasantly surprised by how much of a hit they are with the 21 and older crowd.
How to make these Halloween Graveyard Dirt Cups
Simple ingredients and just a few minutes transform into cute little no bake treats that are perfect for Halloween!
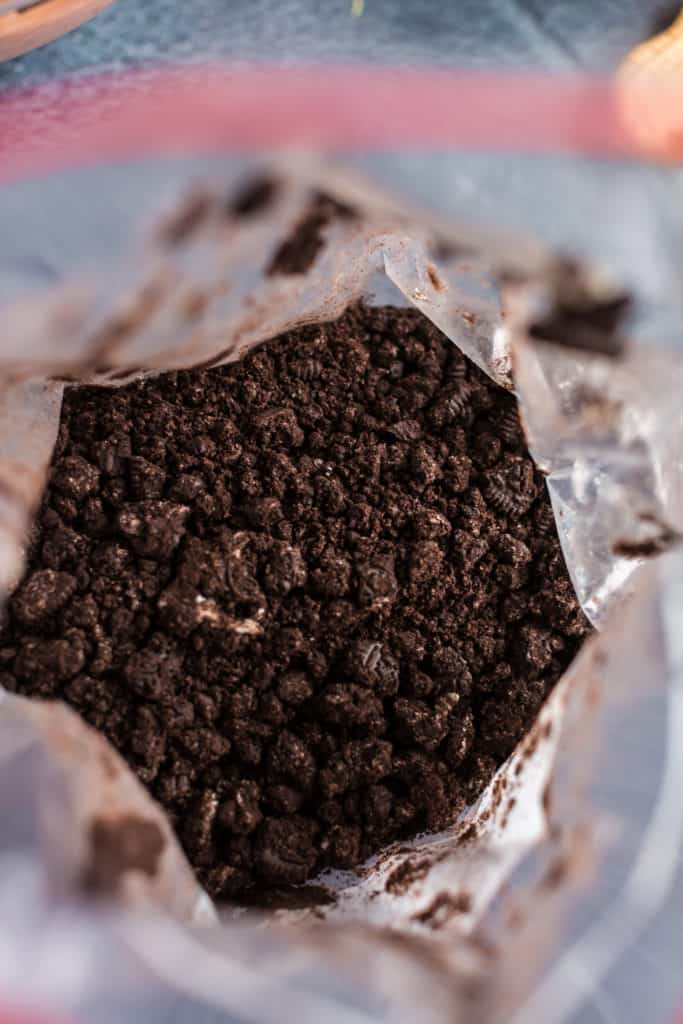
- Place Oreos in a Zip-top bag and crush into small pieces using a rolling pin. A food processor works great too.
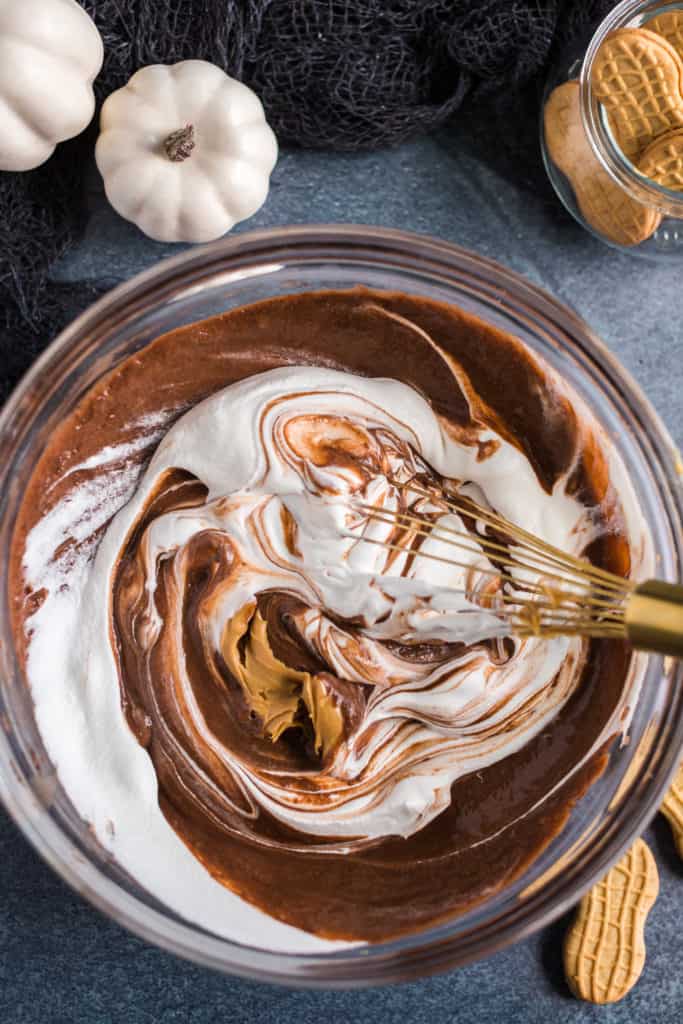
- In a medium bowl, whisk together pudding mix, milk, whipped topping, and peanut butter. Cover with plastic wrap and place in refrigerator while you prepare the Nutter Butters.
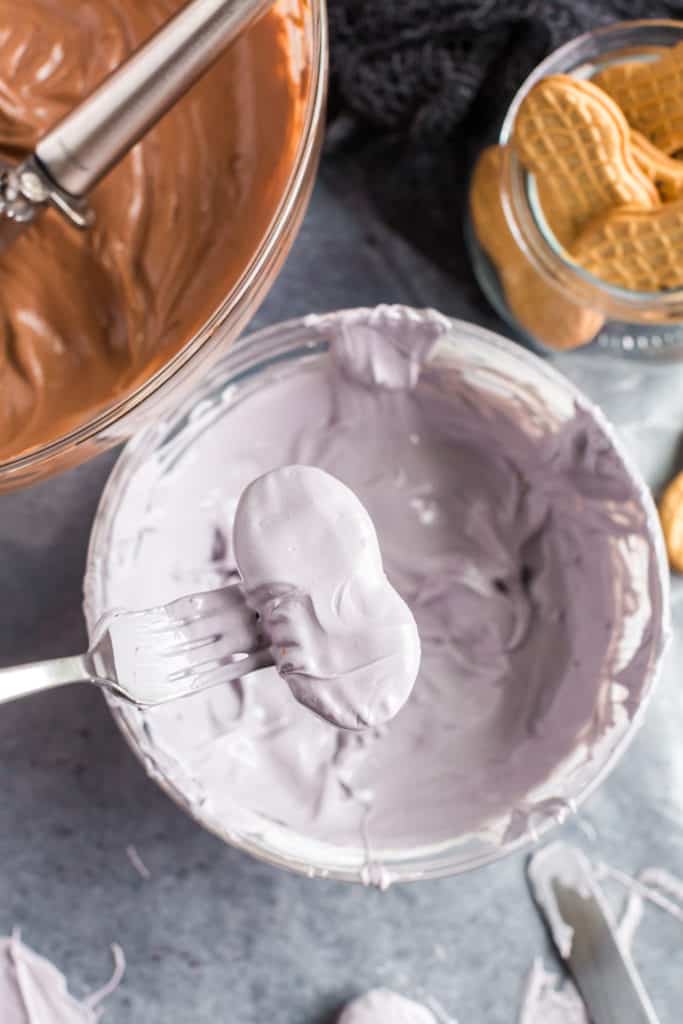
- In a microwave-safe bowl, melt the white and black melting candies in the microwave in 30-second intervals. Remove from the microwave and stir until melted.
- Dip the Nutter Butters one at a time in the candy melts. Shake off excess and use an offset spatula to smooth the front. (You want to make sure the front surface is smooth so you’ll be able to easily write ‘RIP”.)
- Place coated Nutter Butters on a baking sheet lined with wax paper. Allow to dry completely.
- Once they are dry, use the marker to write “RIP” on the tops.
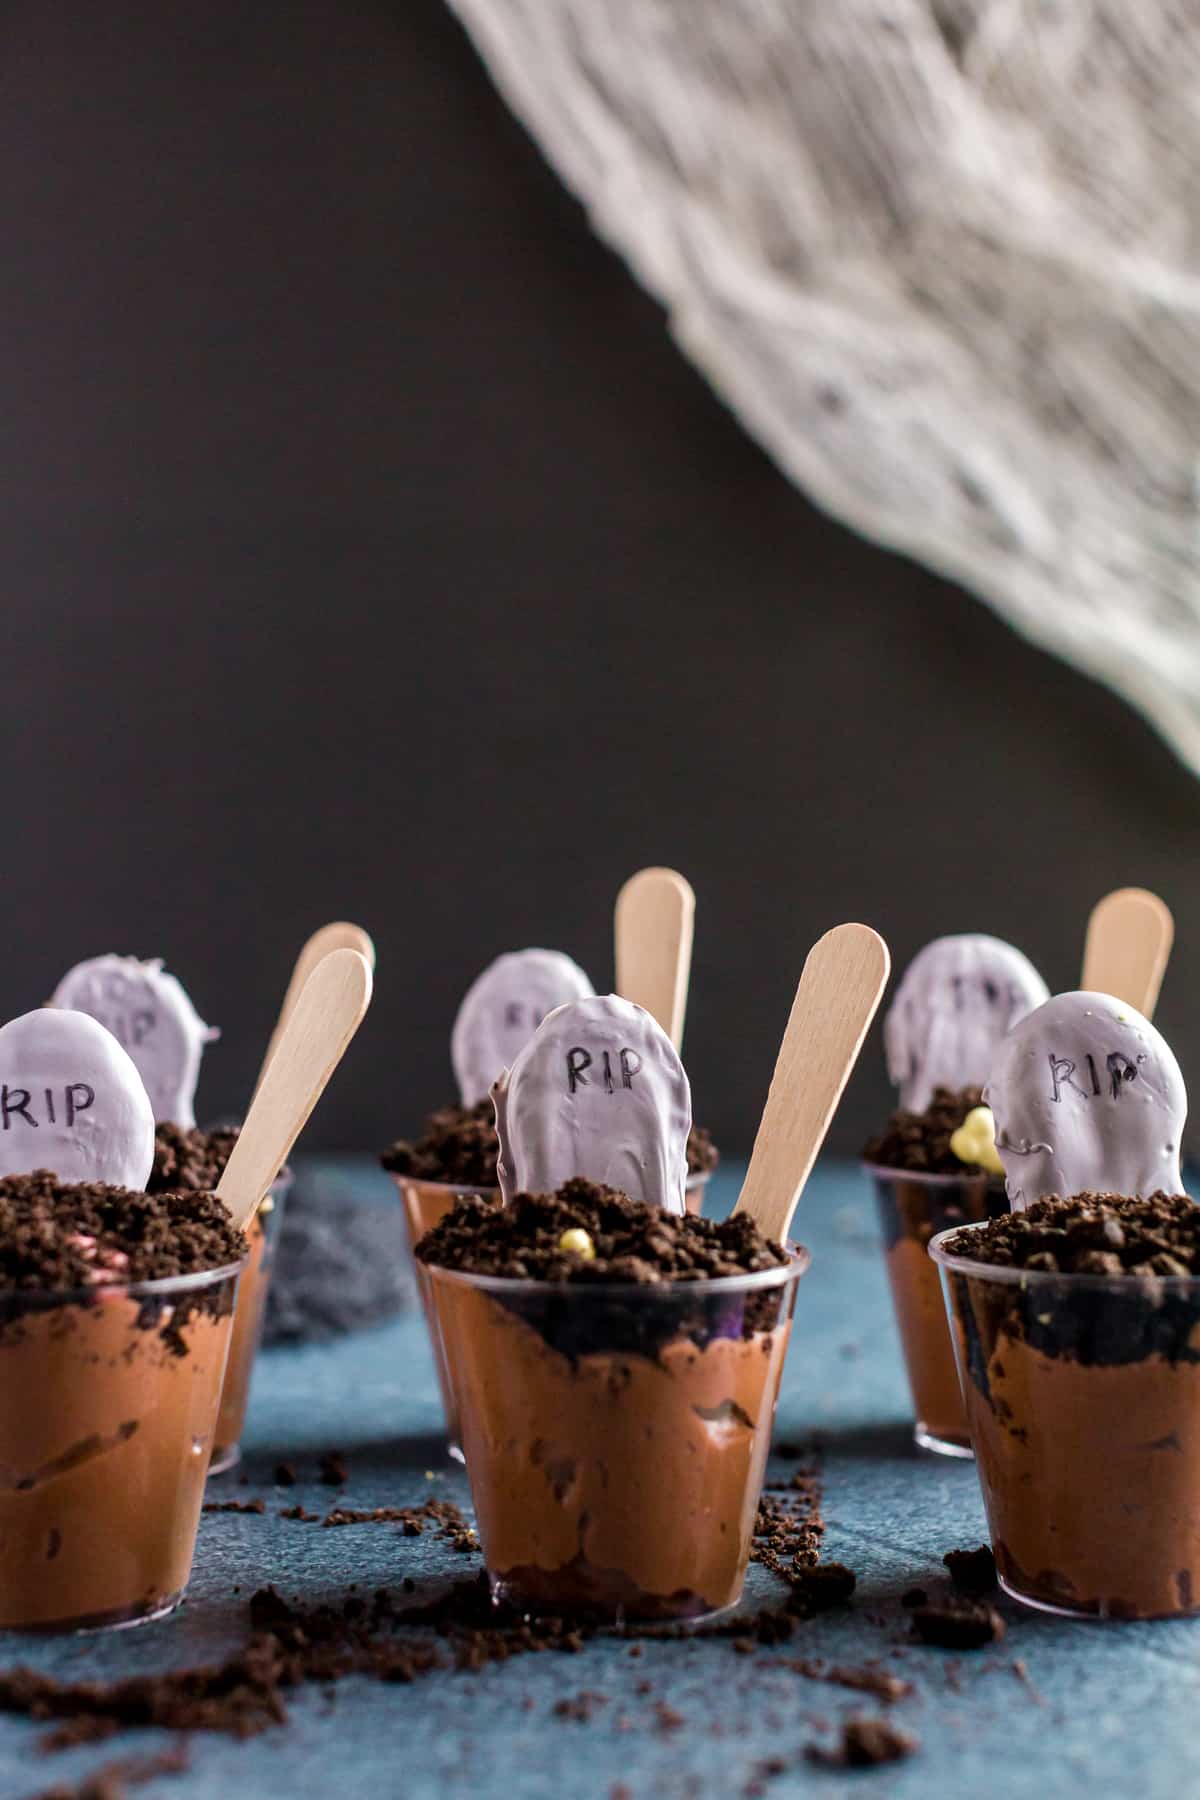
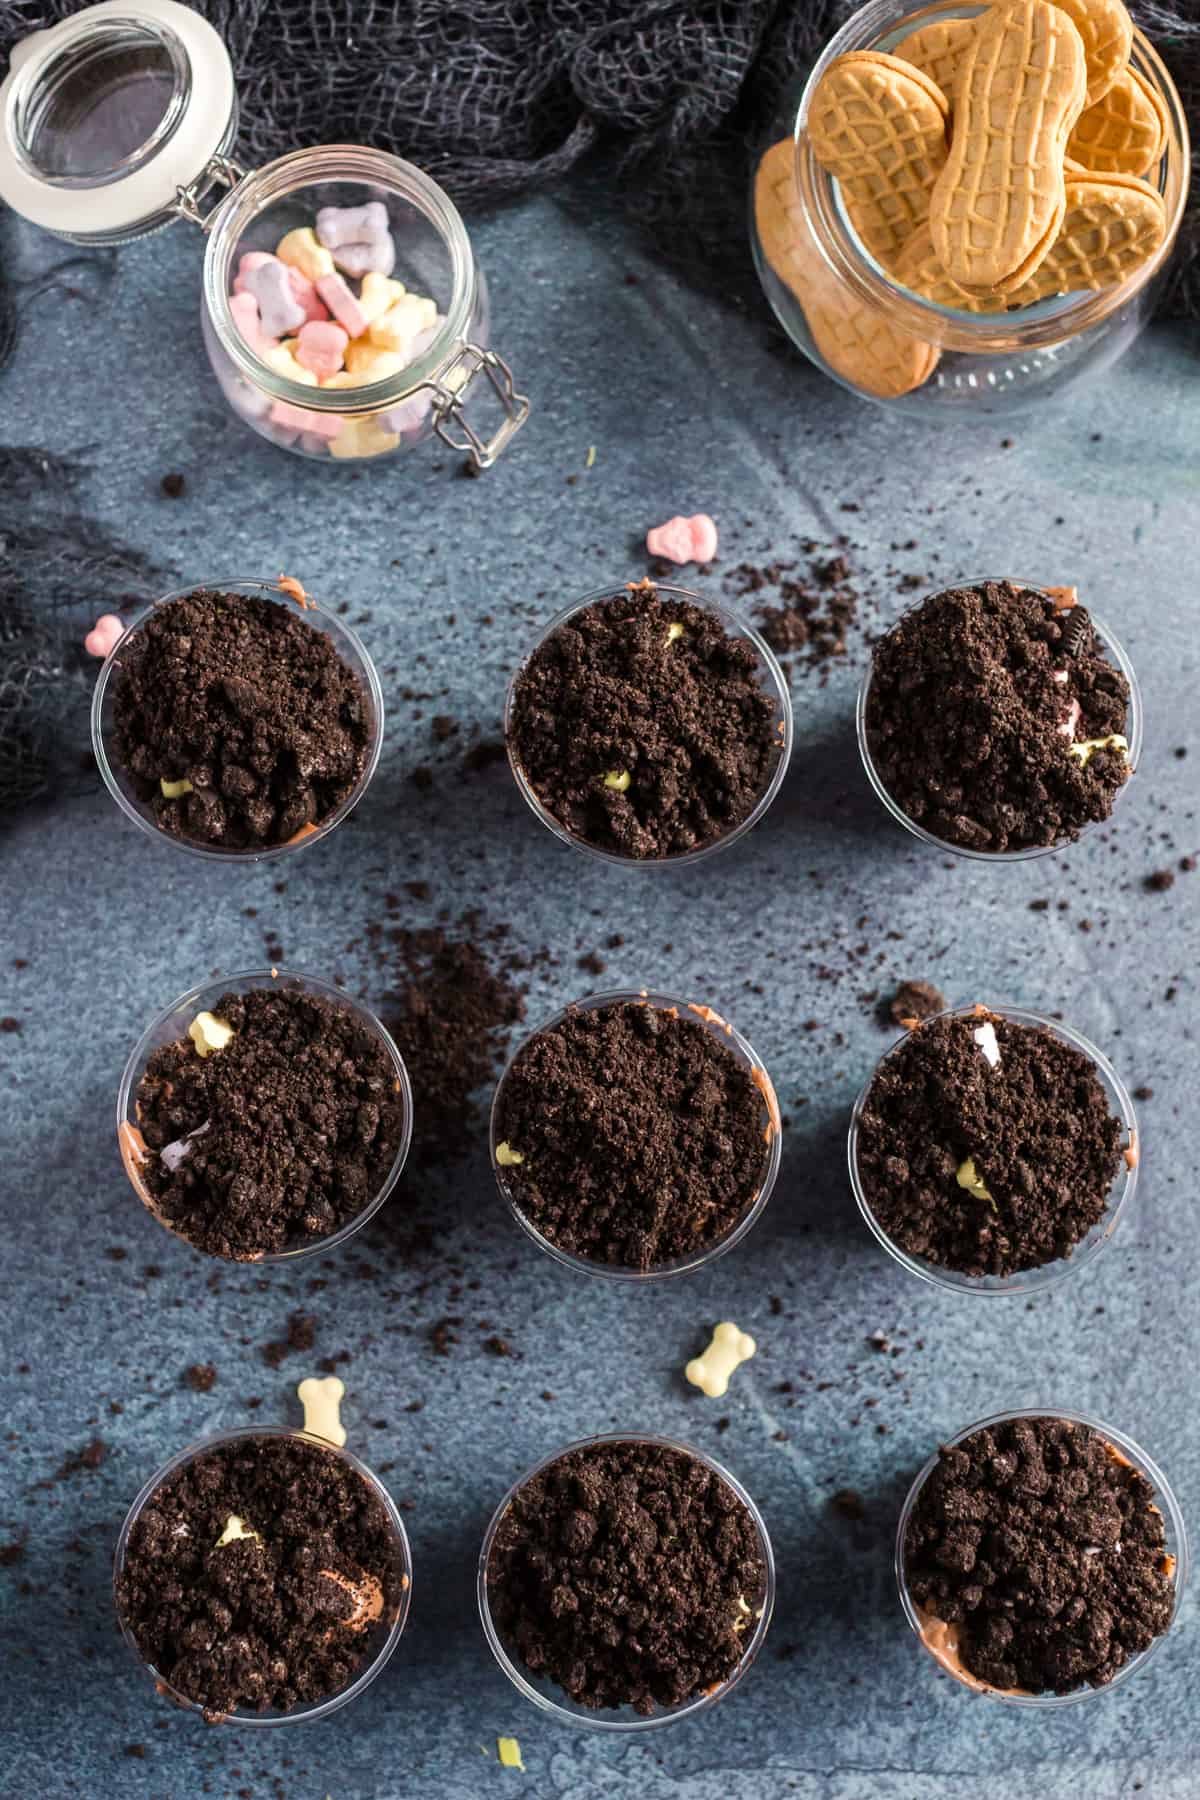
- To assemble the cups, scoop pudding into each cup about ¾ of the way full. Sprinkle skulls and bones candy on top of each pudding cup, then top the cups with crushed Oreos.
- Place Nutter Butter on top, with RIP facing out.
Tips To Personalize Your Halloween Graveyard Pudding Cups
Customizing these pudding cups adds a touch of personality to each serving. From writing names on tombstones to adding spooky gummy worms, the possibilities are endless. Let your imagination run wild and make every cup unique! If you prefer to make a larger "graveyard" instead of little individual cups, simply use this recipe and make it in a 9x13in glass dish.
Reader FAQs:
Can I use regular whipped cream instead of whipped cream topping?
Absolutely! Homemade whipped cream or store-bought canned whipped cream can be a delightful substitute for the whipped cream topping.
I'm allergic to peanuts. What can I use instead of peanut butter?
For those with peanut allergies, almond butter or sunflower seed butter are great alternatives. Graham cracker tombstones can also be made to avoid nuts altogether. Remember to always check labels for any cross-contamination risks.
Can I add fruit to these pudding cups?
Of course! Sliced strawberries or banana pieces can be a delicious and refreshing addition to the pudding mix. Just ensure the fruits are well-drained to avoid making the pudding watery.
Can you make Graveyard Cups in advance?
Yes you can! Get a jump on your party prep and make these pudding cups ahead of time. You can create the white chocolate grave markers, mix the pudding and dish into the cups up to 1 day in advance. However, you do not want to insert tombstone cookies into the pudding cups until you are just about ready to serve.
Dive into the spirit of Halloween and let these Graveyard Pudding Cups be the star of your festivities! With every spoonful, embark on a delightful journey of flavors, textures, and Halloween fun.
MORE FRIGHTENINGLY FUN HALLOWEEN DESSERT IDEAS
Looking for more delicious dishes to serve up this Halloween? Then you'll want to try my Halloween Deviled Eggs, Harvest Moon Sugar Cookies, and this recipe for Halloween Red Velvet Cake.

- 20 Oreos
- 1 5.9 ounce package of instant chocolate pudding
- 3 cups cold milk
- ½ cup creamy peanut butter
- ½ container of whipped cream topping thawed
- 12 Nutter Butter Cookies
- 1 cup white candy melts
- 30 black candy melts
- Wilton edible marker
- Skulls and Bones candy sprinkles or sweet tarts
- Wax paper
- 12 - 5 ounce clear cups
-
Place Oreos in a Ziploc bag and crush into small pieces.
-
In a medium bowl, whisk together pudding, milk, whipped topping, and peanut butter. Cover with plastic wrap and place in refrigerator while you prepare the Nutter Butters.
-
In a microwave-safe bowl, melt the white and black candy melts in the microwave in 30-second intervals. Remove from the microwave and stir until melted.
-
Dip the Nutter Butters one at a time in the candy melts. Shake off excess and use an offset spatula to smooth the front. (You want to make sure the front surface is smooth so you’ll be able to easily write ‘RIP”.)
-
Place coated Nutter Butters on a baking sheet lined with wax paper. Allow to dry completely.
-
Once they are dry, use the marker to write “RIP” on the tops.
-
To assemble the cups, scoop pudding into each cup about ¾ of the way full. Sprinkle skulls and bones candy on top of the pudding, then top the cups with crushed Oreos.
-
Place Nutter Butter on top, with RIP facing out. (I placed the Nutter Butter next to the rim of the cup as opposed to the middle of the cup.)
Leave a Reply